NOTE: For more information on Kochava’s Fraud console, refer to our support documentation outlining the features available.
Fraud Interface
- Log in to Kochava.
- Select the desired Account.
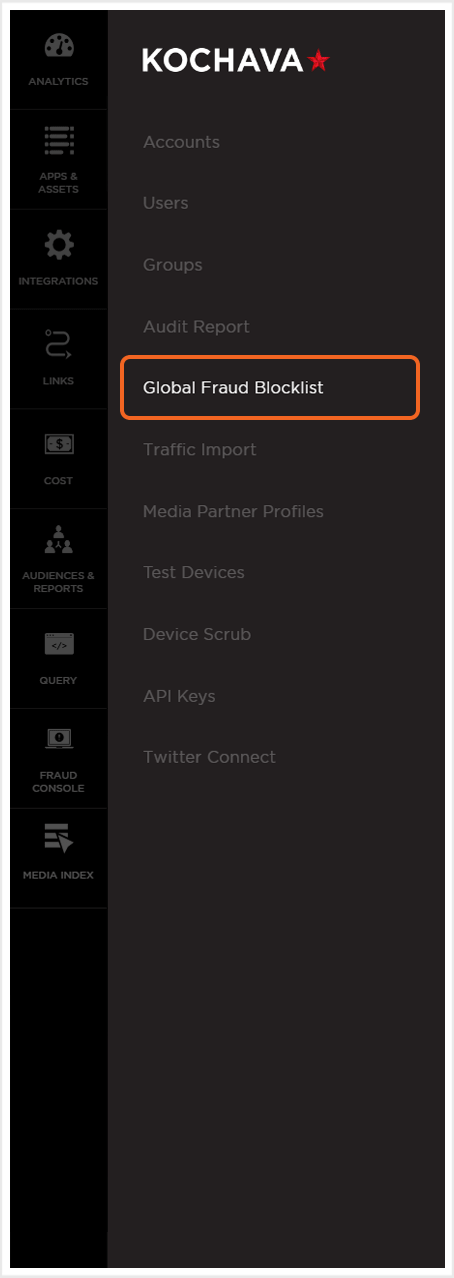
- Select Account Options > Global Fraud Blocklist.

NOTE: The first time that the Global Fraud Blocklist is accessed on an account, a welcome screen will be displayed. In order to access the Fraud Console settings, Click Manage Fraud Blocklist.
Global Fraud Blocklist Settings
The Global Fraud Blocklist enables the application of Traffic Verification features across all the apps within an account or specific apps within the account.
Active Global Fraud Blocklist
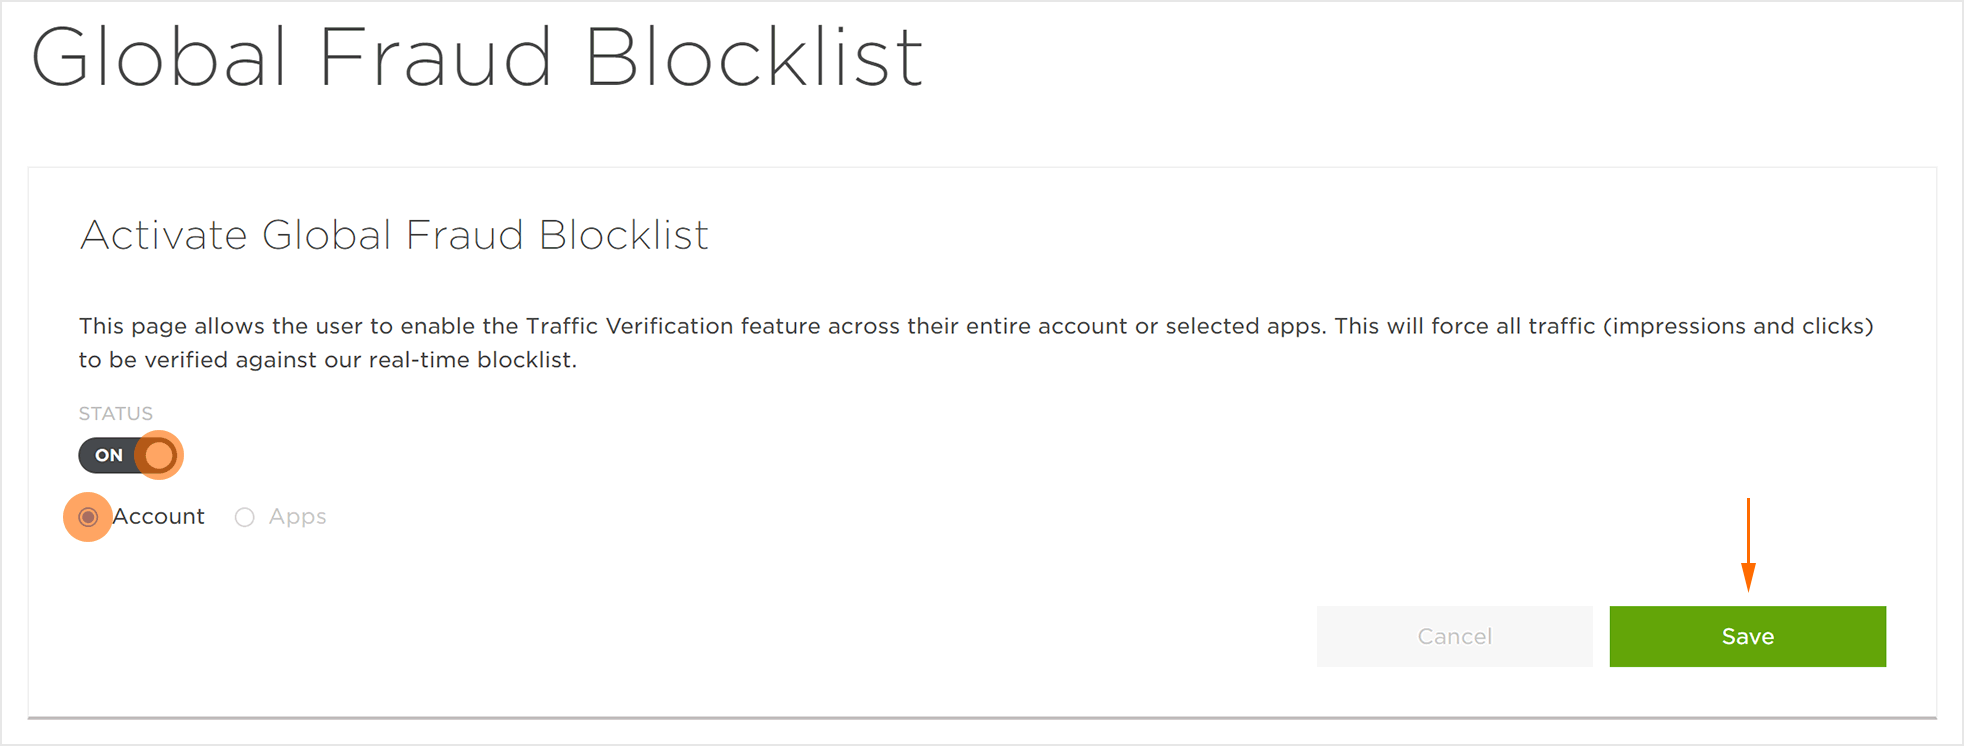
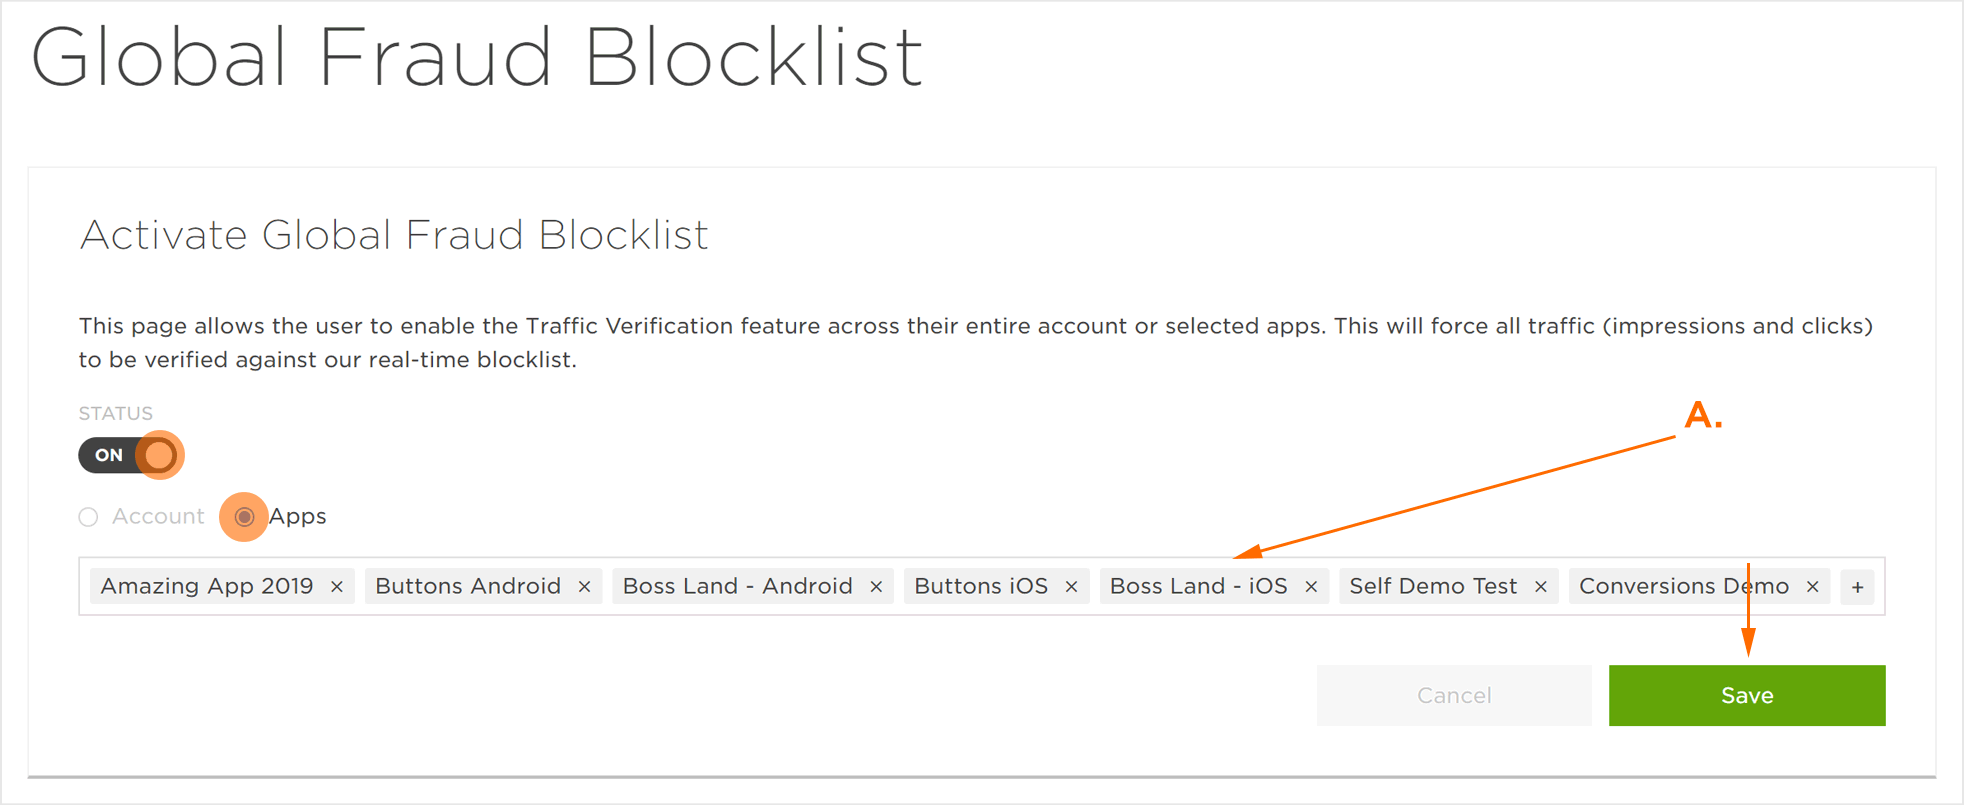
- Select Status > ON.
- Select Account. (optional)
- Select Apps. (optional)
- Click Save.
NOTE: By default Status is set to “OFF”.
NOTE: In order for the Global Blocklist to function properly, the Status toggle needs to be turned ON here as well as the toggle within any desired tracker(s).


Reasons a Device May be Added to the Blocklist
Below is a list of the reasons a device might be sent to the Global Fraud Blocklist. If multiple reasons are identified, each reason will be listed (e.g., blacklist_site|click_flooding|mtti|geo).
NOTE: The blow list is a developing list. As new information and fraud methods are reviewed, this list will be updated.
- IP Address:
- VPN
- Proxy
- TOR | VPN
- Proxy | VPN
- VPN | TOR
- TOR
- VPN | Proxy
- TOR | VPN | Proxy
- VPN | TOR | Proxy
- Proxy | VPN | TOR
- VPN | Proxy | TOR
- Proxy | TOR
- Site
- Click Flooding
- TTI Outlier
- Low MTTI
- TTI Outlier | Low MTTI
- Low MTTI | Click Flooding
- Click Flooding | Low MTTI
- TTI Outlier | Click Flooding
- Ad Stacking
- Ad Stacking | Low MTTI
- Invalid Install Receipts | Click Flooding
- TTI Distribution
- Device
- Device High Click Volume | Invalid Purchase Receipt
- Invalid Purchase Receipts
- Device High Click Volume
- Invalid Purchase Receipts | Device High Click Volume
