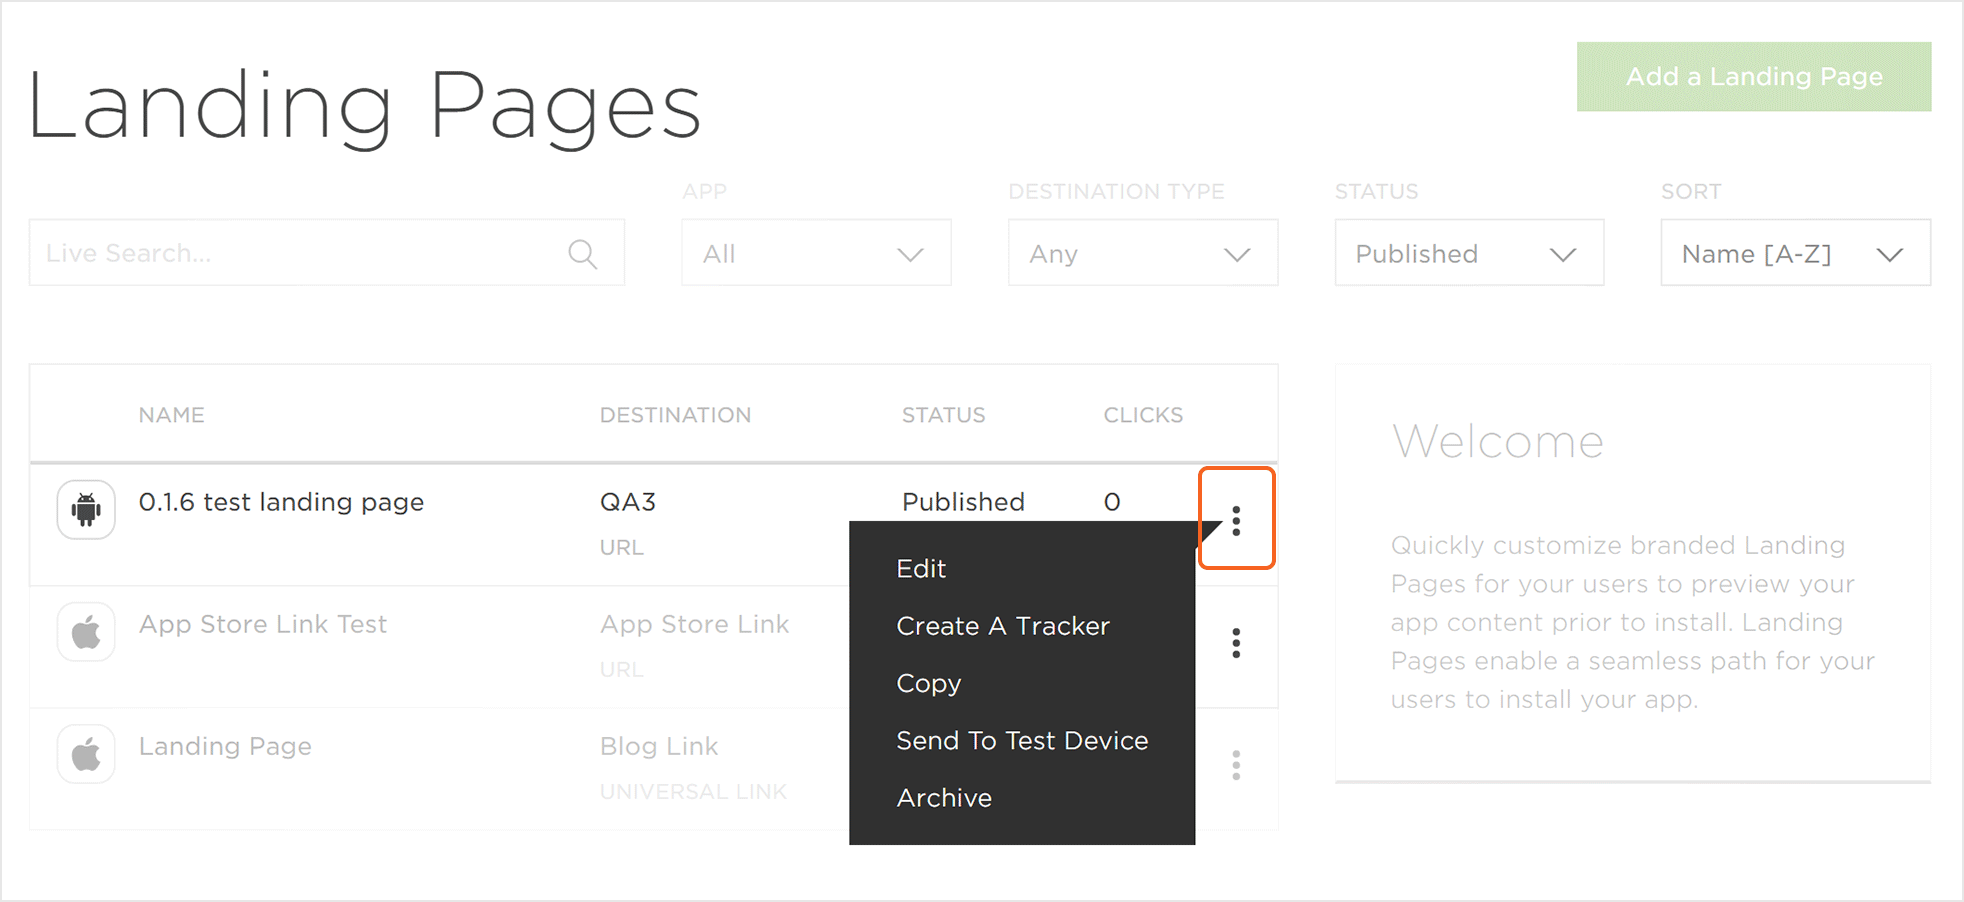
Kochava makes landing pages easy to setup, customize, preview and publish. Once you have created a landing page you can monitor the performance by reviewing clicks and installs associated with each landing page.
SmartLinks Landing Pages Interface
- Log in to Kochava.
- Select the desired Account.
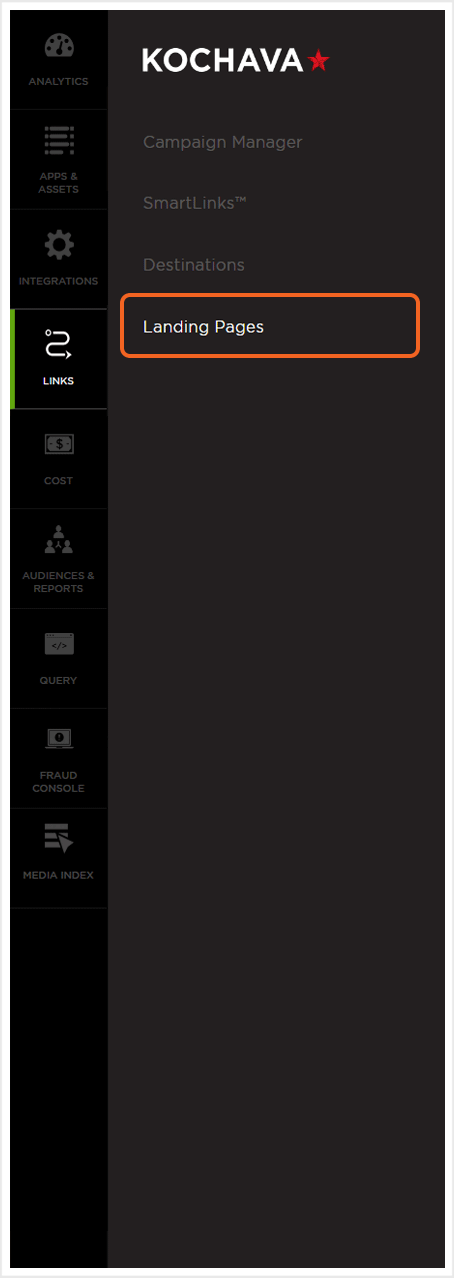
- Select Links > Landing Pages.
Creating a Destination
Before a Landing Page is created, a Destination should be created for that Landing Page. For more information on creating a Destination, refer to our Destination Creation and Maintenance support documentation.
Landing Pages Location and Organization Tools
Landing Pages can be easily located by utilizing the search and organization tools.
Live Search:
Landing Pages can be located using the live search tool by typing part of all of the name of the Landing Page.
App Search:
Landing Pages can be located using the app search tool by either selecting the desired app, or typing the name of an app in the search tool.
Campaign Organization:
Landing Pages can be organized by using one of the following:
Destination Type —
- Any
- App Link
- Custom
- Deep Link
- Universal Link
- URL
Status —
- All
- Archived
- Failed
- Processing
- Published
Sort —
- Name [A-Z]
- Name [Z-A]
- Newest
- Oldest
Creating a Landing Page
- Click Add a Landing Page.
- Enter a unique Landing Page Name.
- Select an App to associated to the Landing Page.
- Enter the Page URL.
- Select the Destination.
- If Destination>Custom has been selected, Enter a Destination URL.
- Select Text App Link. (optional)
NOTE: Destination that have been specifically created for an app may be selected. If a destination has not been created, a custom destination may be entered. For more information on creating Destinations, refer to our Destinations Creation and Maintenance support documentation.
NOTE: If Text App Link is selected, the Landing Page will include the functionality for users to text themselves a link to download the app.
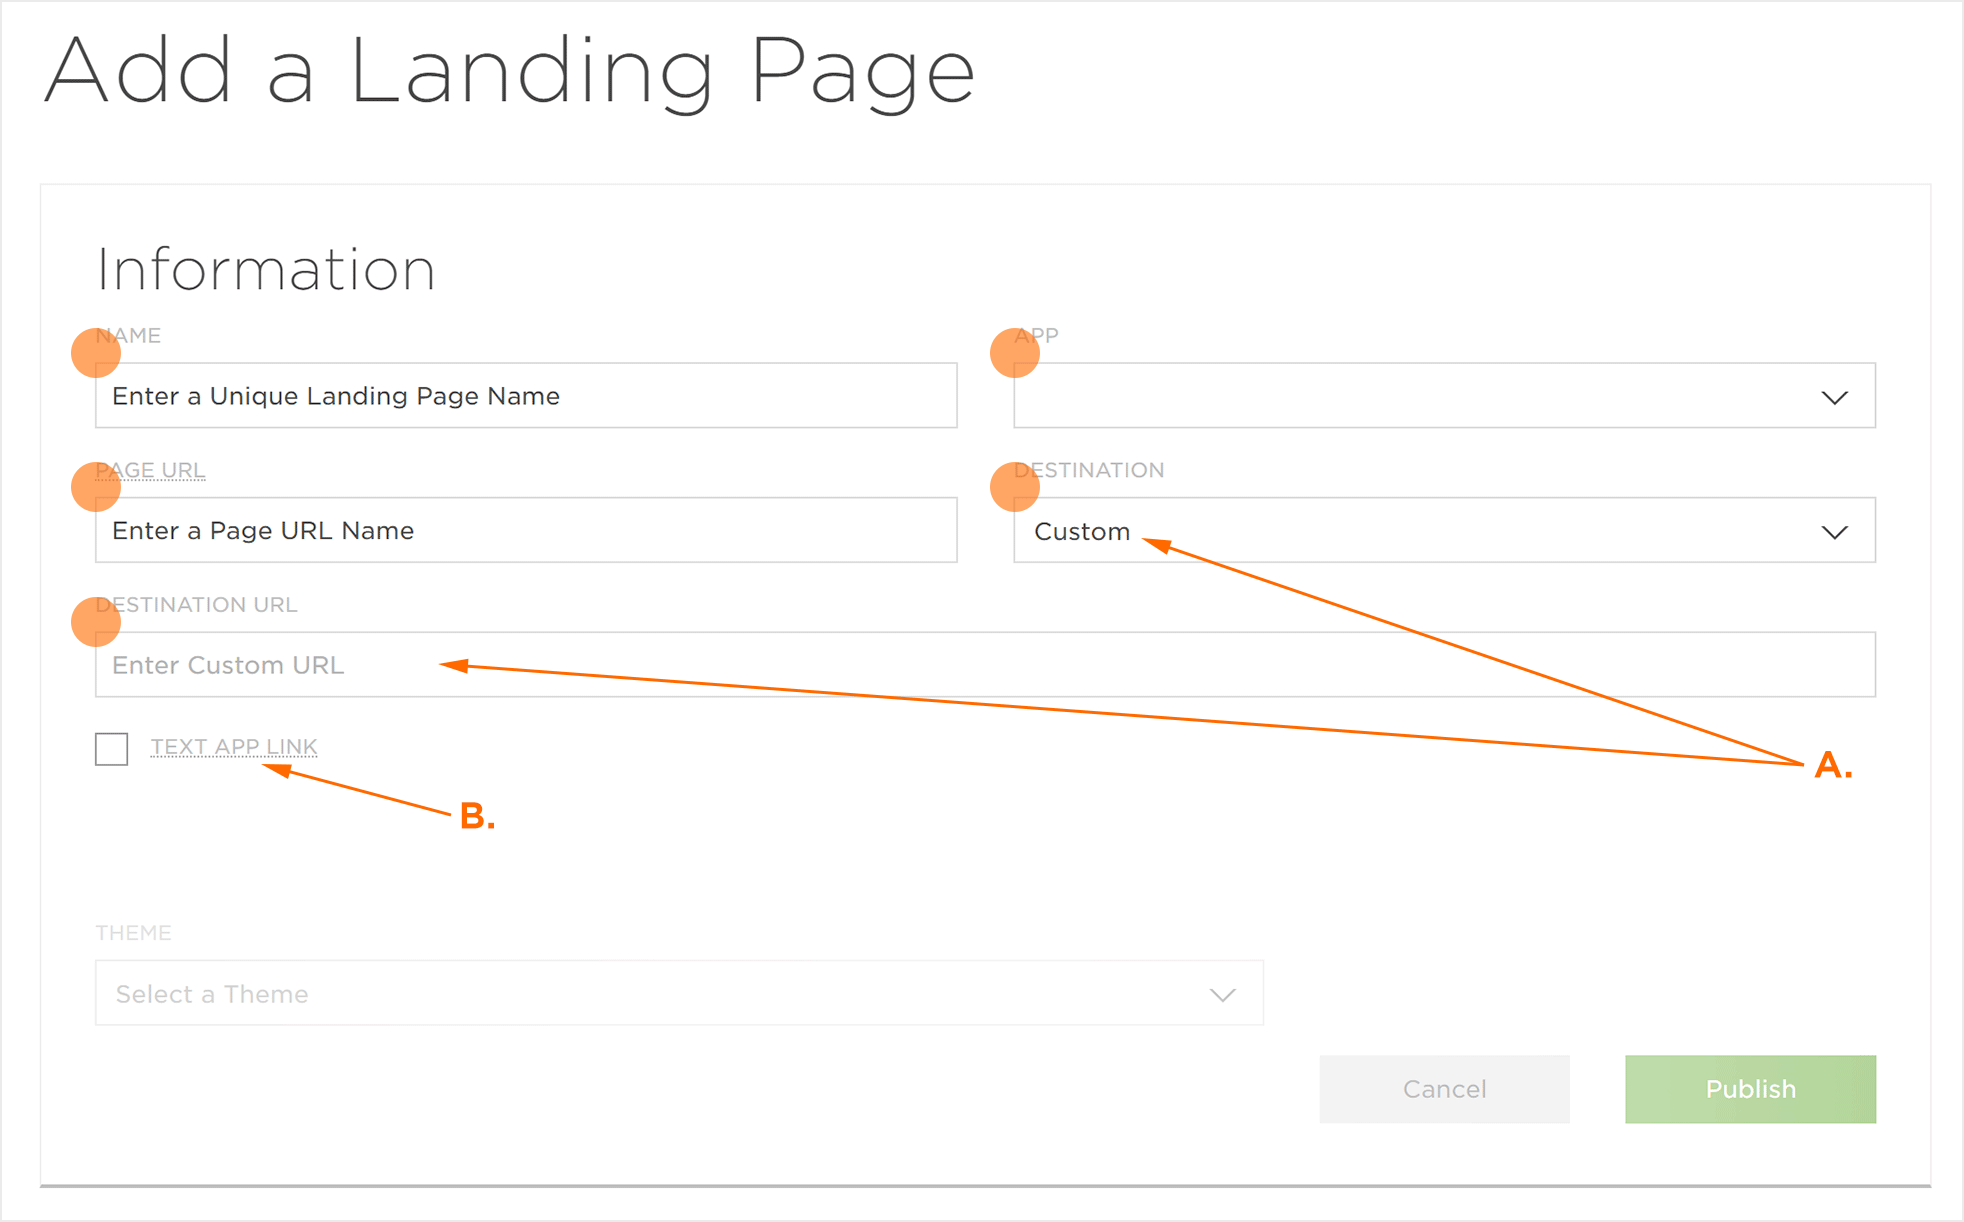
B. Select to allow the user to text a link to themselves.
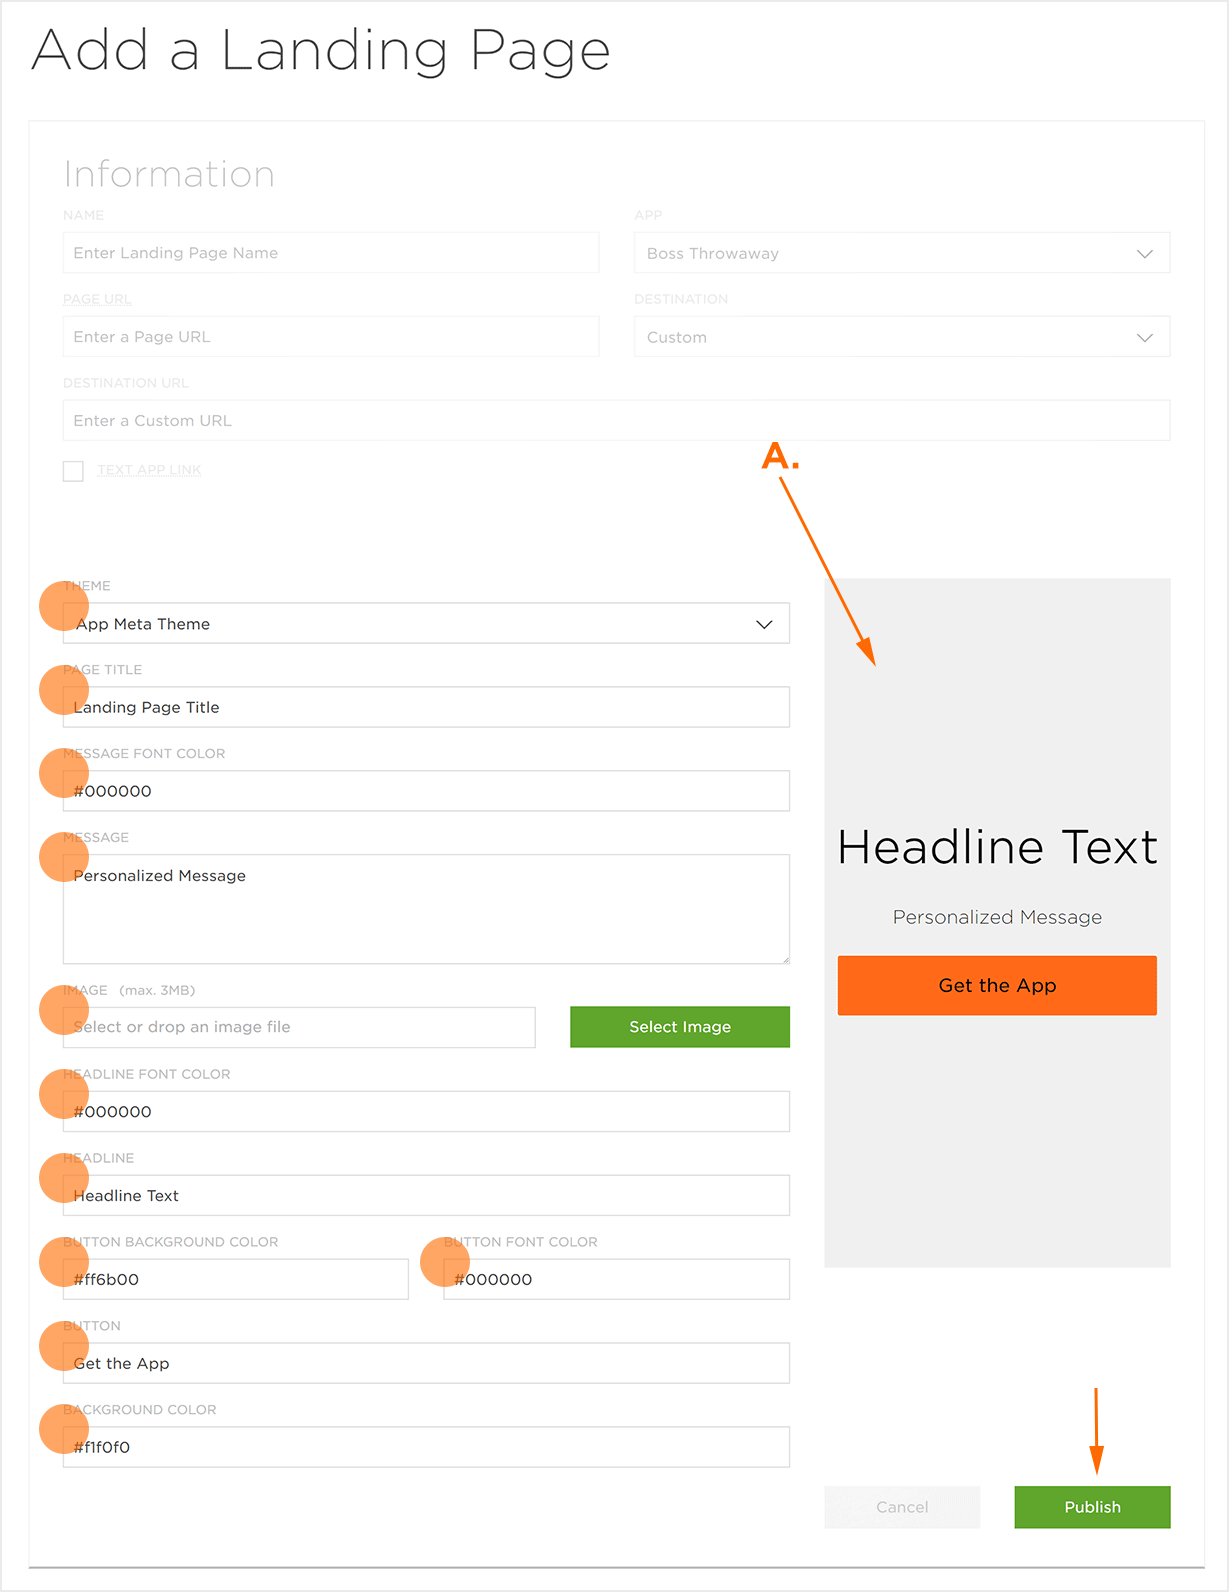
Select a Theme:
- Select the desired Theme:
- App Content
- Text Content
- Image Content
- Enter the Page Title.
- Enter the Message Font Color.
- Enter the page Message.
- Select an Image.
- Enter the Headline Font Color.
- Enter the Headline.
- Enter the Button Background Color.
- Enter the Button Font Color.
- Enter the Button text.
- Enter the Background Color.
- Click Publish.
NOTE: While many settings between the themes are the same, the position and format of the title, message and button vary.
Archived Landing Pages
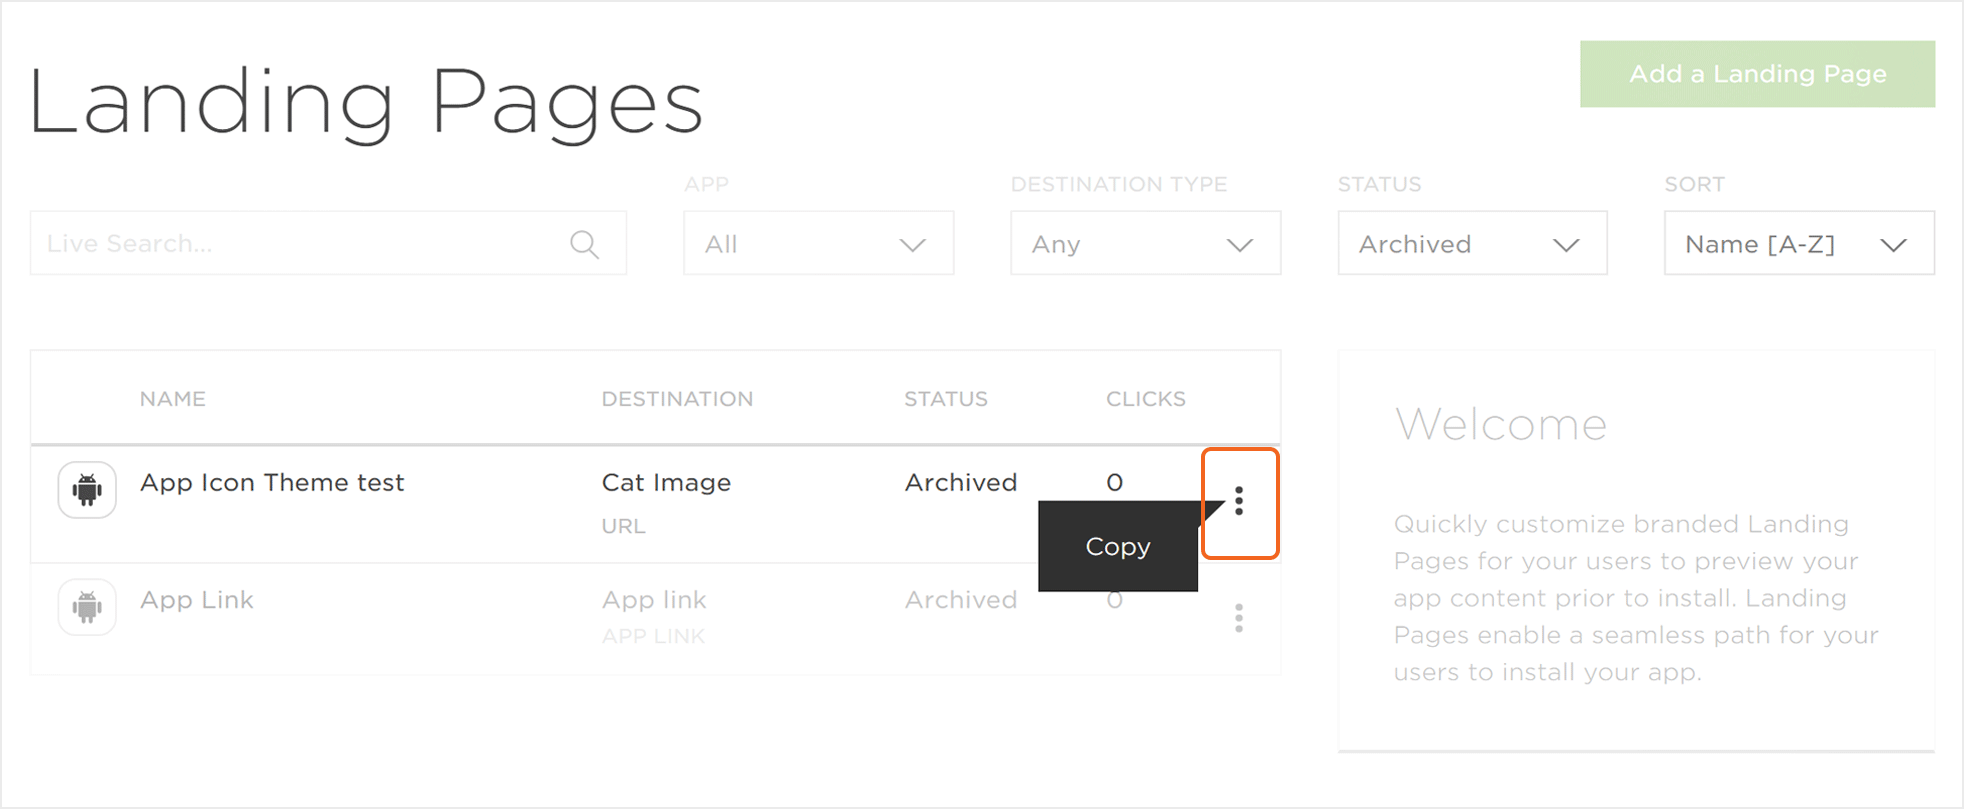
Archived Landing Pages are pages that user has specifically sent to the archive. Archived Landing Pages are no longer accessible to users and will remain in the archive for reference or potential future use. The following options are available for Archived Landing Pages:
- Copy – Creates an exact copy of the archived page which can be published.
Failed Landing Pages
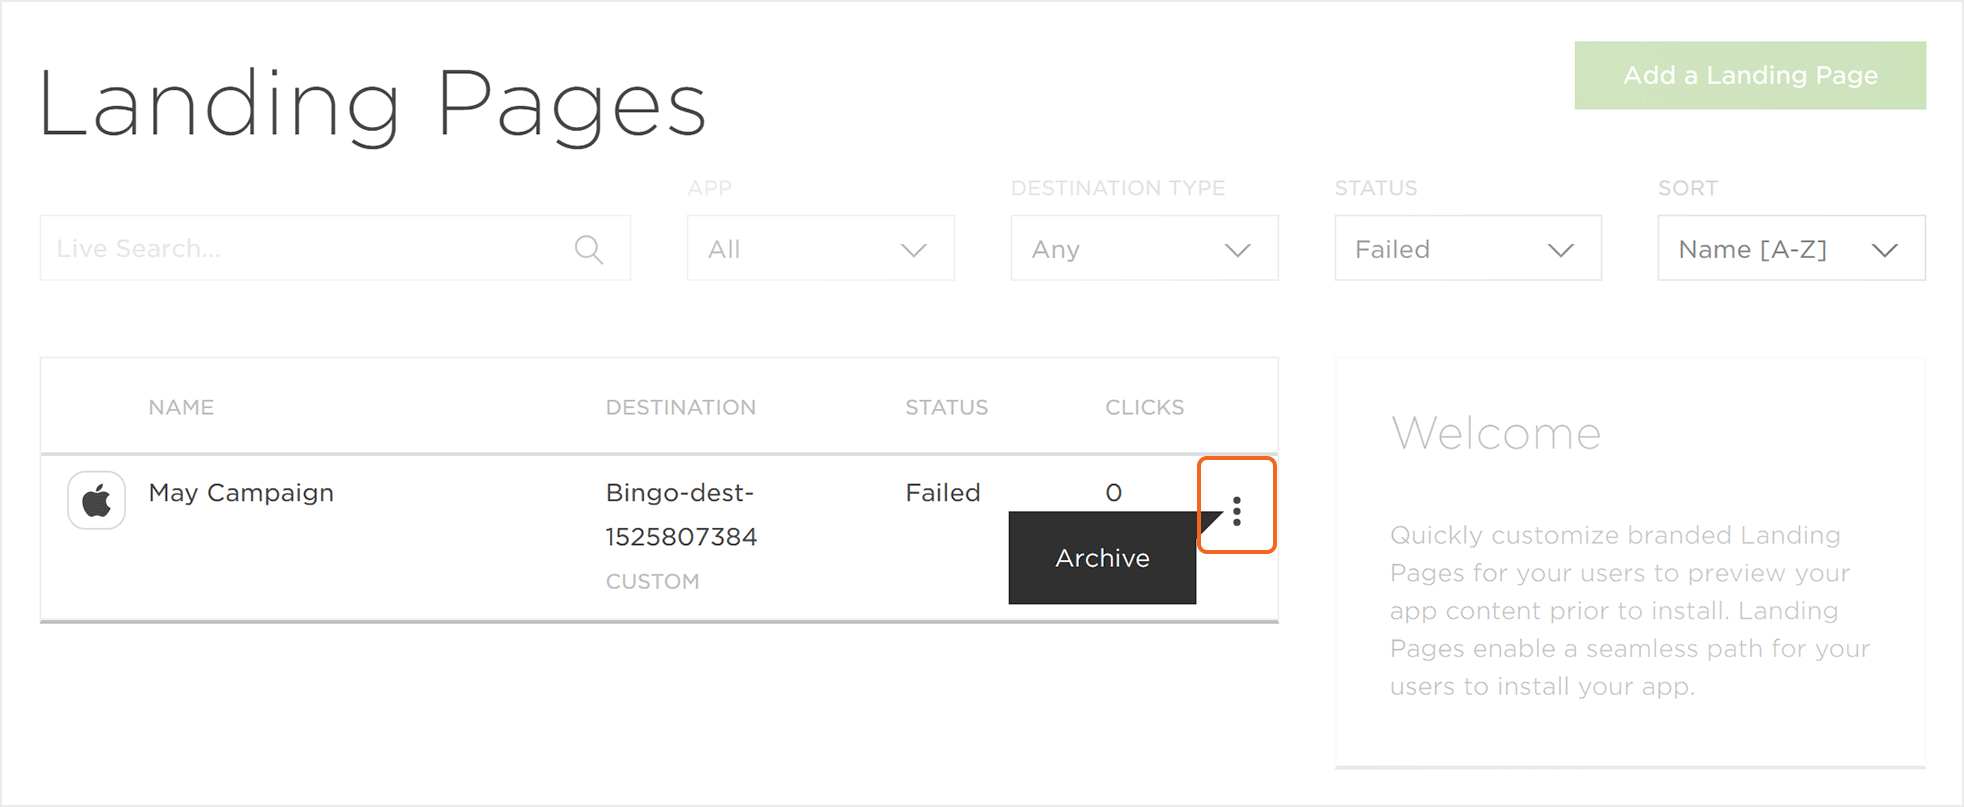
Failed Landing Pages are pages that have an error causing the page to not function properly. If a Landing Page has failed, contact your Customer Success Management team for more information.
- Archive – Sends the associated Landing Page to the archive.
Processing Landing Pages
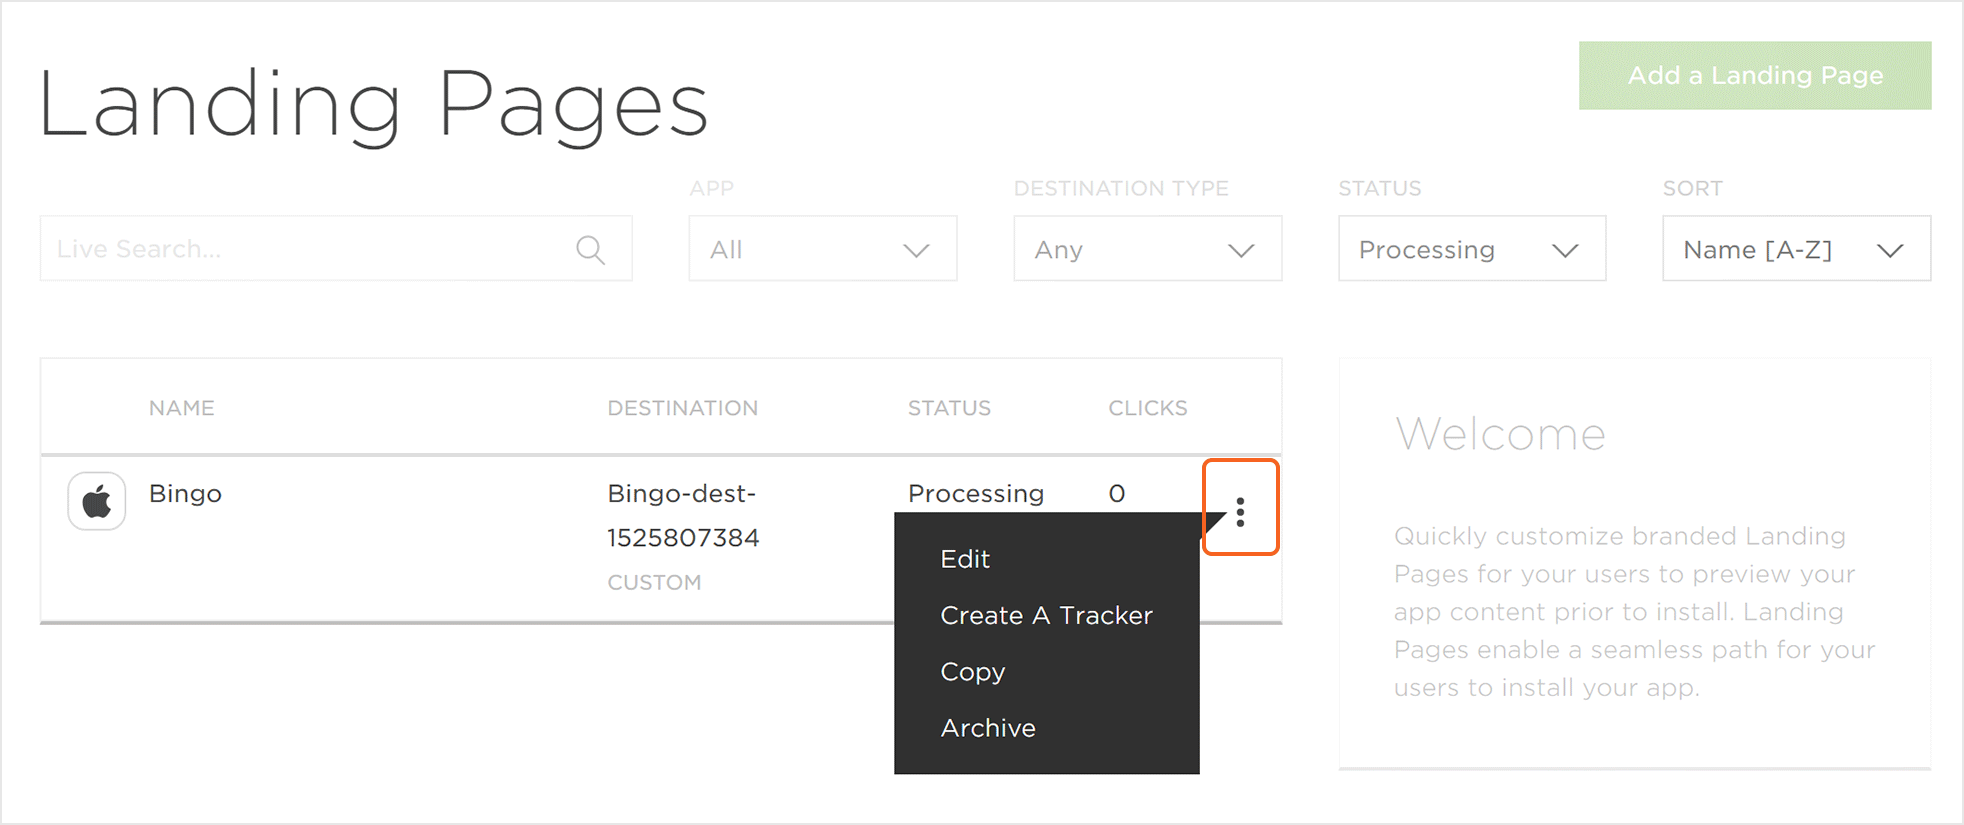
Processing Landing Pages are newly created pages that will be available to users soon. The following options are available for Processing Landing Pages:
- Edit — Open the Landing Page to update/change settings.
- Create a Tracker — Create a tracker with the associated Landing Page as the destination.
- Copy — Create an exact copy of the Landing Page which can be updated/changed.
- Archive — Sends the associated Landing Page to the archive.
NOTE: Once a Landing Page has been created, it may take up to 5 minutes to process the page.
Published Landing Pages
Published Landing Pages are pages that are currently available for users to access. The number of clicks logged for each Landing Page is displayed and by clicking on the Landing Page will display the associated settings and theme. The following options are available for Published Landing Pages:
- Edit — Open the Landing Page to update/change settings.
- Create a Tracker — Create a tracker with the associated Landing Page as the destination.
- Copy — Create an exact copy of the Landing Page which can be updated/changed.
- Send to Test Device — Provides a popup box into which a cellphone number may be entered to send the Landing Page to.
- Archive — Sends the associated Landing Page to the archive.
