External audiences can be joined with audiences that have been created within Kochava. The below Query example searches for device IDs that have accessed the app within a certain date range (7 days) but has not made a purchase.
Audiences can be easily created within Analytics or joined with external data within Query to create specifically granular audience sets. Kochava Audiences provides a single location for the delivery of an audience to a media partner for activation on a marketing campaign, or the export of an audience as a row-level list of device IDs to an email address or S3 bucket.
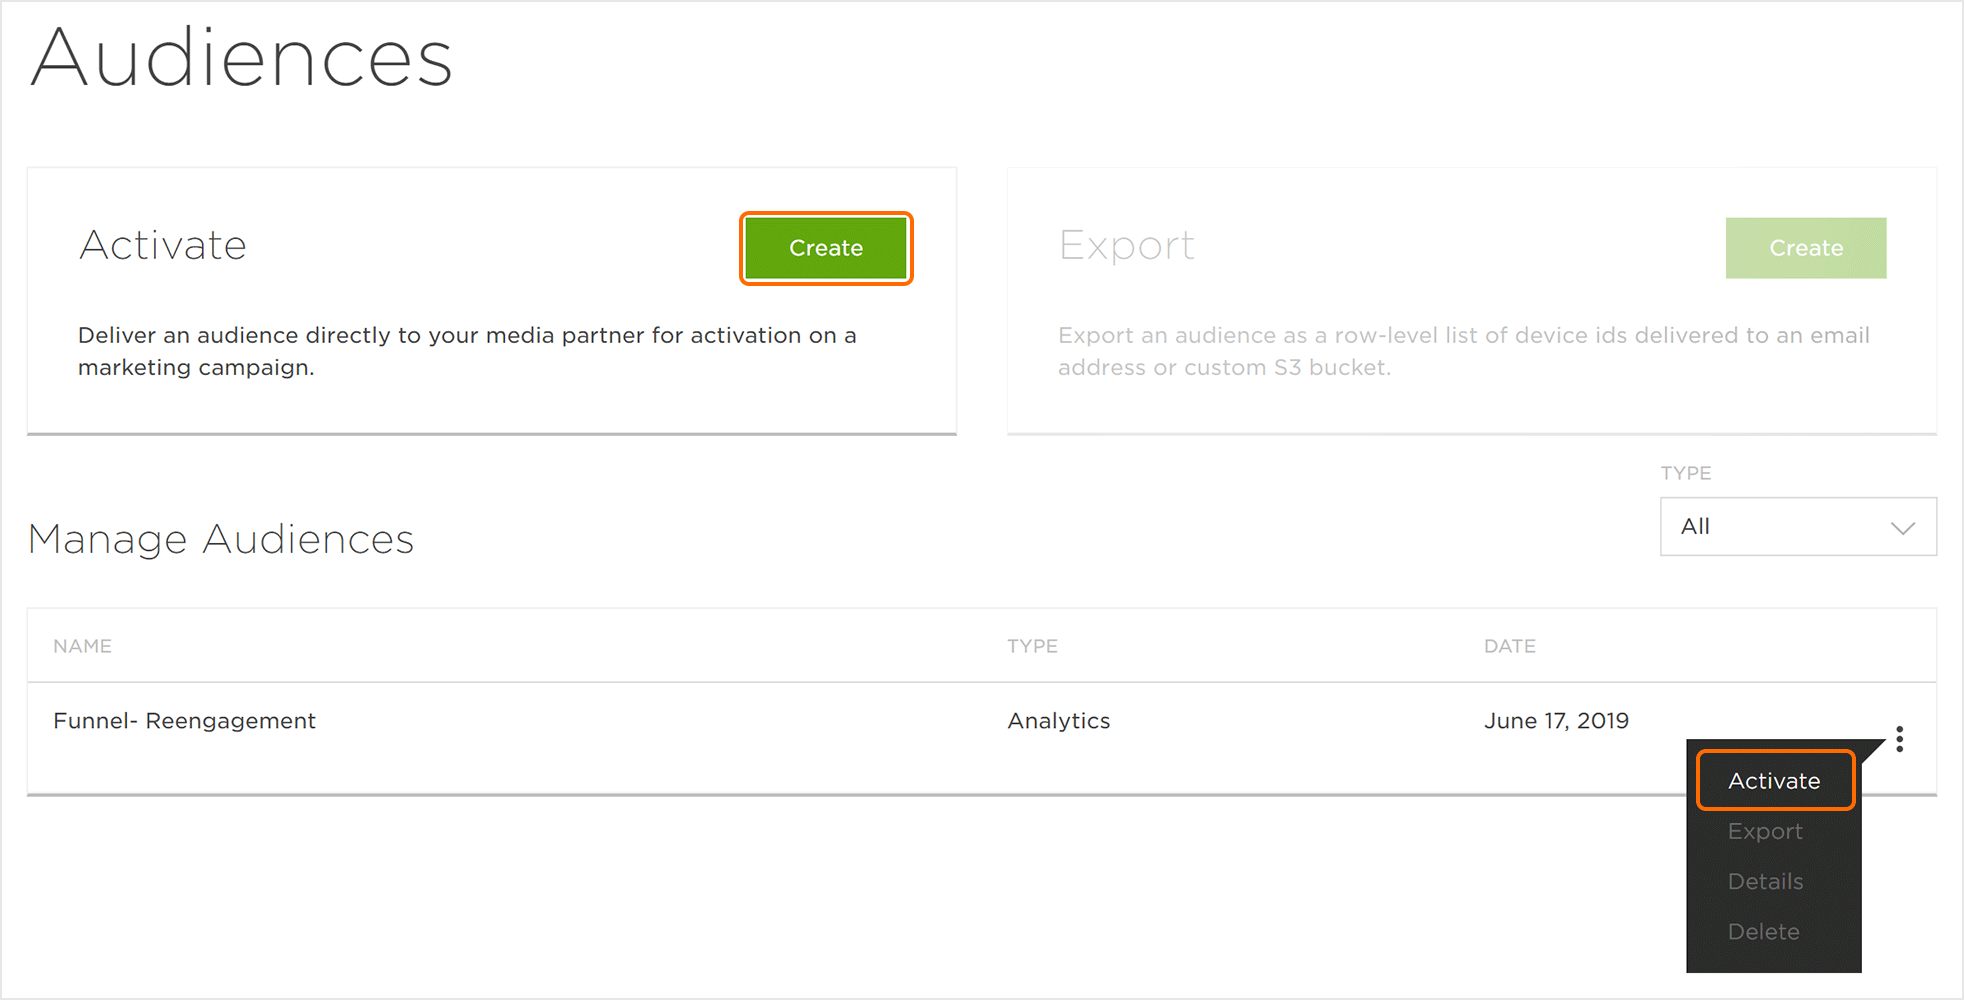
Audiences Interface
- Log in to Kochava.
- Select the desired Account and App.
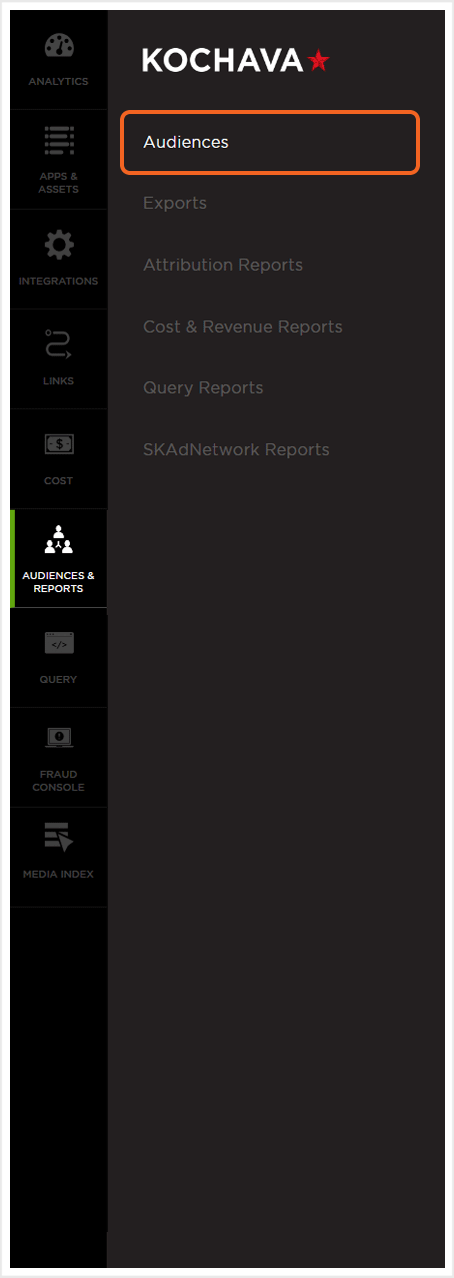
- Select Audiences & Reports > Audiences.
Creating an Audience
Analytics:
From many views within Analytics, audiences can be created and saved. For more information about creating and saving audiences in Analytics, refer to our Analytics Page Tools support documentation.
Acquisition Audience Example —
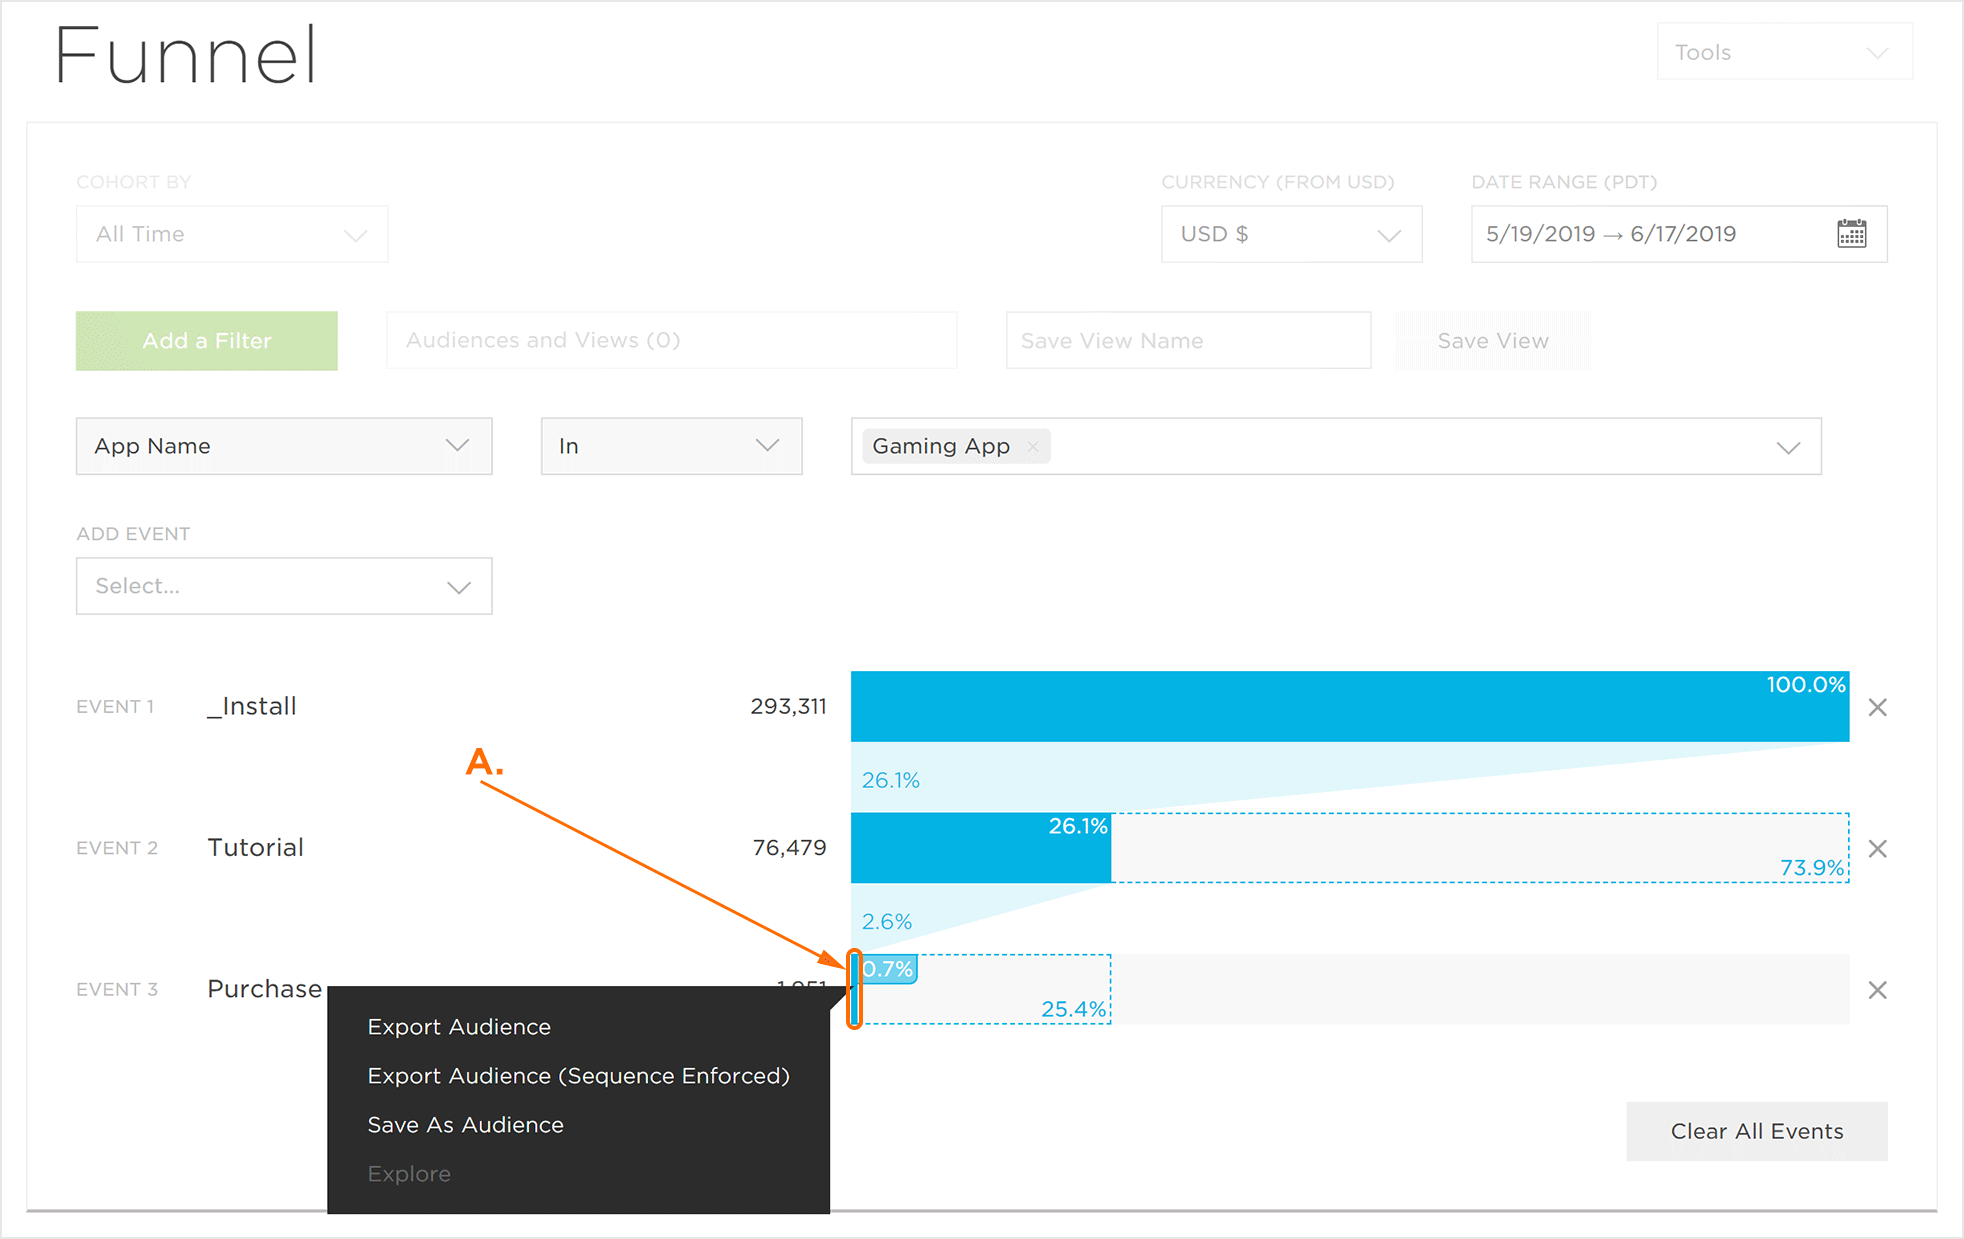
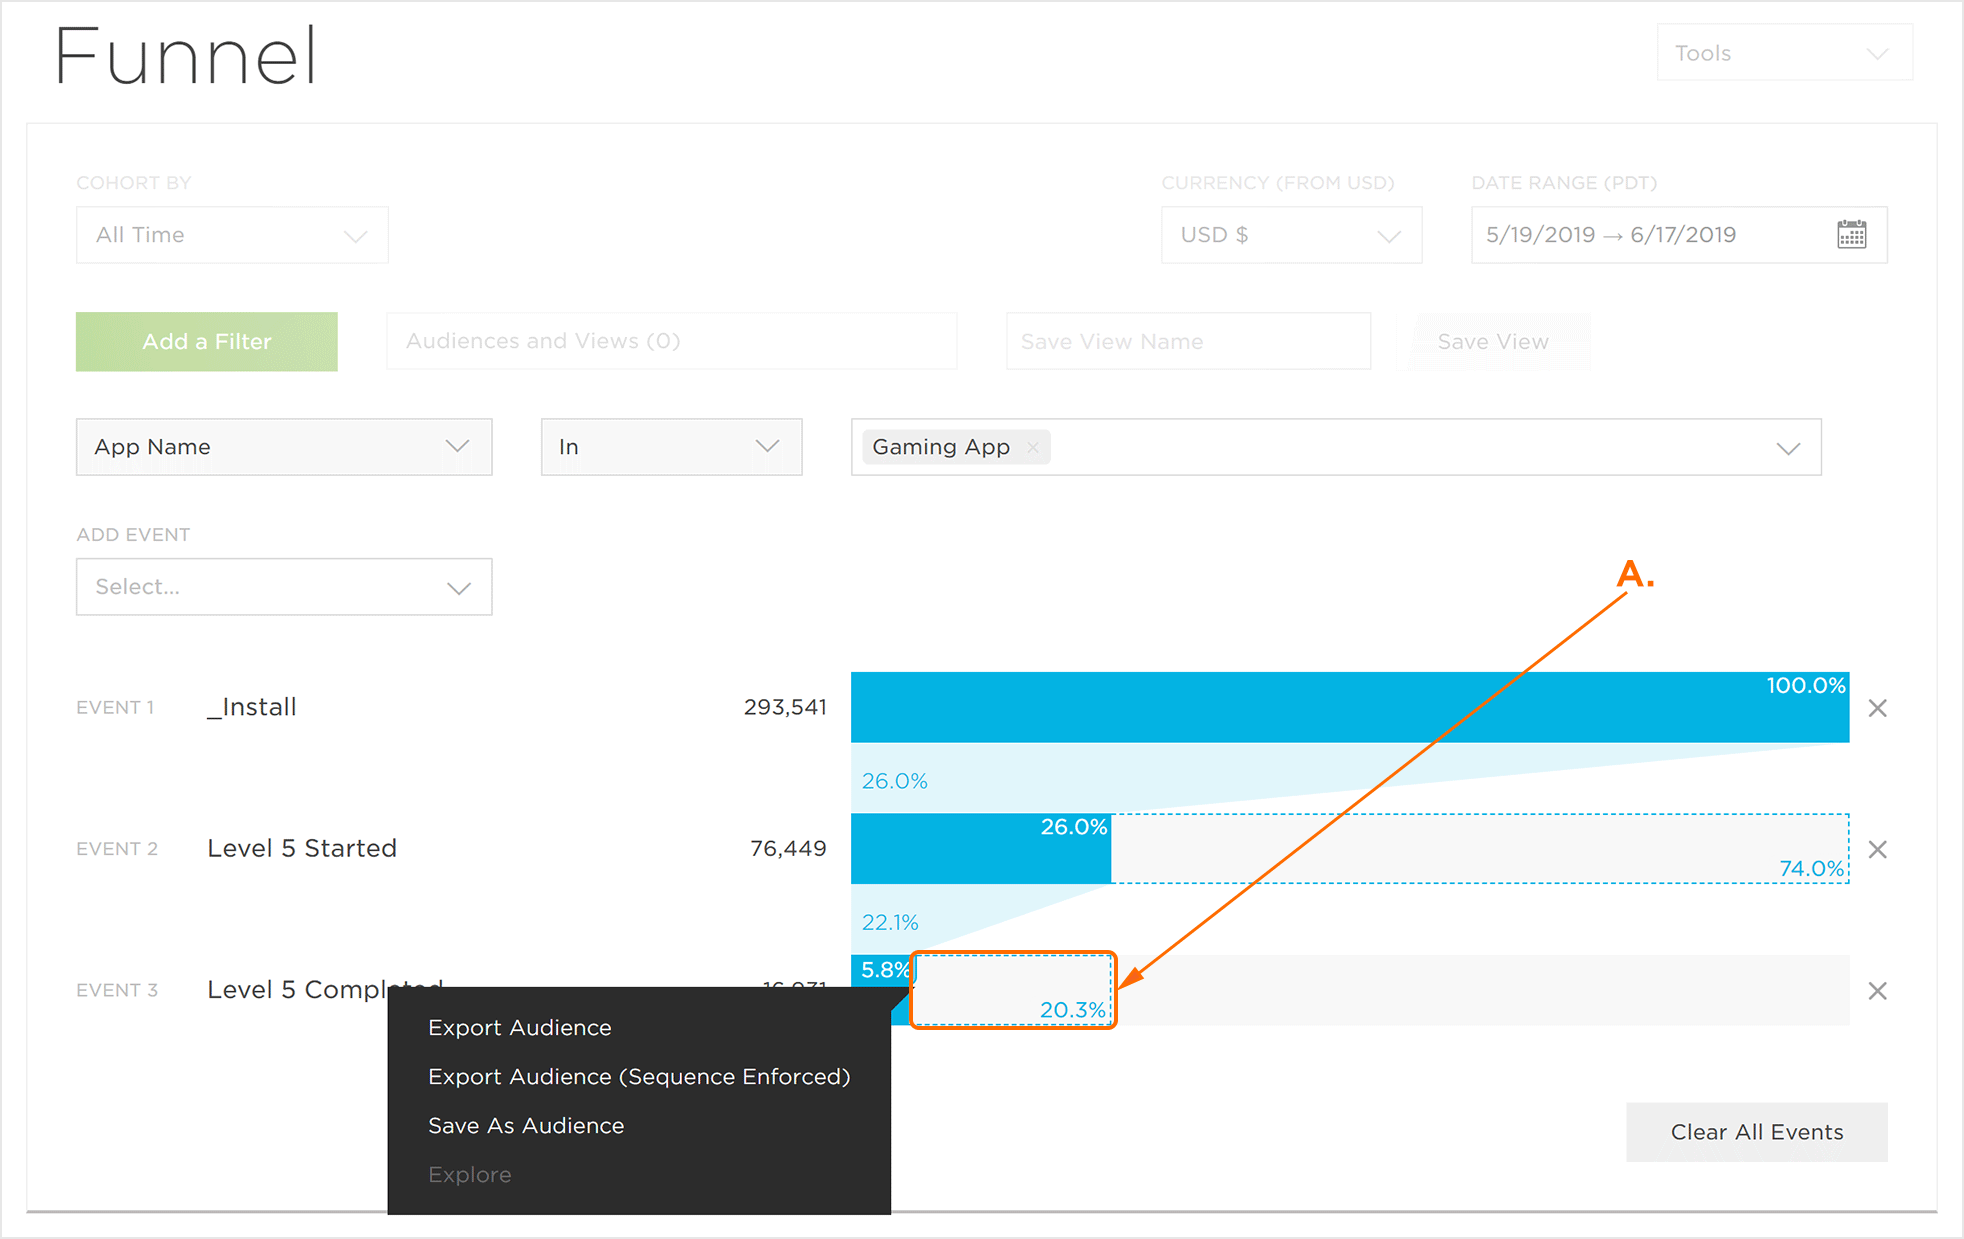
Locating high-value users is very important. Analytics Funnel provides a unique opportunity to locate a user base that can be used within an Activation Partner to acquire a lookalike audience. For example, a gaming app looking for users that make purchases after completing a specific event such as completing a tutorial. The data shows that for this gaming app if a user completes the tutorial before they make a purchase the lifetime value of those users is much greater. If the Analytics Funnel is used to create an audience of users that have completed the tutorial and then made a purchase, those users can be used to locate a very valuable lookalike audience. Clicking on the devices in the purchase funnel event and selecting Export Audience (Sequence Enforced) will export the device IDs needed.
NOTE: Export Audience (Sequence Enforced) is specific used within the Analytics Funnel. Sequence Enforced means that only users that specifically followed the path of the funnel will be exported. In the image provided, only the users that followed the event path of _Install > Tutorial > Purchase will be exported.
Reengagement Audience Example —
Depending on the type of app, a reengagement strategy can be specifically designed for the most impact. For example, a gaming app that has a high number of users proceed to level 5 however they do not complete the level and there is a drastic drop-off of engagement by the users. In order to reengage those users, the Analytics Funnel can be used to create an audience of users who have started level 5 but have not completed the level. Special offers may be sent to users who have reached and completed level 5 in order to keep the users engaged with the game.
Managing Audiences
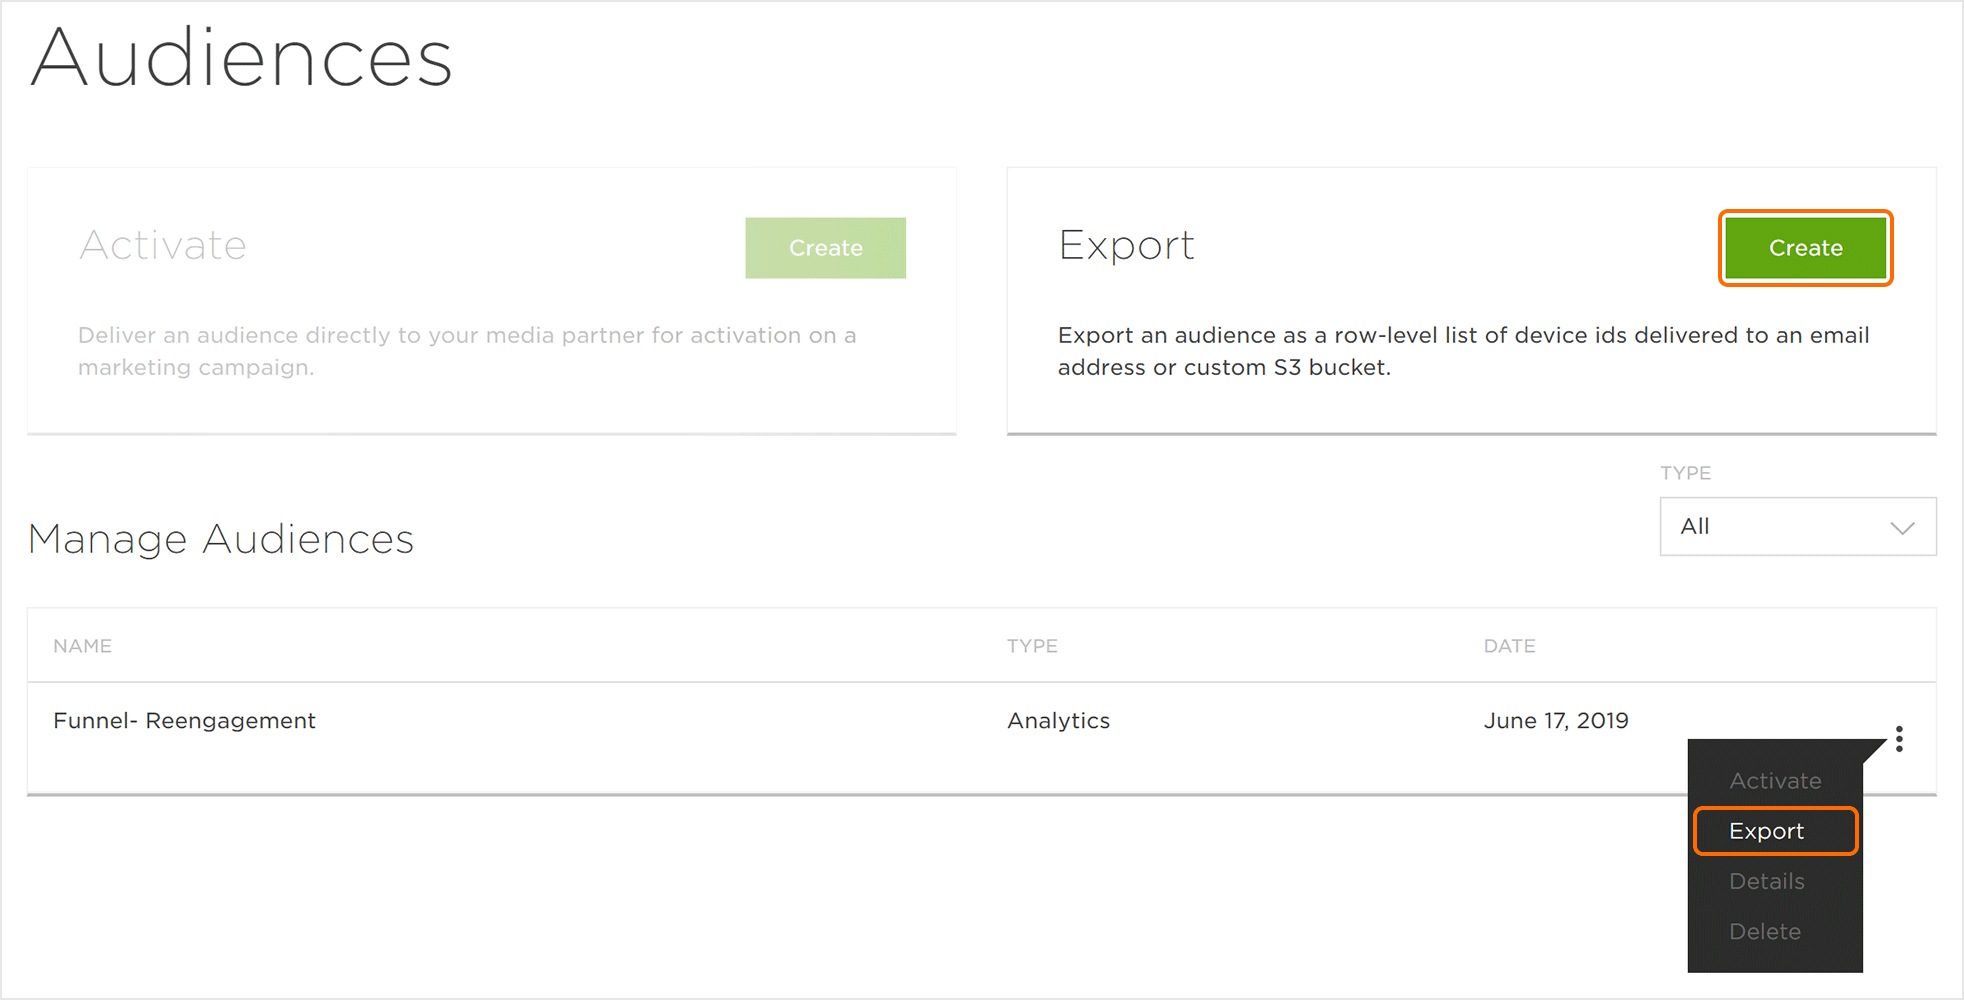
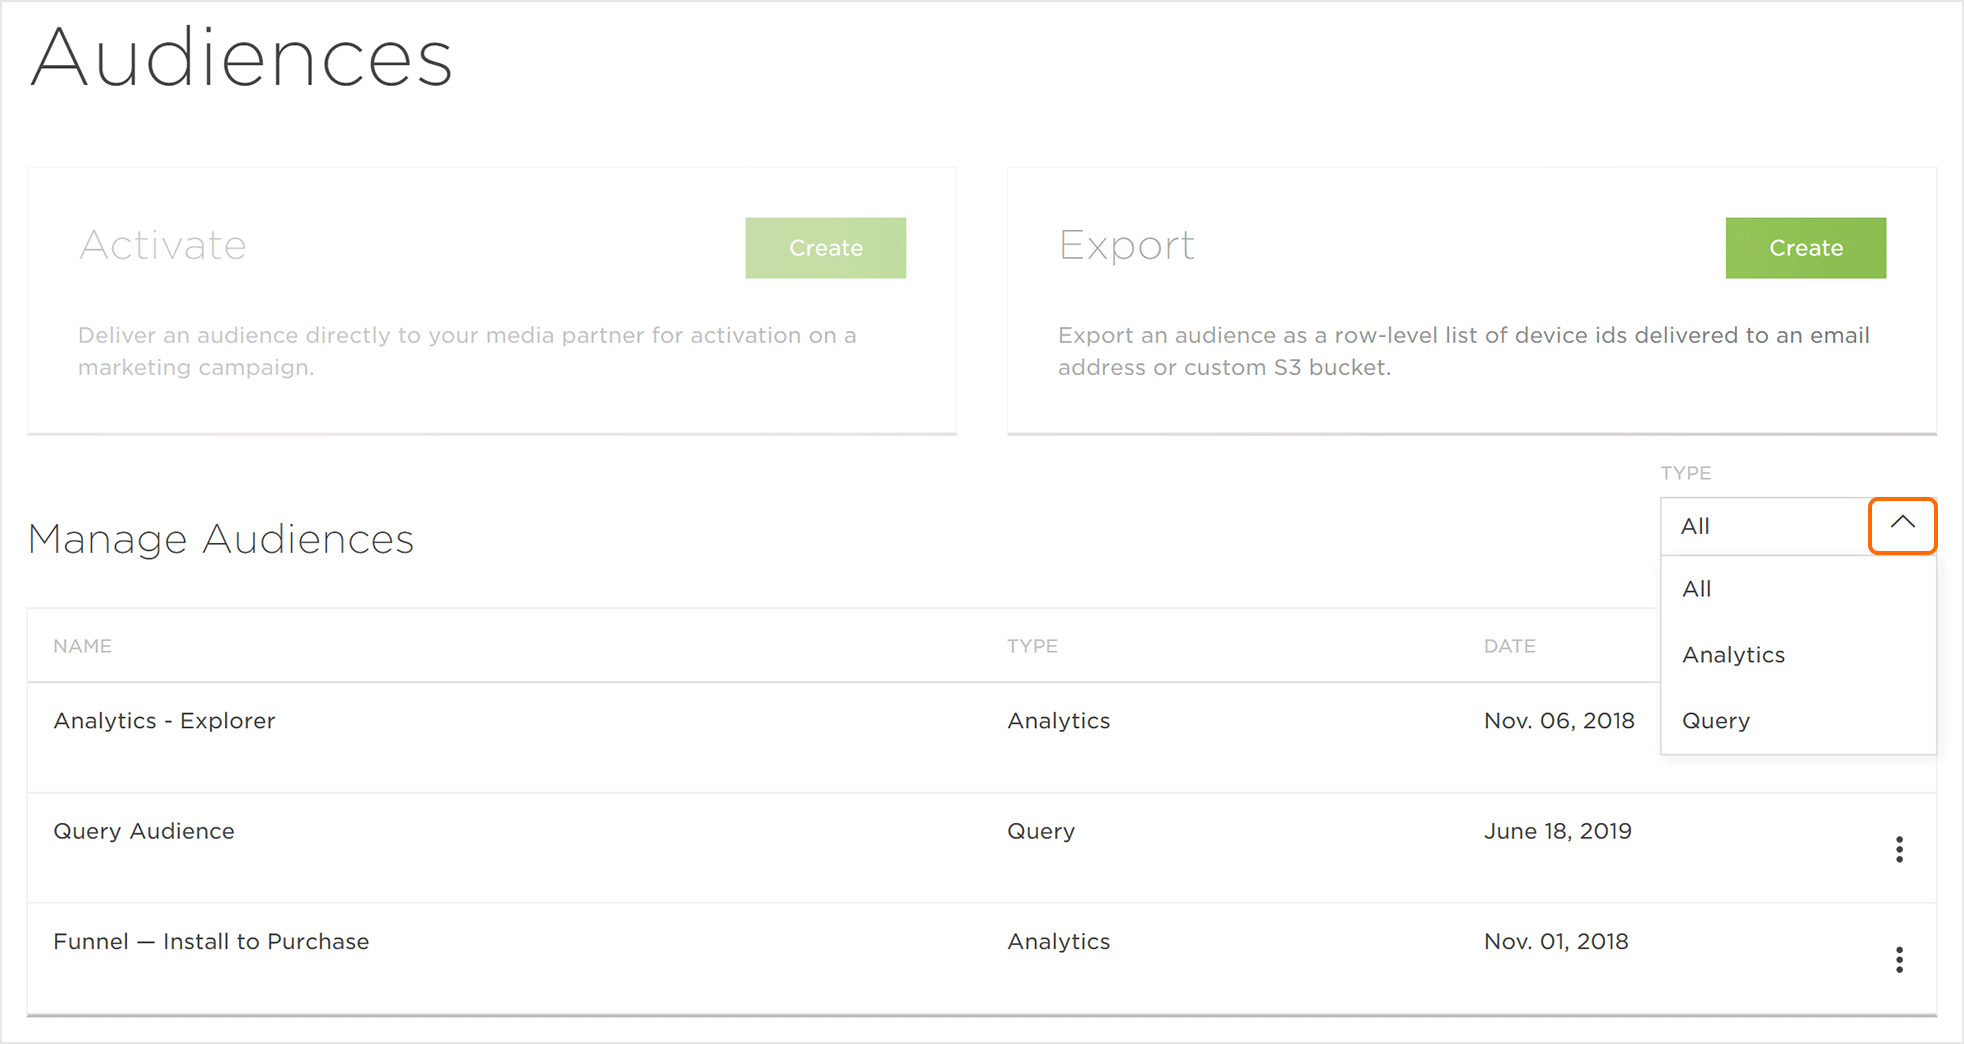
Audiences that have been created in Query or Analytics can be managed within the Audiences interface. Audiences may also be viewed by type (All, Query, Analytics).
Organize by Type:
Utilizing the Type drop-down menu, Audiences can be organized for easy and quick location. The following options are available:
- All — Displays both Analytics and Query audiences.
- Analytics — Displays only the Analytics audiences.
- Query — Displays only the Query audiences.
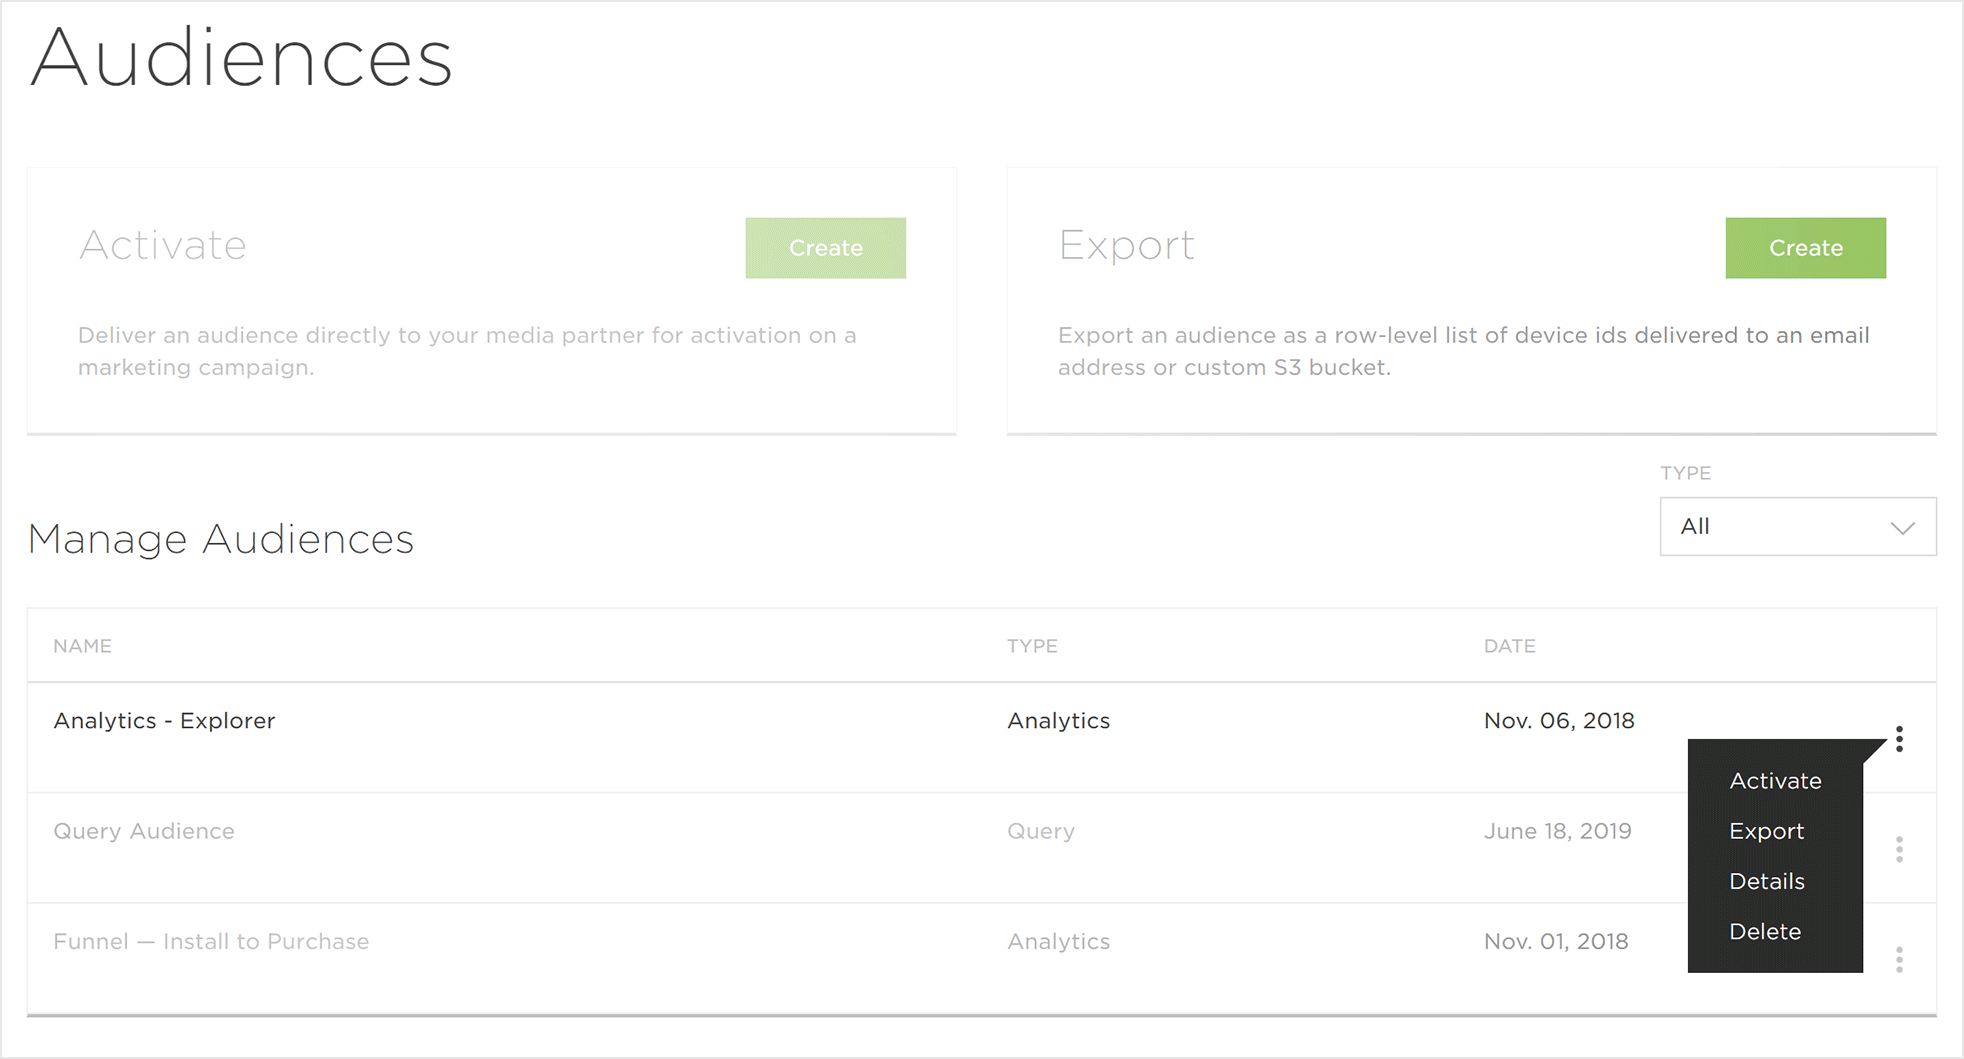
Analytics Audiences:
- Activate — Delivers the Analytics audience to a media partner for activation on a marketing campaign.
- Export — Delivers a row-level list of device IDs to an email address or custom S3 bucket.
- Details — Displays the name of the app the audience was generated from.
- Delete — Permanently removes the audience.
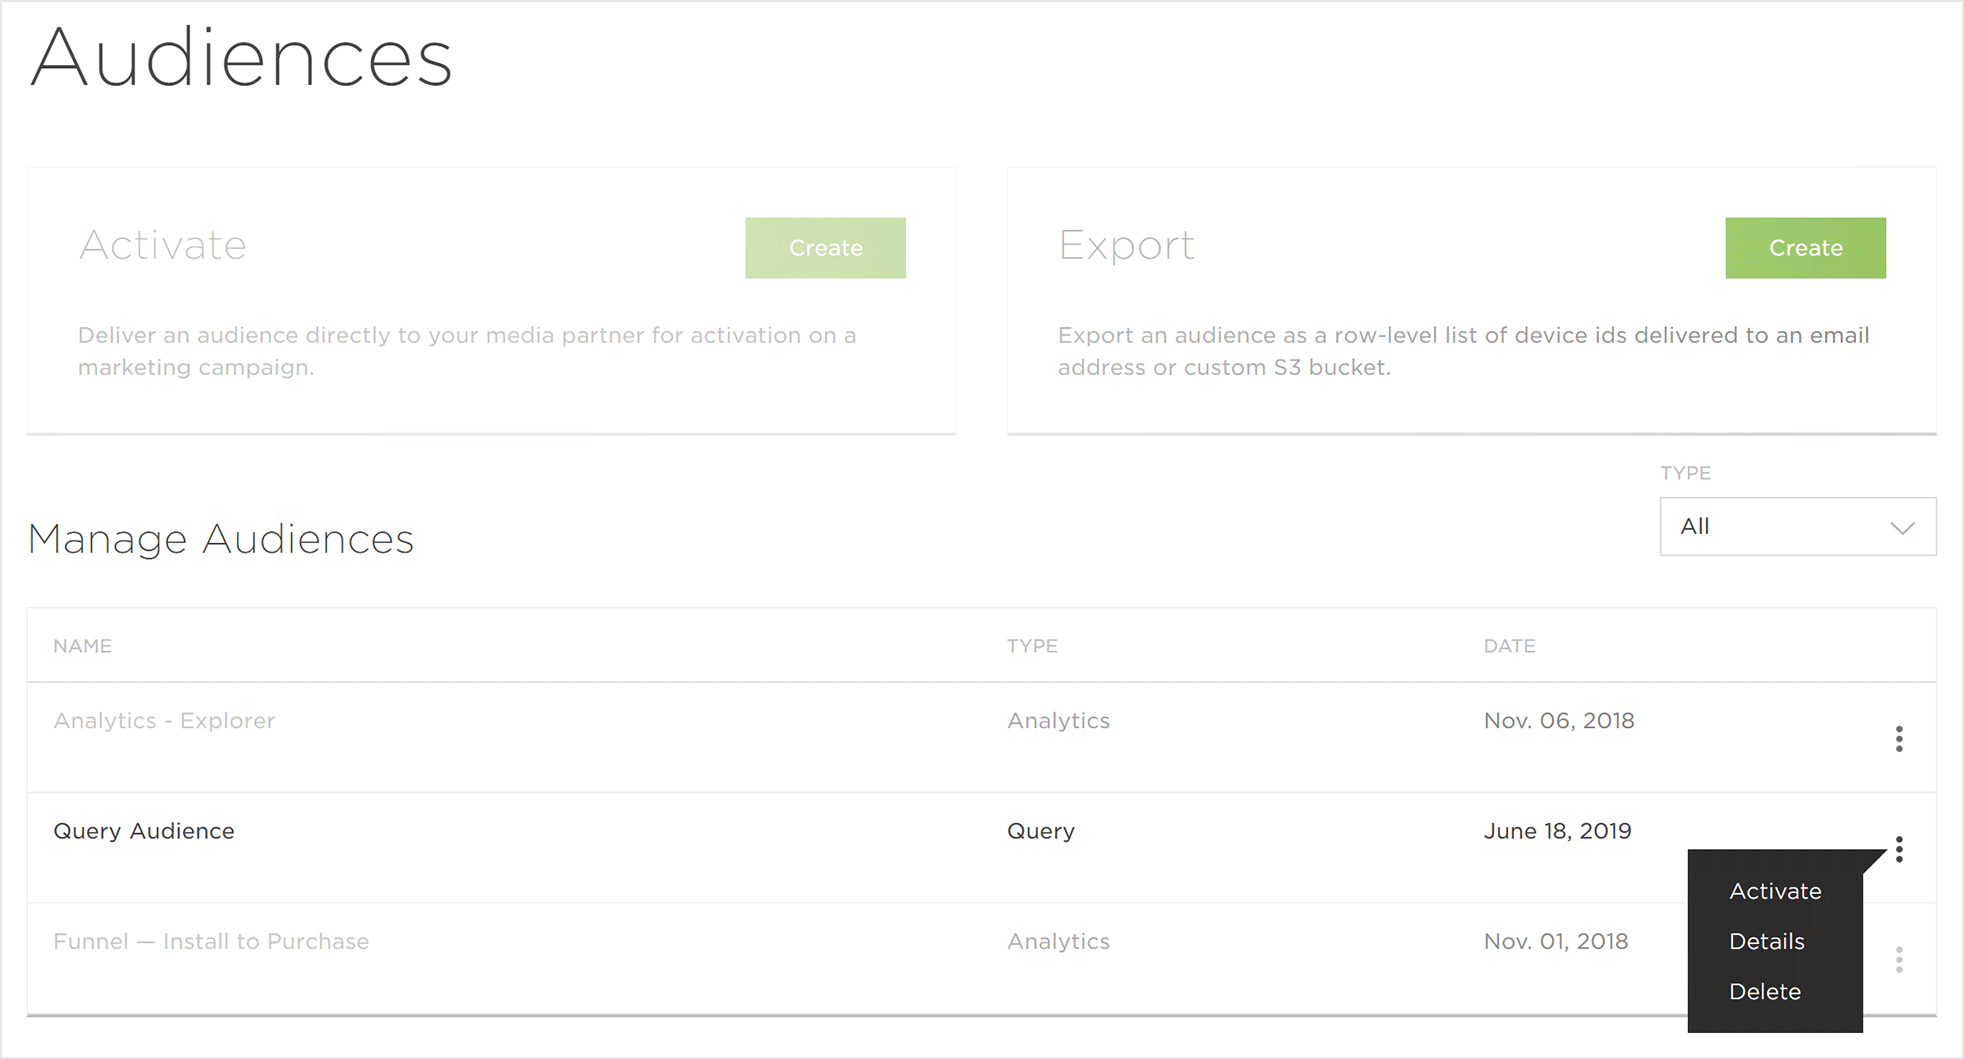
Query Audiences:
- Activate — Delivers the Query audience to a media partner for activation on a marketing campaign.
- Details — Provides a list of the table columns composing the audience.
- Delete — Permanently removes the audience.
Activate Audiences
Once an audience has been created, the audience may be delivered directly to a media partner for activation on a marketing campaign.
- Click Activate > Create or locate the desired Audience and Click Audience Tools (⋮) > Activate.
- Select the Audience.
- Select the Timezone.
- Select the Frequency:
- One-Time
- Scheduled/Recurring
- Select a Date Range:
- Today
- Yesterday
- Week-to-Date
- Last Week
- Last 7 Days
- Month-to-Date
- Last Month
- Last 30 Days
- Custom Range
- Enter a Recipient(s).
- Select an Activation Partner.
- Enter the Activation Partner Credentials.
- Click Save.
- Click Submit.
NOTE: If the option to Save is not enabled, clear your cache which should then allow you to save before submitting.
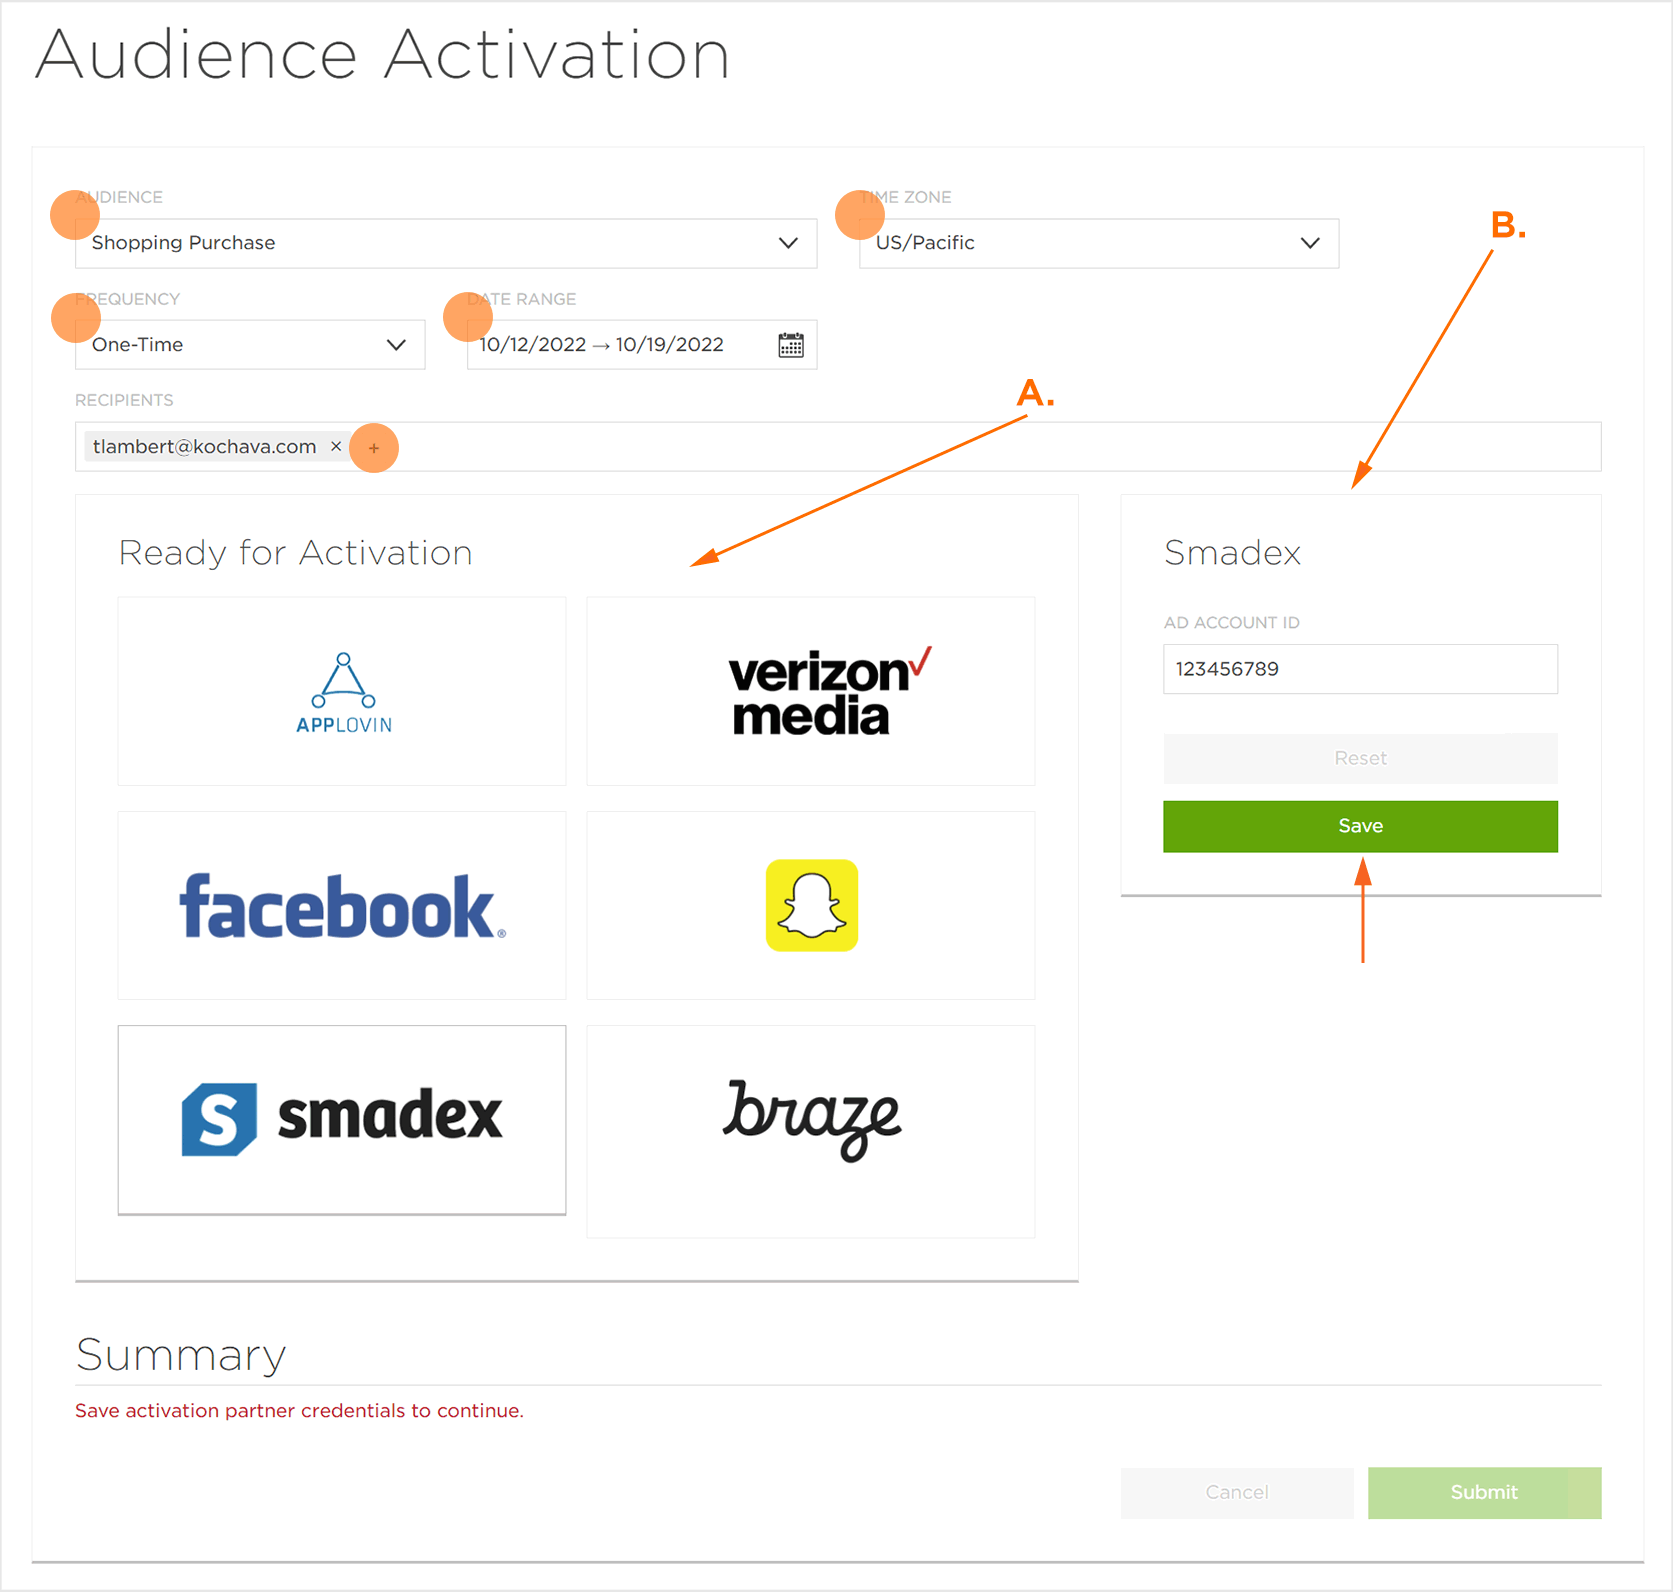
B. Partner Credential Settings.
- Each scheduled audience will be rerun according to the frequency selected in the recurring to generate the refreshed audience for send to partner.
- Daily (3am for selected time zone) UTC run for midnight to midnight previous day.
- Weekly (4am for selected time zone) UTC run for midnight to midnight previous week.
- Monthly (5am for selected time zone) UTC run for midnight to midnight previous month.
- All dates ranges will be converted into a dynamic audience.
If an audience is created for 14 days last October, and I want to send it to an Activation partner every Monday, how is this audience re-generated each week? Is it re-generated using that same timeframe in October or is it re-generated using a new more current timeframe?
- Analytics – Save as Analytics Audience:
- Daily (3am for selected time zone) UTC run for midnight to midnight previous day.
- Weekly (4am for selected time zone) UTC run for midnight to midnight previous week.
- Monthly (5am for selected time zone) UTC run for midnight to midnight previous month.
- Audience Query:
- Kochava will rerun the query as saved. User is responsible to date period in where clause.
Each scheduled audience will be rerun according to the frequency selected in the recurring to generate the refreshed audience for send to partner
Export an Audience
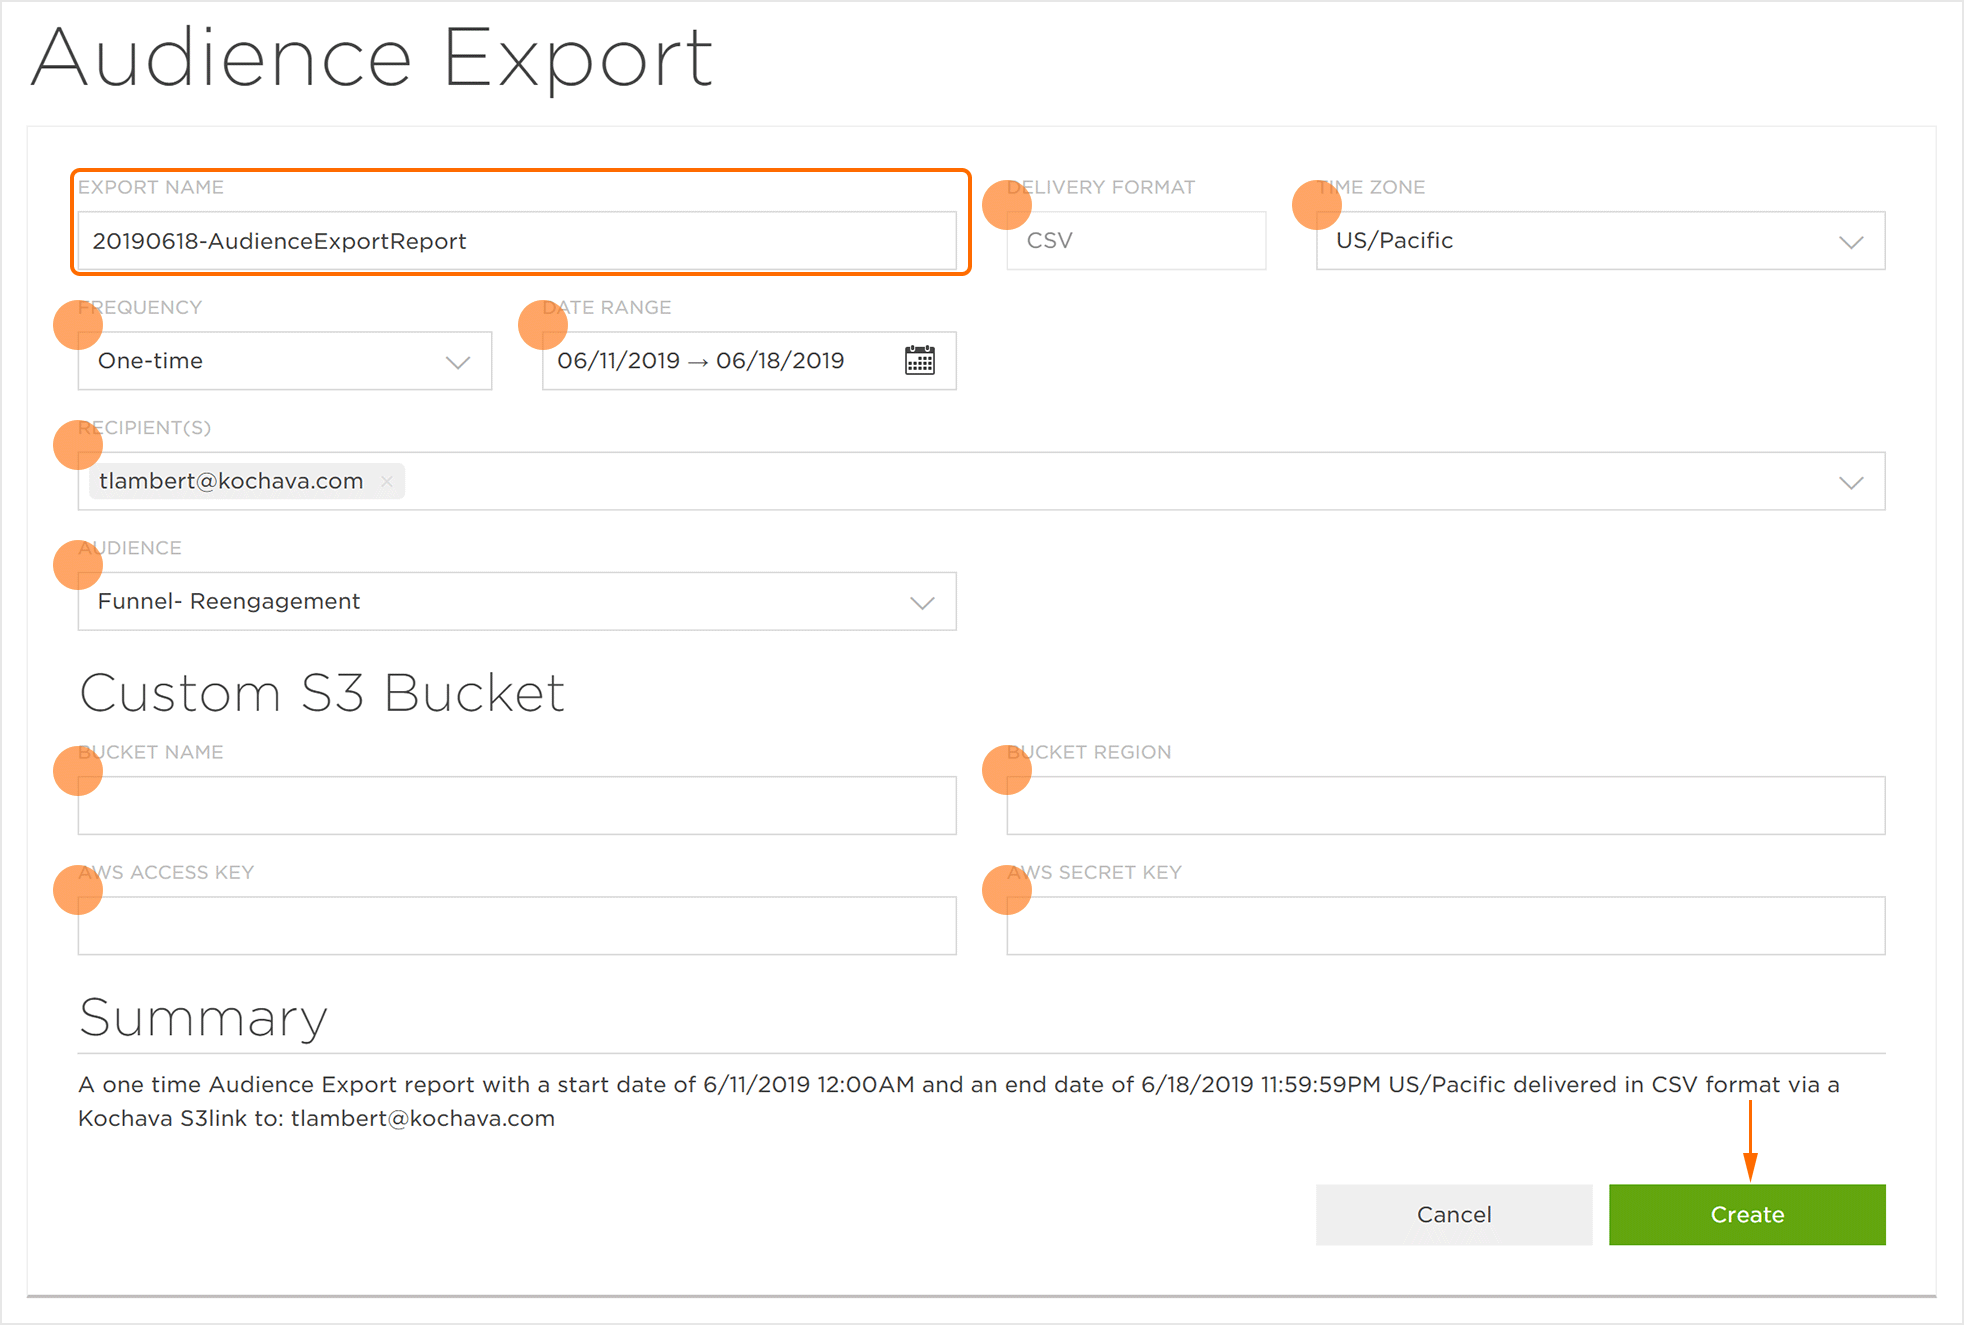
The Export an Audience tool provides the ability to deliver a row-level list of device IDs to an email address or custom S3 bucket.
- Click Export > Create or locate the desired Audience and Click Audience Tools (⋮) > Export.
- Enter an Export Name.
- Select a Delivery Format:
- CSV
- Select a Timezone.
- Select the export Frequency:
- One-time
- Scheduled/Recurring
- Select a Date Range:
- Today
- Yesterday
- Week-to-Date
- Last Week
- Last 7 Days
- Month-to-Date
- Last Month
- Last 30 Days
- Custom Range
- Enter a Recipient(s).
- Select the Audience.
- Enter S3 Bucket credentials:
- Enter the Bucket Name.
- Enter the Bucket Region.
- Enter the AWS Access Key.
- Enter the AWS Secret Key.
- Click Create.
