Use Cases for a Private Network:
- You have a large user base for your app and want to serve ads in the context of your app.
- You have your own website on which you want to serve ads.
- You have a source interested in banners or interstitials within one of your apps.
NOTE: Private Networks must be created in the Advertiser account if the private network needs to be used by Agencies as well as Advertisers.
NOTE: SmartLinks™ are an alternative to creating a Private Network. For more information about SmartLinks, refer to our Creating and SmartLinks™ support documentation.
Create a Private Network
- Log in to Kochava.
- Select the desired Account.
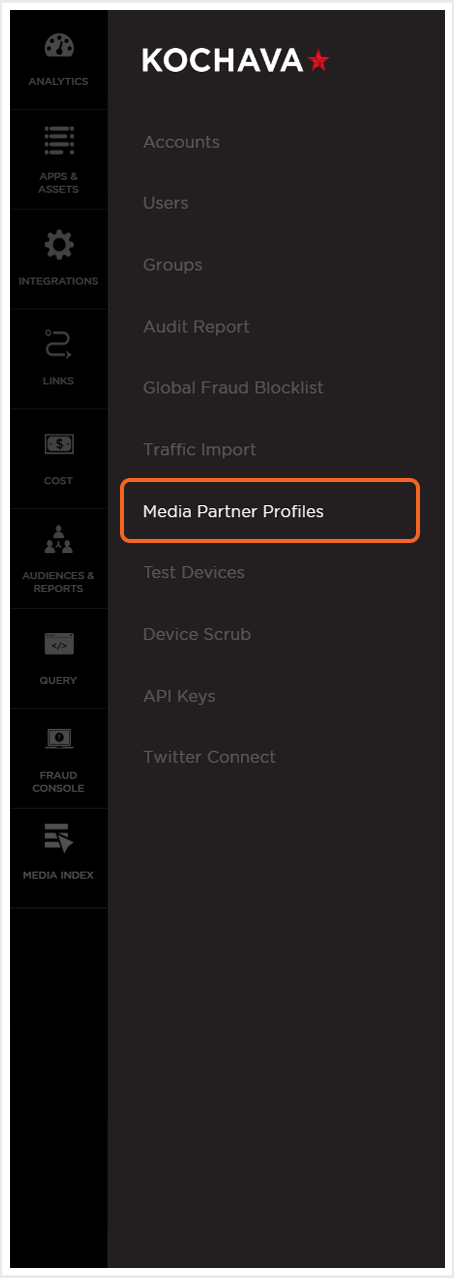
- Select Account Options > Media Partner Profiles.

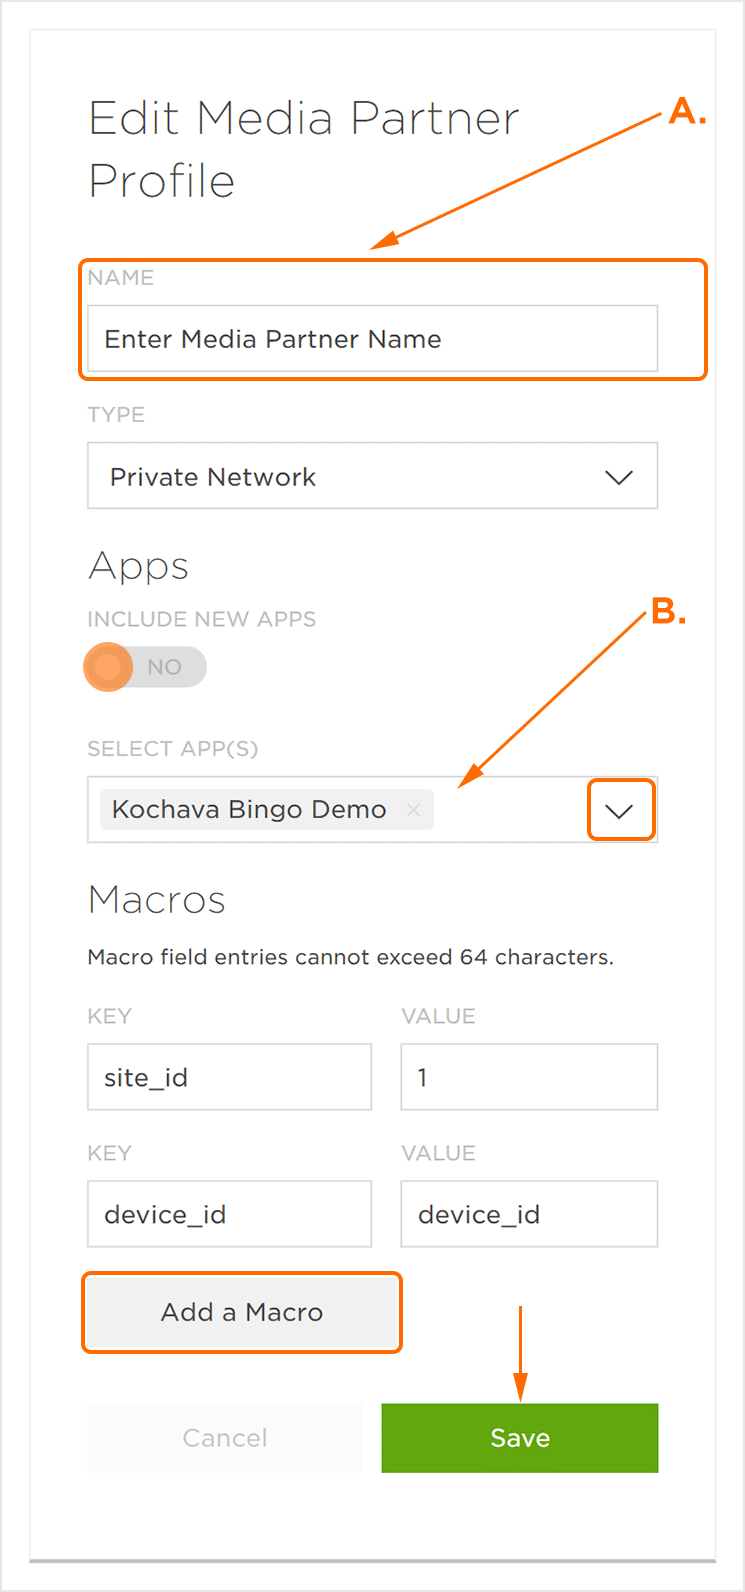
- Click Add a Media Partner Profile.
- Enter a unique Network Name.
- Check Include New Apps. (optional)
- Click + and Select the desired App(s).
- Click Add a Macro to enter any additional Macros that need to be associated with this Private Network. (optional)
- Click Save.
NOTE: If the Include New Apps option is checked, the Private Network will be available to new apps that are created in the Kochava Dashboard.
NOTE: Any specific app that is selected, the Private Network will be available to within the Kochava Dashboard.
NOTE: site_id and device_id are default Macros.

B. Select Apps the Private Network will be available to within Kochava.
NOTE: Once a Private Network is created, it will be available during the Media Partner selection portion of tracker creation. Select the Private Network and the associated click URL will populate accordingly.
NOTE: No Postback is required for a Private Network campaign. Custom Postback can be created for additional configuration.
