The following document provides the steps for setting up a campaign within Kochava from start to finish within 10 minutes.
Data Needed Before Beginning Process:
- Create an App Within Kochava
- Integrate Kochava SDK successfully into an app, SDKs can be found on our SDK Integration page.
Create an Install Campaign
- Log in to Kochava.
- Select the desired Account and App.
- Select Engagement > Campaign Manager.
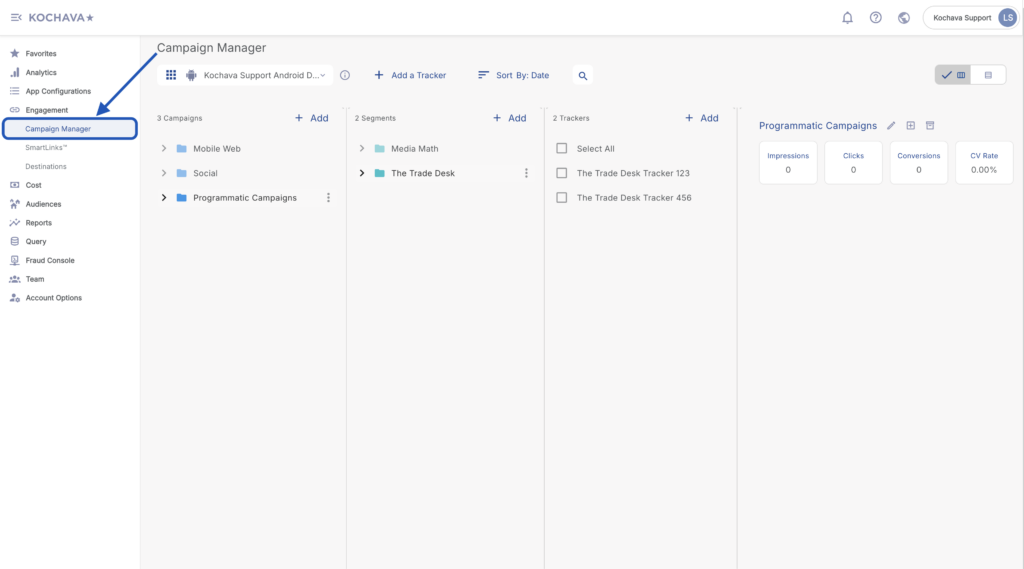
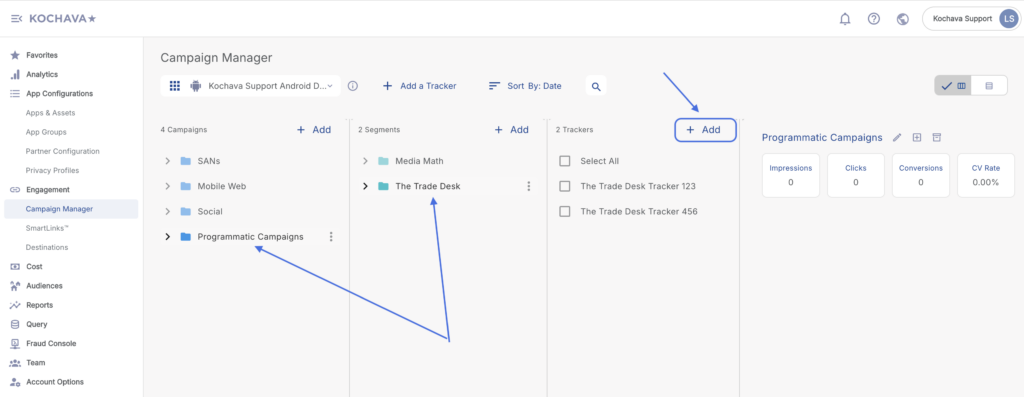
- Click + Add (Tracker) or Select Segment Tools (⋮) > Add Tracker.
- Enter Tracker Name.
- Select the desired Media Partner.
- Enter Destination URL
- Click Save.
Create a Postback
- Select App Configurations > Partner Configuration.
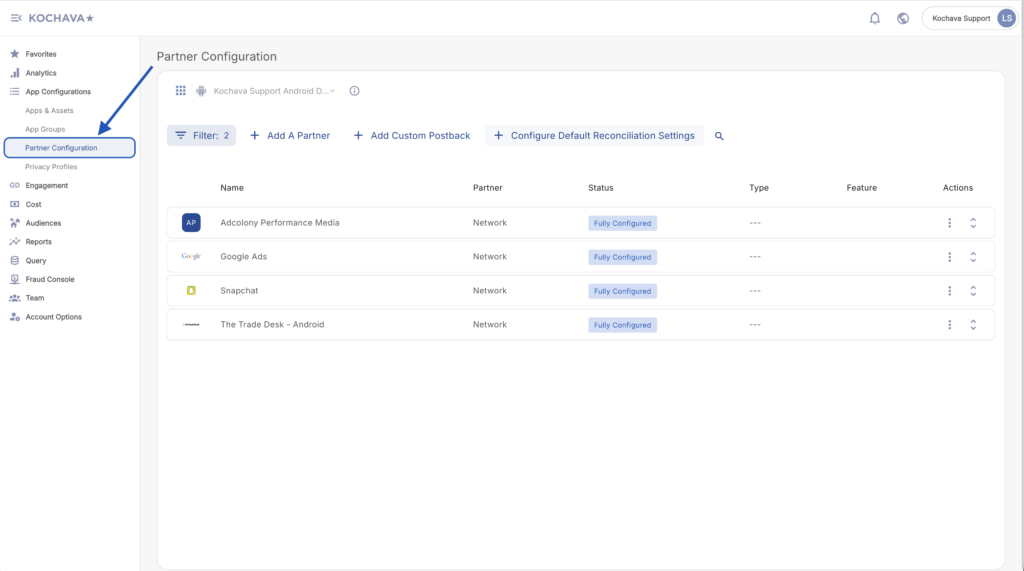
- Click + Add a Partner.
- Select a Media Partner.
- Click Next.
- Verify Status: Active
- Click Save.
- Expand the Media Partner Postbacks.
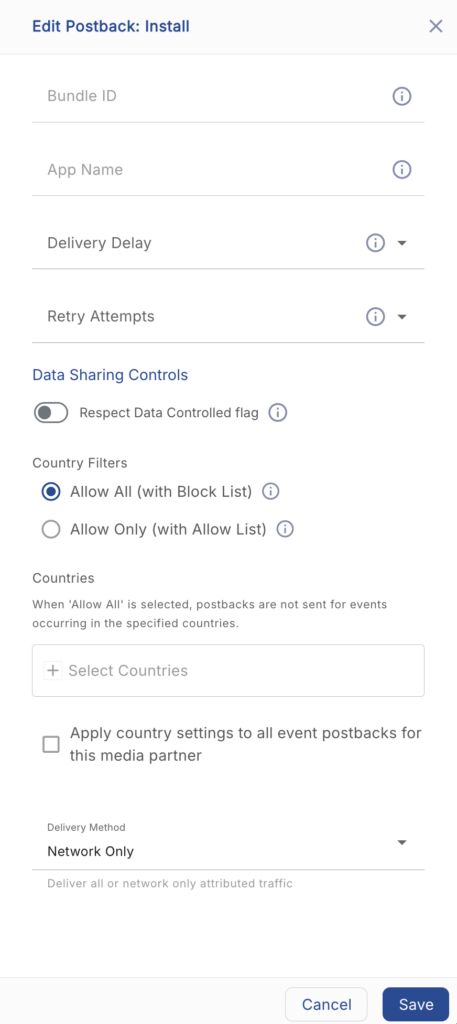
- Select Install > ⚙ (Edit).
- Enter network specific data.
- Click Save.