A reengagement campaign is designed to target existing users to drive them to complete a particular in app action. In a reengagement campaign, clicks and/or impressions are matched with post-install events for attribution. The following document defines the process for creating a reengagement campaign within Kochava. If you are planning on running a re-install reengagement campaign you will want to first make sure you have updated the install reprocessing lookback window, this process is outlined here.
Create a Reengagement Campaign
- Log in to Kochava.
- Select the desired Account and App.
- Select Engagement > Campaign Manager.
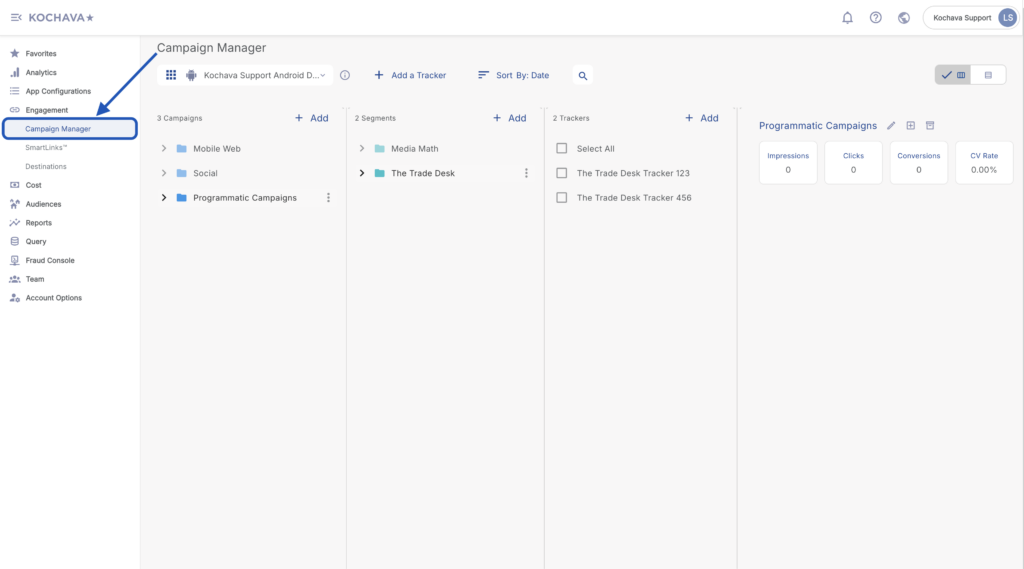
- Select the desired Campaign & Segment, or create new ones.
- Click + Add (Tracker).
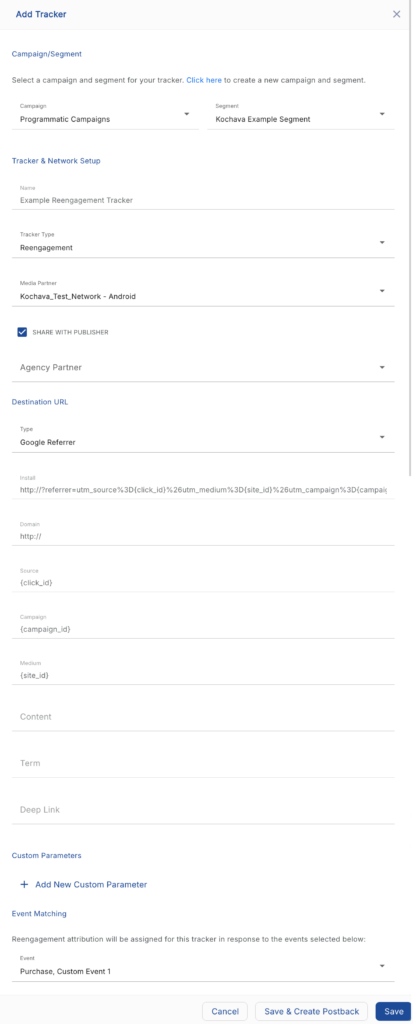
- Enter Tracker Name.
- Select Tracker Type > Reengagement.
- Select a Media Partner.
- Select an Agency Partner. (optional)
- Select the Destination URL Type:
- Custom
- Google Referrer (Android Only)
- Enter an Install URL.
- Enter a Deep Link. (optional)
- Enter a Custom Parameter. (optional)
- Select Event(s) for Reengagement attribution.
- Click Save (If no further trackers need to be created).
- Click Save & Add Another Tracker (If additional trackers need to be created).
- Click Save & Create Postback (To navigate directly to the Partner Configuration page).
Minimum Time to Reengagement
Minimum Time to Reengagement (MTR) settings within Kochava provide the ability to establish specific lookback windows for any post-install event. MTR settings provide the ability to set a window for how long after attribution occurs that a device can then be eligible to be re-attributed for a reengagement campaign. For more information on setting an event lookback window, refer to our Post-Install Event Creation and Configuration support documentation.
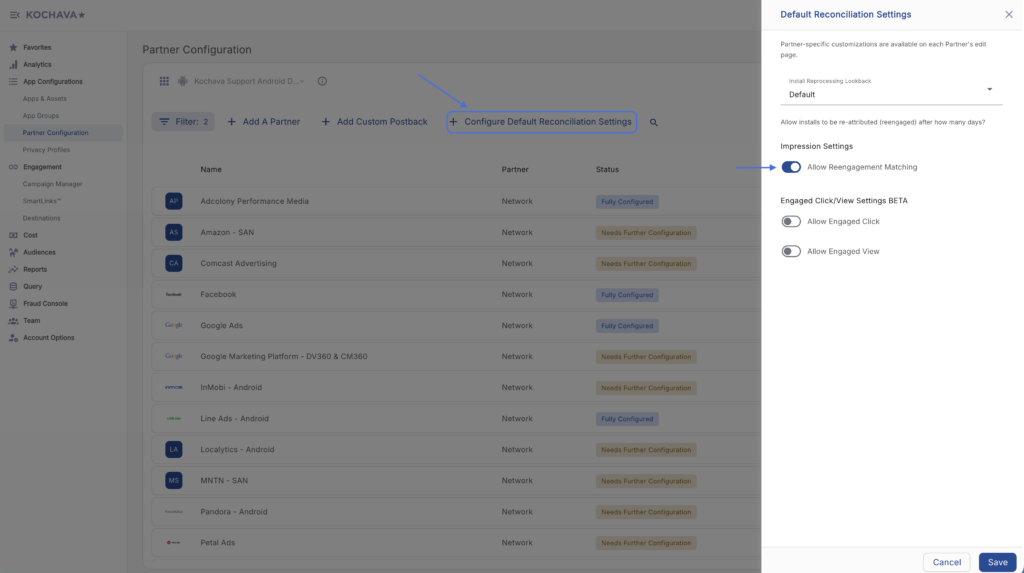
Impression Based Reengagement
Kochava fully supports Impression Based Reengagement which allows impressions to be attributed to specific post-install events that are selected on a reengagement tracker.
In order to ensure that impression based reengagement is enabled for your app, follow the steps below.
- Navigate to App Configurations > Partner Configuration.
- Select + Configure Default Reconciliation Settings.
- Toggle on Allow Reengagement Matching under Impression Settings (on by default)