The following document defines the process for creating a Google Ads (UAC, Display, YouTube, etc.) campaign for iOS and Android.
Data Needed Before Beginning Process:
- Google Ads Account
- Link ID
- Google Customer ID
Create a Link ID within Google Ads
The following procedure provides the steps for creating a Link ID within Google Ads. For further details, contact a Google account representative.
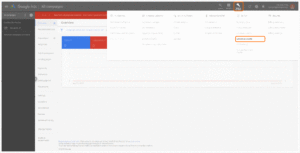
- Log in to Google Ads.
- Click Tools & Settings > Linked accounts.
- Select Third-party app analytics > Details.
- Click Create Link ID for the initial link in the account, or click “+” to add an additional link.
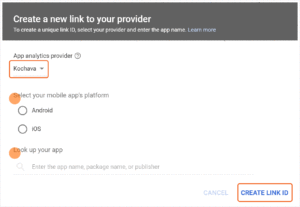
- Select App analytics provider > Kochava.
- Select your mobile app’s platform:
- Android
- iOS
- Locate the desired app.
- Click Create Link ID.
- Copy and Retain the Link ID.

Install Setup Process
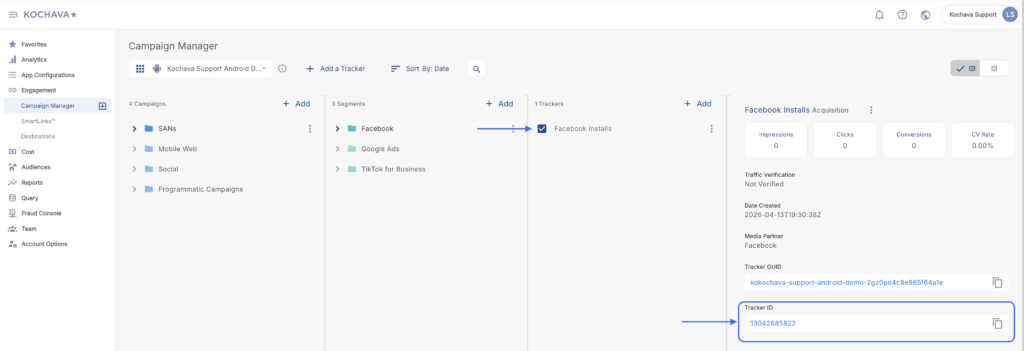
Locate Tracker ID:
- Once a tracker has been created, navigate to Campaign Manager.
- Locate and click on the desired Campaign.
- Select the desired Segment.
- Locate the desired Tracker, and Check the associated selection box.
- Locate and copy the Tracker ID.
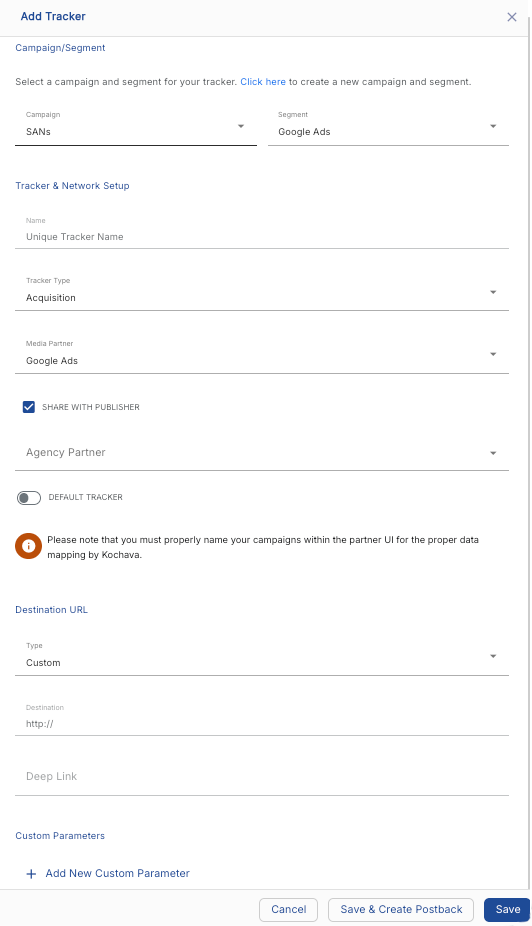
Create an Install Tracker:
- Log in to Kochava.
- Select the desired Account and App.
- Create a new Tracker. For more information about Creating Trackers, click here.
- Enter a unique Tracker Name.
- Select the Tracker Type > Acquisition.
- Select Media Partner > Google Ads.
- Select an Agency Partner. (optional)
- Check Share with Publisher. (optional)
- Select Default Tracker:
- On
- Off (default)
- Select the Destination URL Type>Custom. (default selection)
- Enter a Deep Link. (optional)
- Enter any Custom Parameters. (optional)
- Click Save if no additional trackers need to be created.
- Click Save & Add Another Tracker if additional trackers need to be created.
- Click Save & Create Postback. (To navigate directly to the Partner Configuration page).
Create an Install Postback:
- Select App Configurations > Partner Configuration.
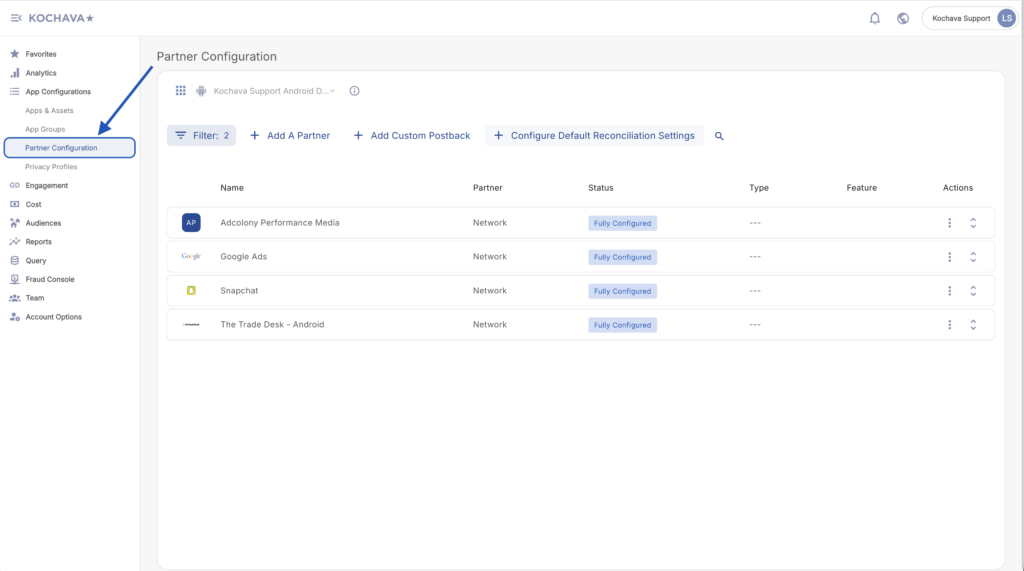
- Click Add a Partner.
- Select Network Partner > Google Ads.
- Click Next.
- Confirm Status: Active and click Save.
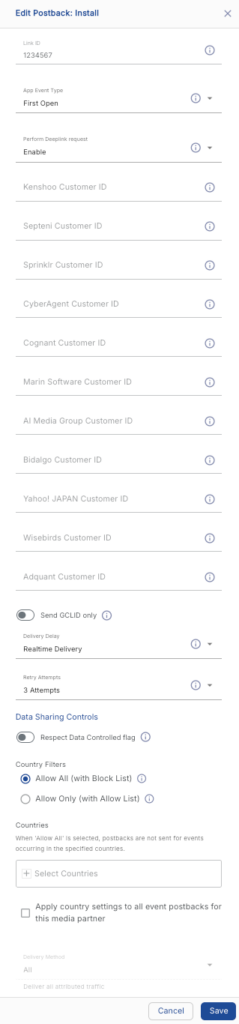
- Expand Google Ads Partner Configuration and select settings on the Install Postback.
- Enter the Link ID. (generated/obtained in the Google UI)
- Select App Event Type > First Open. (default setting)
- Enter the Kenshoo Customer ID. (optional)
- Enter the Septini iOS Customer ID. (optional)
- Enter the Sprinklr Customer ID. (optional)
- Enter the Cyberagent Customer ID. (optional)
- Enter the Cognant Customer ID. (optional)
- Enter the Marin Software Customer ID. (optional)
- Enter the AI Media Group Customer ID. (optional)
- Enter the Bidalgo Customer ID. (optional)
- Enter the Yahoo! Japan Customer ID. (optional)
- Enter the Wisebirds Customer ID. (optional)
- Enter the Adquant Customer ID. (optional)
- Check Send GCLID Only. (optional)
- Select a Delivery Delay.
- Select the number of Retry Attempts.
- Click Save.
Post-Install Event Setup Process
Post-install events sent to Google must be designated with the corresponding Google App Event Type using the drop-down menu within the Partner Configuration UI. Google has eight event types to select:
- Custom
- Session Start
- In_App Purchase
- View Item List
- View Item
- View Search Results
- Add to Cart
- eCommerce Purchase
- Select App Configurations > Partner Configuration.
- Expand Google Ads Postbacks.
- Select + Add Postback.
- Select desired Post-Install Event.
- Enter the Link ID.
- Select the App Event Type.
- If using the Custom Event Type, Enter an Event Name.
- Enter the Kenshoo Customer ID. (optional)
- Enter the Septini iOS Customer ID. (optional)
- Enter the Sprinklr Customer ID. (optional)
- Enter the Cyberagent Customer ID. (optional)
- Enter the Cognant Customer ID. (optional)
- Enter the Marin Software Customer ID. (optional)
- Enter the AI Media Group Customer ID. (optional)
- Enter the Bidalgo Customer ID. (optional)
- Enter the Yahoo! Japan Customer ID. (optional)
- Enter the Wisebirds Customer ID. (optional)
- Enter the Adquant Customer ID. (optional)
- Check Send GCLID Only. (optional)
- Select a Delivery Delay.
- Select the number of Retry Attempts.
- Select the Delivery Method.
- Click Save.
Implementing Integrated Conversion Measurement
Integrated Conversion Measurement (ICM) provides more real-time, comprehensive, and accurate attribution for Google App campaigns for installs and post install events within third-party AAP interfaces. You gain a clearer picture of how your campaigns drive conversions across iOS and Android devices, unlocking actionable insights to more effectively optimize campaign performance and allocate ad dollars.
If you are interested in adopting ICM for your campaigns, here’s what you need to know.
Implementing ICM for Google Ads:
Android —
The following settings can be selected, modified or disabled for modeled attribution.
Enabling Modeled Attribution
- Select the desired Impression Reconciliation > Modeled Lookback timeframe.
- Select the desired Click Reconciliation > Modeled Lookback timeframe.
- Click Save.
Disabling Modeled Attribution
- Select Impression Reconciliation > Modeled Lookback > Disabled.
- Select Click Reconciliation > Modeled Lookback > Disabled.
- Click Save.
iOS —
The following settings can be selected, modified or disabled for modeled attribution.
- Update your Kochava iOS SDK to v9.1 or above and include the optional KochavaGoogleODM module
- Enable on-device conversion measurement using event data by updating to the latest version of the Google Analytics for Firebase SDK (min v11.14.0).
Enabling Modeled Attribution
- Select the desired Impression Reconciliation > Modeled Lookback timeframe.
- Select the desired Click Reconciliation > Modeled Lookback timeframe.
- Select Additional Settings > Modeled Attribution > Enabled.
- Click Save.
Disabling Modeled Attribution
- Select Impression Reconciliation > Modeled Lookback > Disabled.
- Select Click Reconciliation > Modeled Lookback > Disabled.
- Select Additional Settings > Modeled Attribution > Standard.
- Click Save.
SKAD Credentials
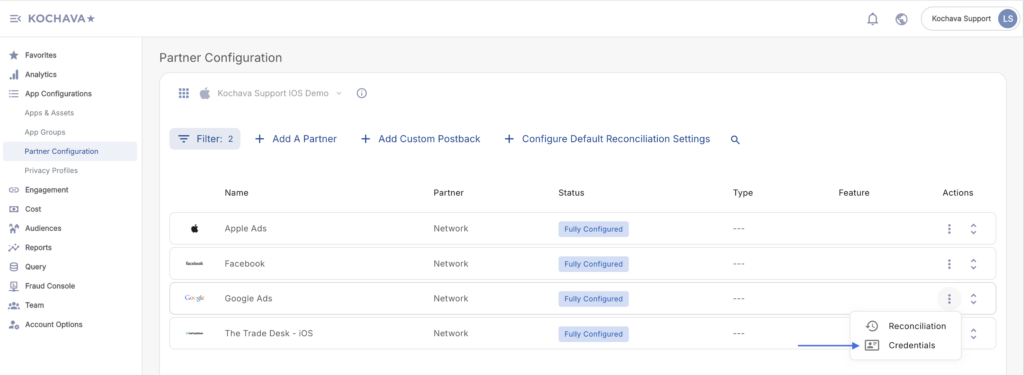
- Select App Configurations > Partner Configuration.
- Locate the Google Ads Partner Configuration.
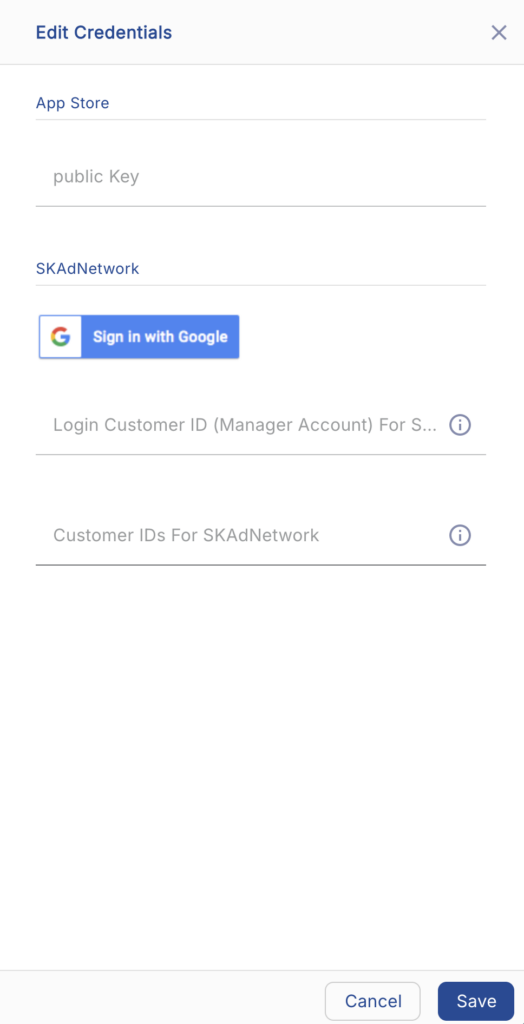
- Select Google Ads > Network Tools (⋮) > Credentials.
- Enter the Login Customer ID(s) (Manager Account) for SKAdNetwork.
- Enter the Customer ID(s) for SKAdNetwork.
- Click Save.
SKAd Conversion Model Upload
- Add a SKAd Conversion Model.
- Add Install and event postbacks with a valid Google Ads Link ID.
- Add Google Ads SKAd Credentials.
Existing Conversion Models:
Existing conversion models will be uploaded the first time Google SKAd credentials are added as long as an install event postback is in place with a valid Google Ads Link ID.
Updated Conversion Models:
Updated conversion models will be automatically sent for advertisers who have added SKAD credentials and have install or event postbacks in place with a valid Google Ads Link ID.
Import Mapped Conversion Events
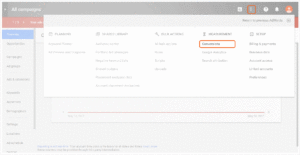
- Click Tools, billing, and setting > Measurement>Conversions.
- Click the plus button.
- Click Conversion Type > App.
- Select Third-party app analytics.
- Click Continue.
- Check the box next to each event to be imported.
- Click Import and continue.
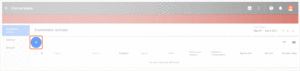
The conversion events will now be present in the Conversion actions table. Event details may be viewed by click on the name of the event.
References
| Related Documentation | Link a 3rd party App Analytics Platform with Ads
If you use a third-party app analytics provider to track and measure your mobile app conversions, you can import data from your third-party app analytics platform by linking it to your Ads account.
Track App Conversions with 3rd Party App Analytics If you use a third-party app analytics provider to track and measure your mobile app conversions then, you can import app conversion data from your provider. |