Install campaigns allow marketers to create click and impression tracking URLs. The URLs that are created are what allow Kochava to perform attribution on a given network that is running media on your behalf. After the campaign has been created, the tracking URLs need to be provided to the network to traffic.
Creating an Install Campaign
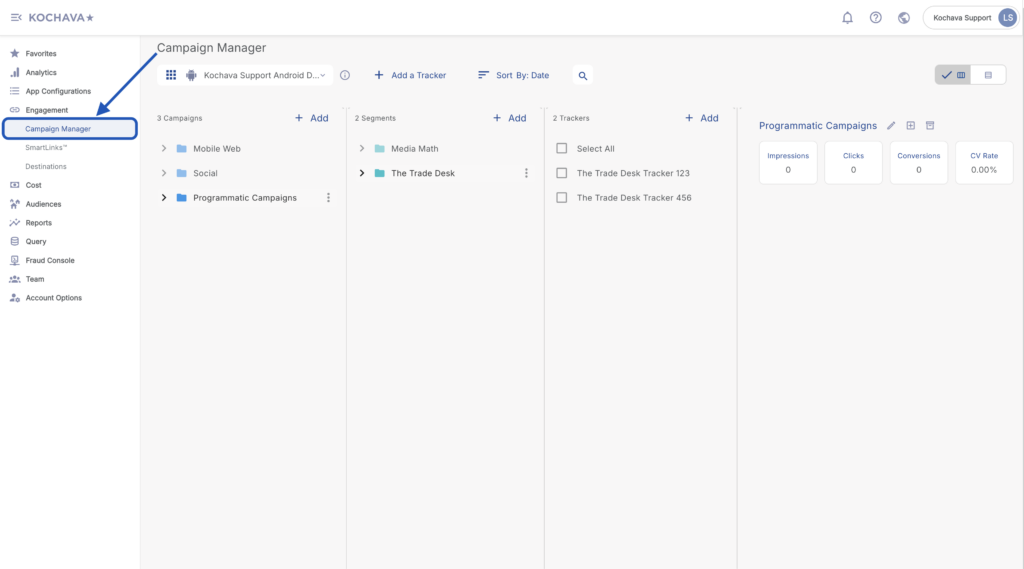
- Log in to Kochava.
- Select the desired Account and App.
- Select Engagement > Campaign Manager.
Creating a Campaign:
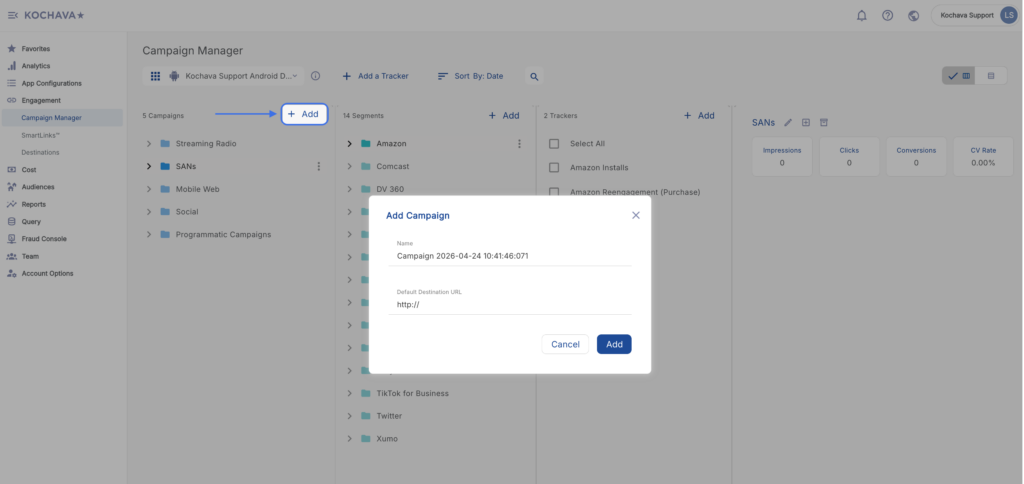
- Click + Add (Campaigns).
- Enter a Campaign Name.
- Enter the Default Destination URL.
- Click Add.
Create a Segment:
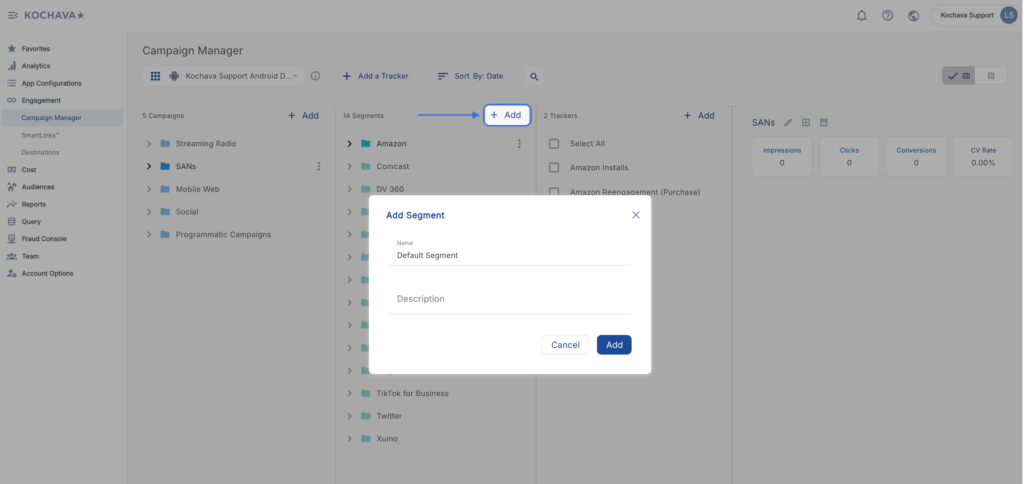
- Select the desired Campaign.
- Click + Add (Segment).
- Enter a Segment Name.
- Enter a Segment Description. (optional)
Create a Tracker:
- Select the desired Campaign & Segment.
- Click + Add (Tracker).

- Enter a Tracker Name.
- Select Tracker Type > Acquisition.
- Select a Media Partner.
- Select an Agency Partner. (optional)
- Select the Destination URL Type:
- Custom
- Google Referrer (Android Only)
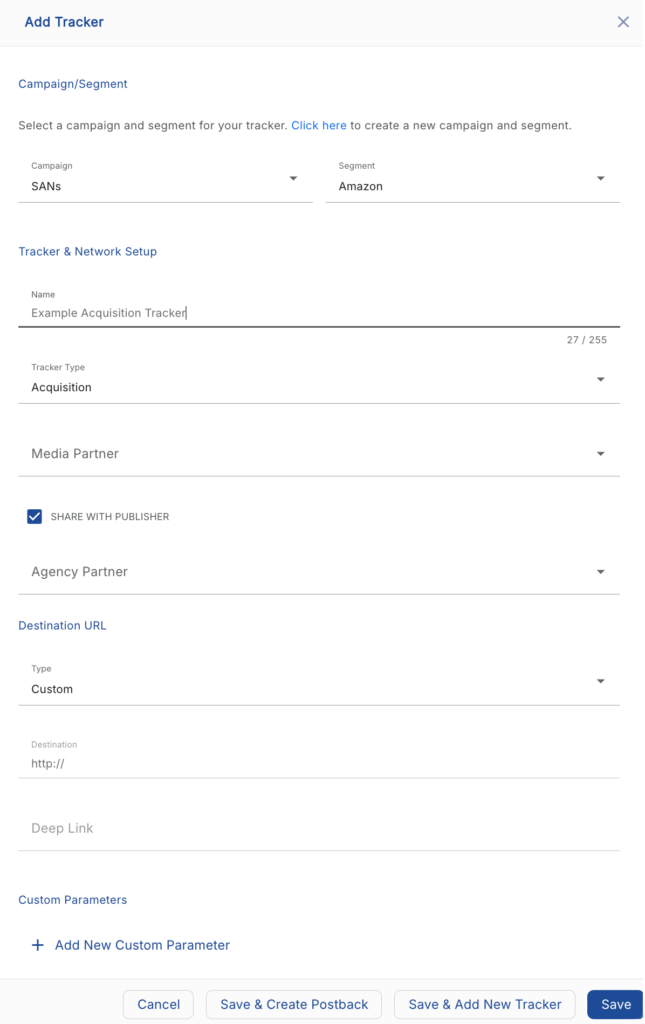
- Enter the Install Destination URL.
- Enter a Deep Link. (optional)
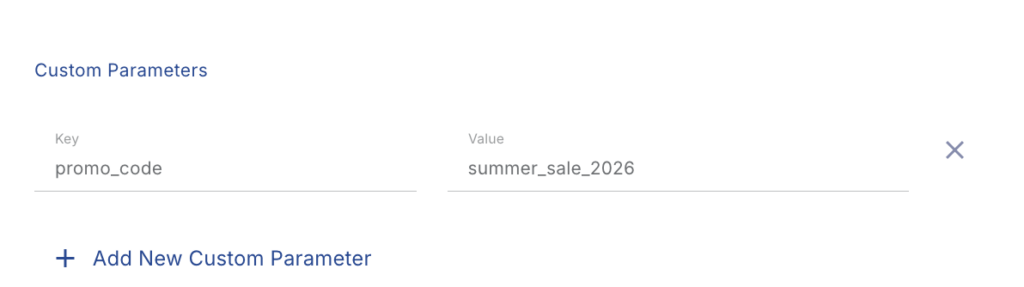
- Add a Custom Parameter. (optional)
- Click + Add New Custom Parameter.
- Enter the Key & Value.
- Add additional Custom Parameters. (optional)
- Click Save (If no further Trackers need to be created).
- Click Save & Add Another Tracker (if additional trackers need to be created).
- Click Save & Create Postback (if a Postback needs to be created for the Media Partner).
- Locate the desired Tracker and select it by checking the associated box.
- If available, Copy and Send Click URL to publisher. (Traditional Networks)
- If available, Copy and Send Impression URL to publisher. (Traditional Networks)
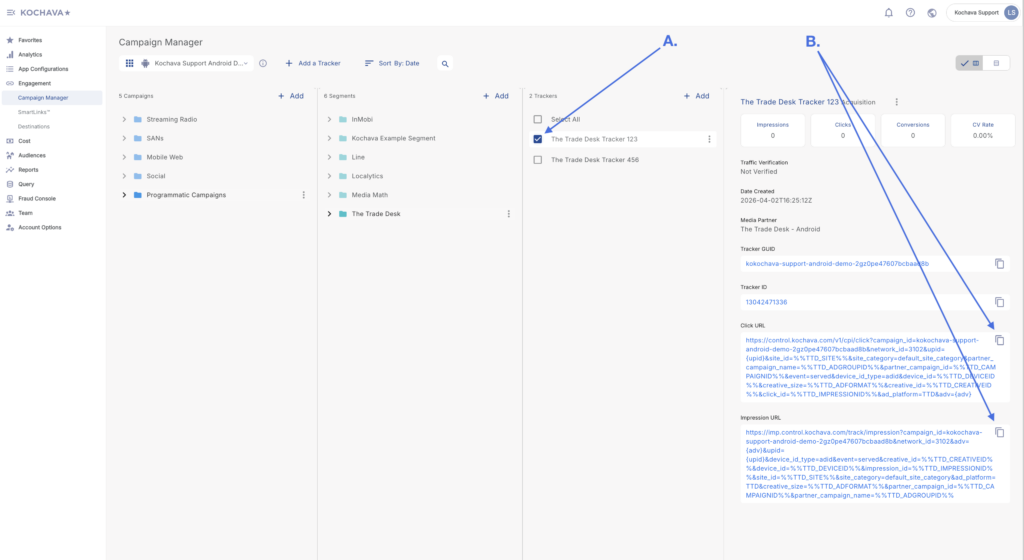
A. Select the desired Tracker
B. Copy and send to Publisher
Bulk Editor and Tracker Export
The bulk editor tool provides the ability to select multiple trackers, either in the same campaign or over multiple campaigns in order to edit fields across all of the selected trackers.
The tracker export tool provides the ability to select a single tracker or multiple trackers and export tracker information into a CVS file.
Bulk Editor
Within the List view of the Campaign Manager:
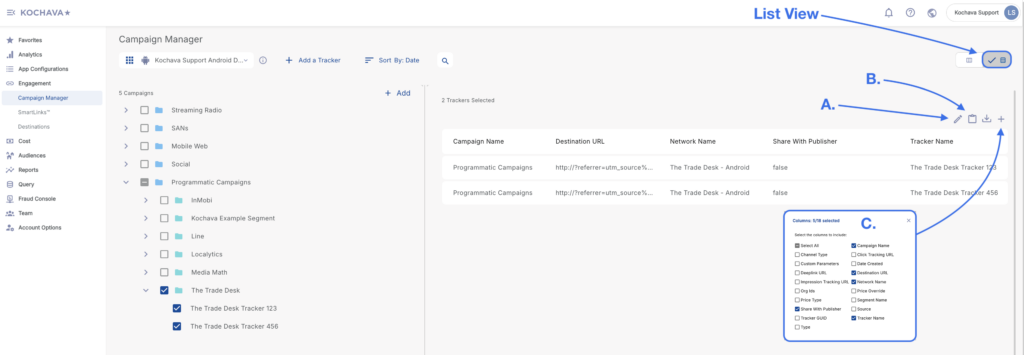
A. Edit Trackers
B. Paste Tracker Settings
C. Edit Visible Columns
- Locate the desired Campaigns and Trackers.
- Select the desired Trackers.
- Choose one of the following actions:
- Edit — Provides the ability to update:
- The campaign the selected trackers are nested under.
- The Destination URL of the selected trackers.
- The Share with Publisher setting.
- Paste — Provides the ability to paste the settings below from the selected tracker:
- Tracker Override Settings
- Traffic Verification Settings
- Custom Parameters
- Columns Selected — Provides the ability to select which columns to display for the selected trackers.
- Edit — Provides the ability to update:
Options:
- Select All
- Channel Type
- Custom Parameters
- Deeplink URL
- Impression Tracking URL
- Org IDs
- Price Type
- Share with Publisher
- Tracker GUID
- Type
- Campaign Name
- Click Tracking URL
- Date Created
- Destination URL
- Network Name
- Price Override
- Segment Name
- Source
- Tracker Name
Tracker Export
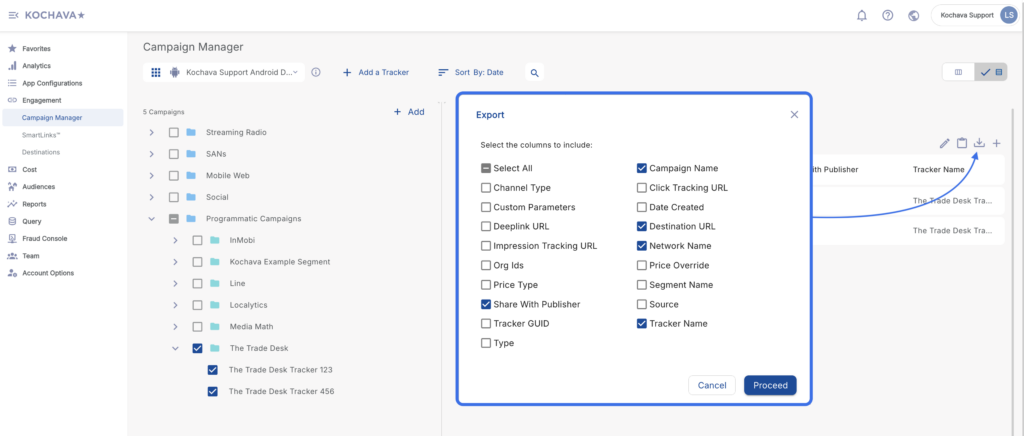
Within the List view of the Campaign Manger:
- Locate the desired Campaign and Trackers.
- Click the Download icon and select from the following columns:
Options:
- Select All
- Channel Type
- Custom Parameters
- Deeplink URL
- Impression Tracking URL
- Org IDs
- Price Type
- Share with Publisher
- Tracker GUID
- Type
- Campaign Name
- Click Tracking URL
- Date Created
- Destination URL
- Network Name
- Price Override
- Segment Name
- Source
- Tracker Name
- Click Proceed.
Create a Postback
If desired, create a postback for the install event. Refer to our Creating Kochava-Certified Postback or Creating a Custom Postback support documents for more information.