This document defines the process for setting up an advertising campaign with ChatGPT Ads in Kochava. ChatGPT Ads is an open integration in Kochava that utilizes click tracking URLs for attribution and server-side postbacks via the OpenAI Conversions API to deliver conversion data back to OpenAI.
Kochava supports ChatGPT Ads across mobile and web environments with three dedicated network partner integrations:
- ChatGPT Ads – iOS
- ChatGPT Ads – Android
- ChatGPT Ads – Web
Data Needed Before Beginning Process
Before creating trackers and postbacks in Kochava, gather the following credentials from your OpenAI Ads Manager account:
- Pixel ID (retrieved in Step 1 below)
- Conversions API Key (generated in Step 2 below)
Step 1: Retrieve Your Pixel ID
- Sign in to OpenAI Ads Manager.
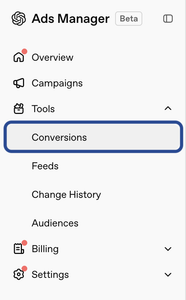
- Navigate to the Conversions tab.
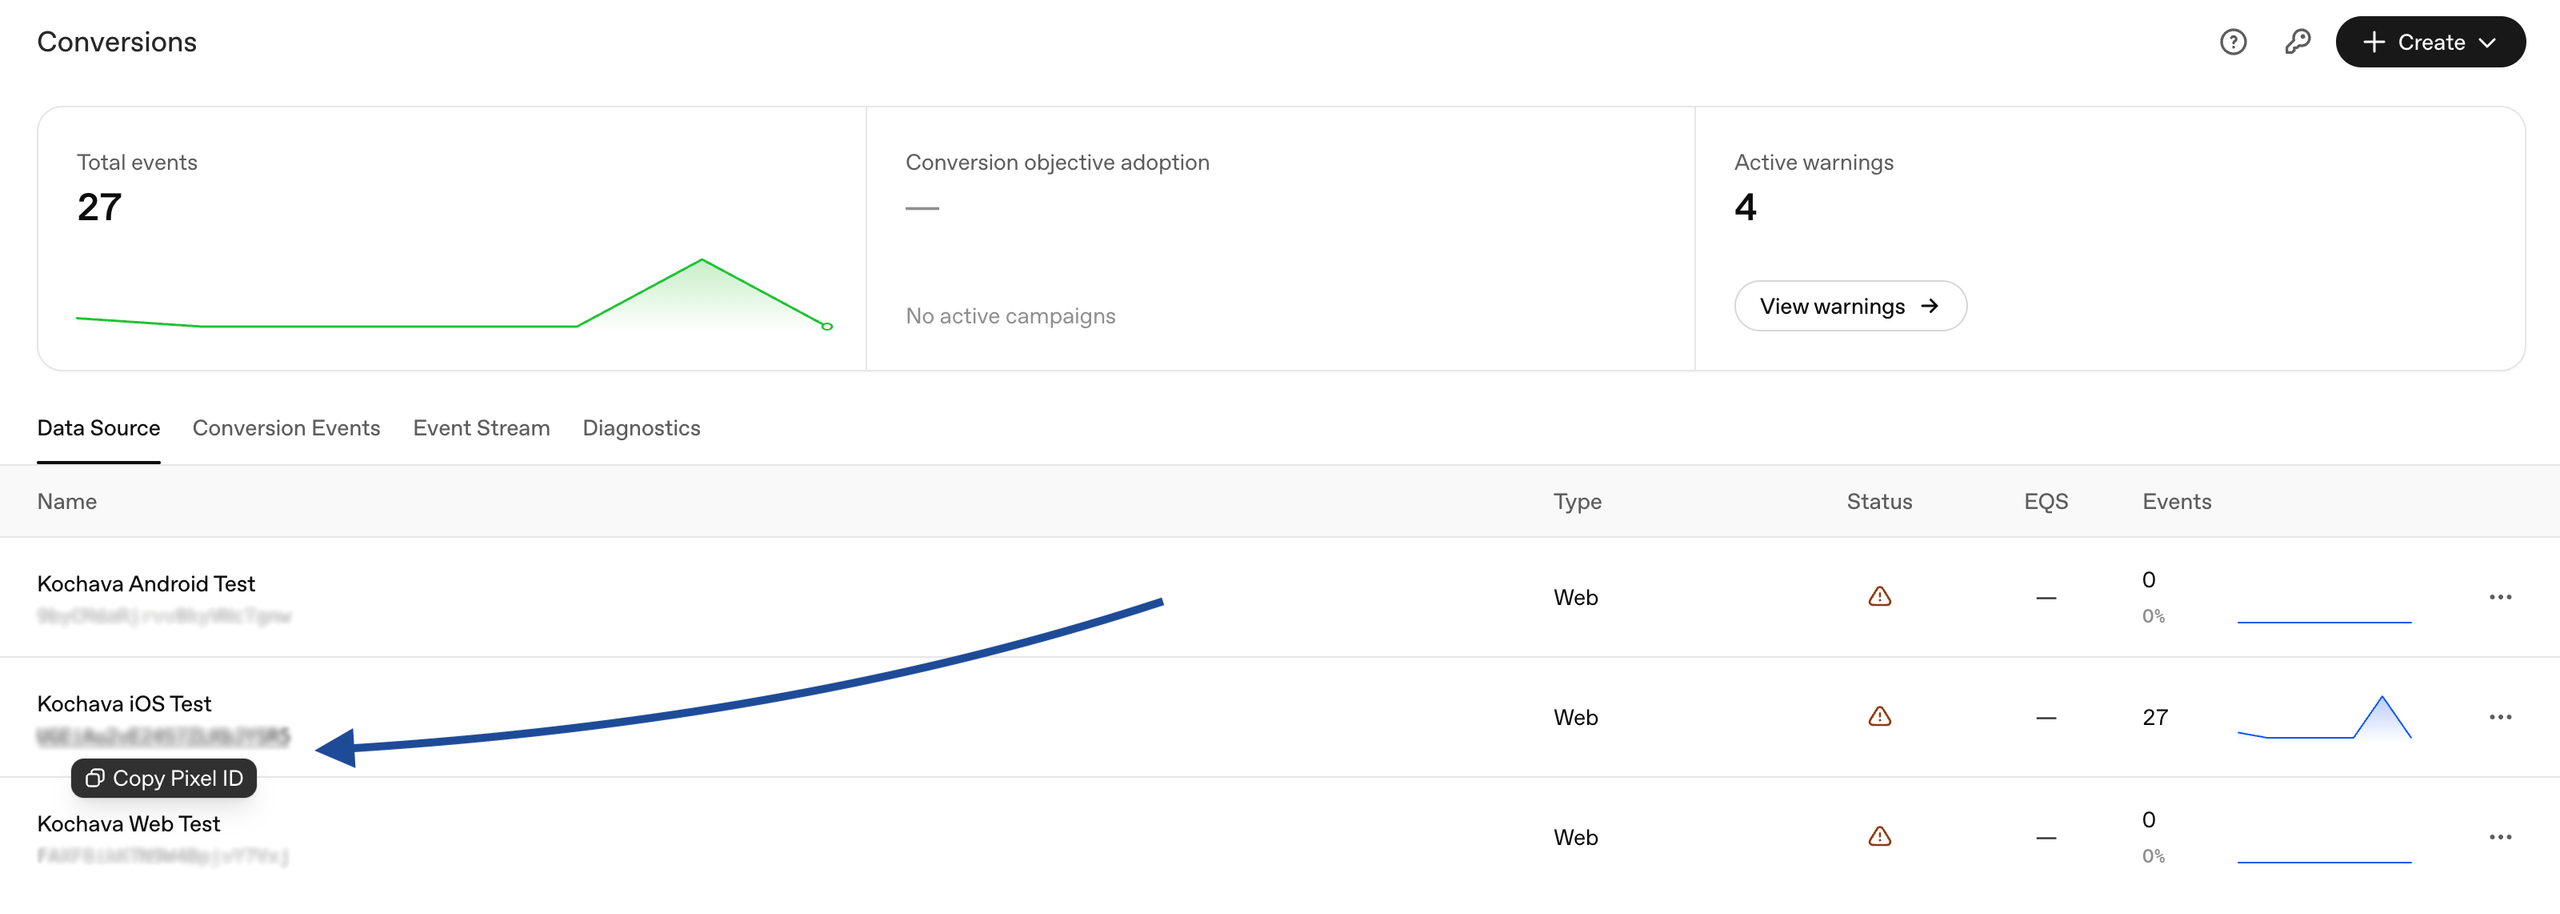
- Select an existing data source (or select Create Data Source if one has not yet been established).

- Copy the Pixel ID associated with the data source.
Step 2: Generate a Conversions API Key
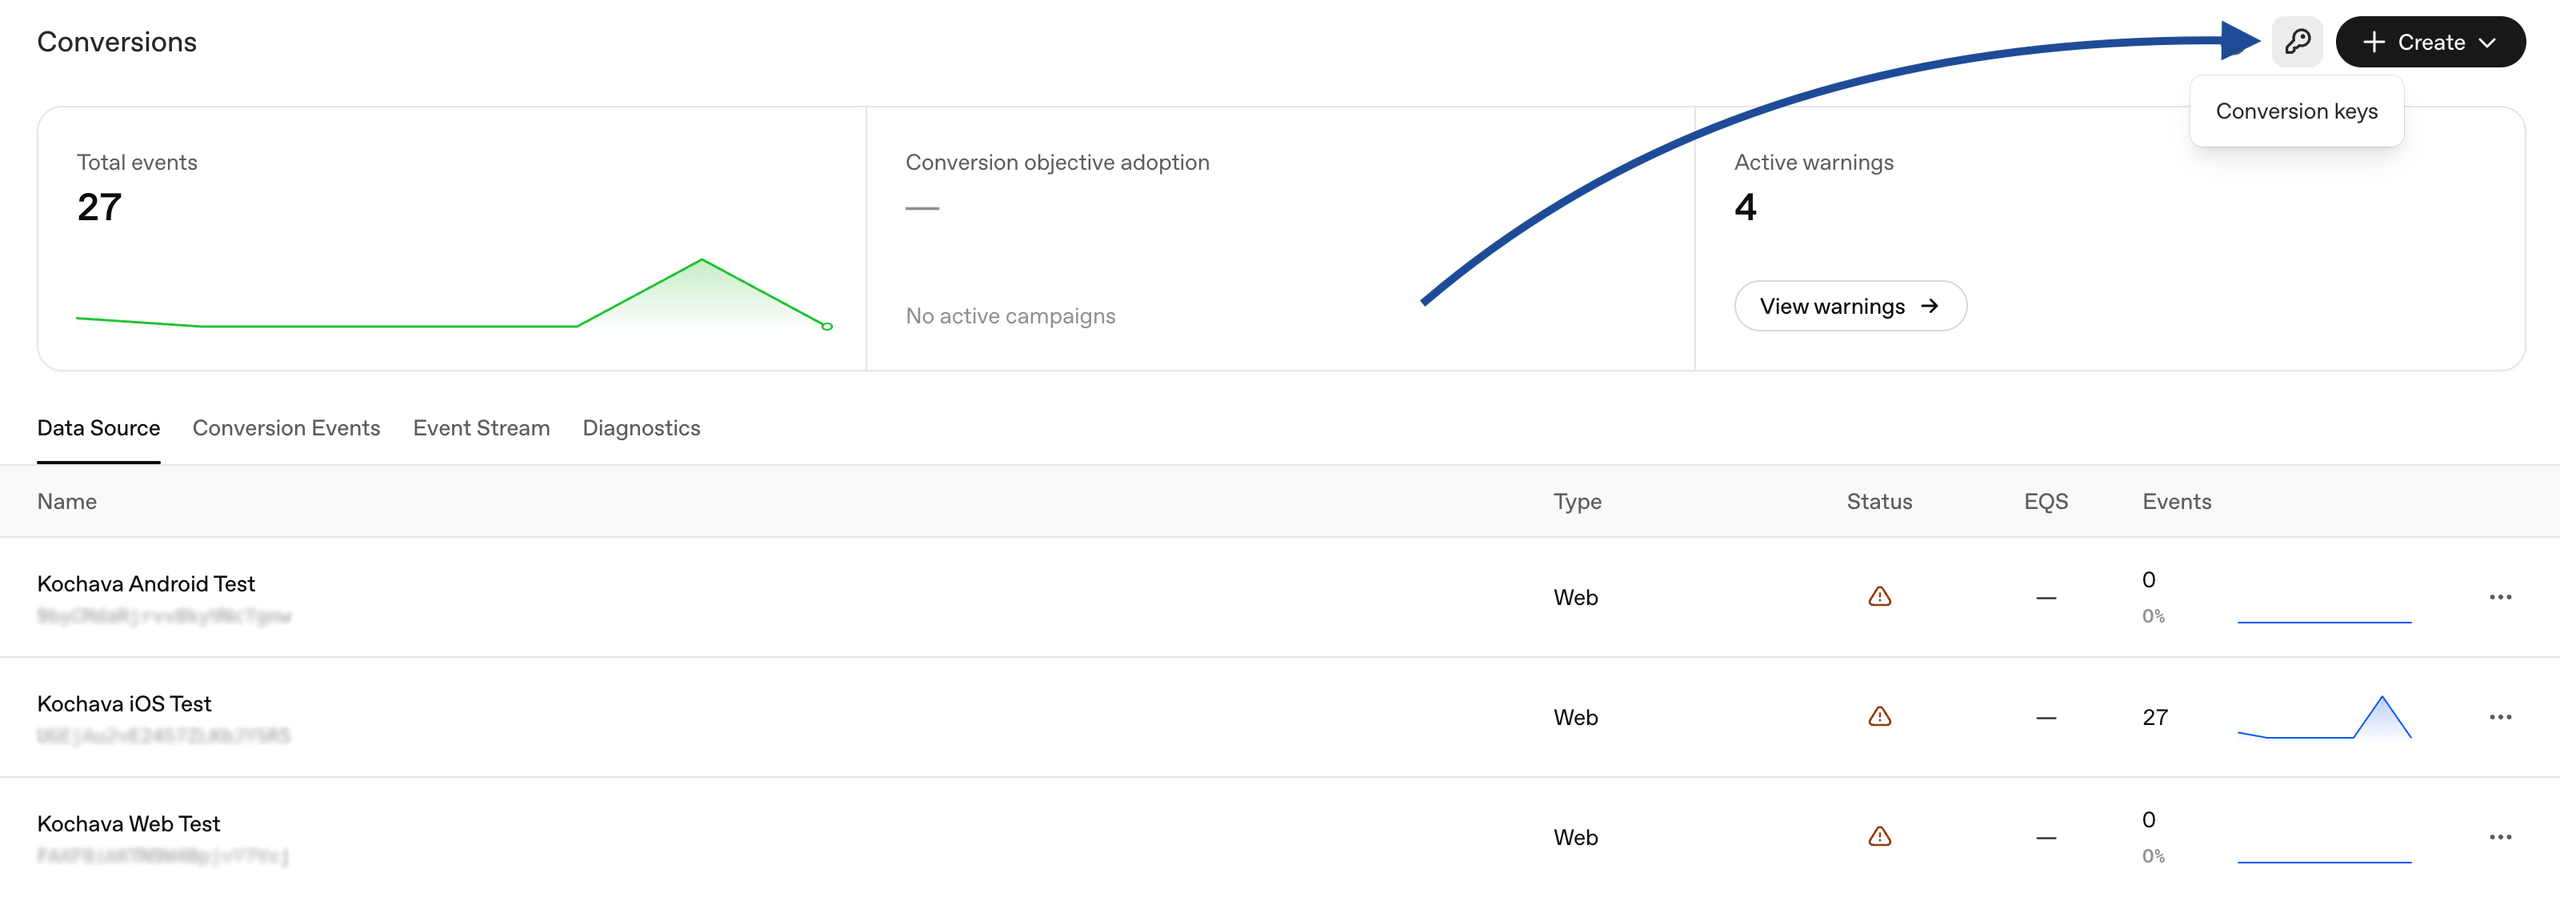
- Within the Conversions tab of OpenAI Ads Manager, select the Conversion Keys dropdown (or select Generate API Key if a key has already been created for the account).
- Copy the generated Conversions API key immediately.
Create a ChatGPT Ads Campaign in Kochava
Kochava organizes campaign management into a three-tiered hierarchy: Campaign > Segment > Tracker. Follow the steps below to establish your campaign and generate tracking URLs.
- Log in to Kochava.
- Select the desired Account and App.
- Select Engagement > Campaign Manager.
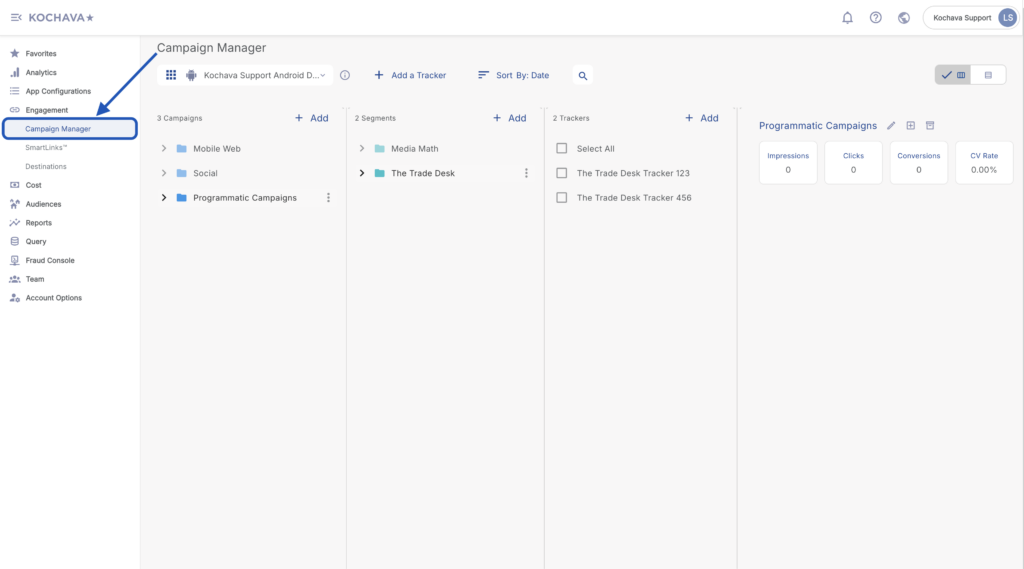
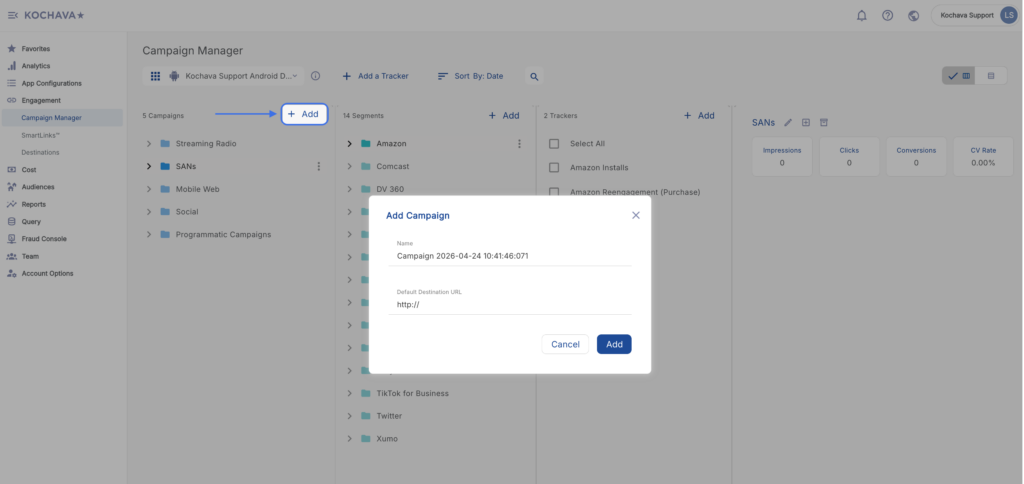
Create a Campaign
- Click + Add (Campaigns).
- Enter a Campaign Name.
- Enter the Default Destination URL.
- Click Add.
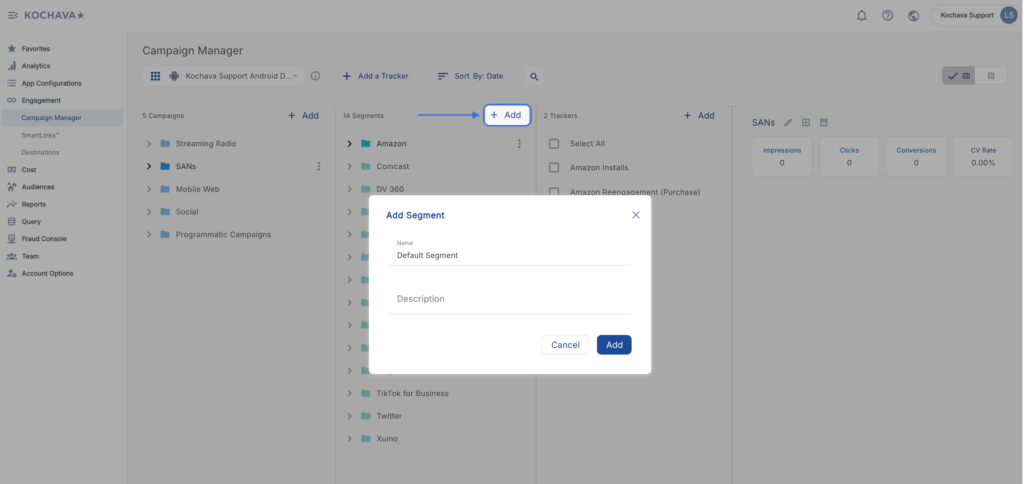
Create a Segment
- Select the desired Campaign.
- Click + Add (Segment).
- Enter a Segment Name.
- Enter a Segment Description. (optional)
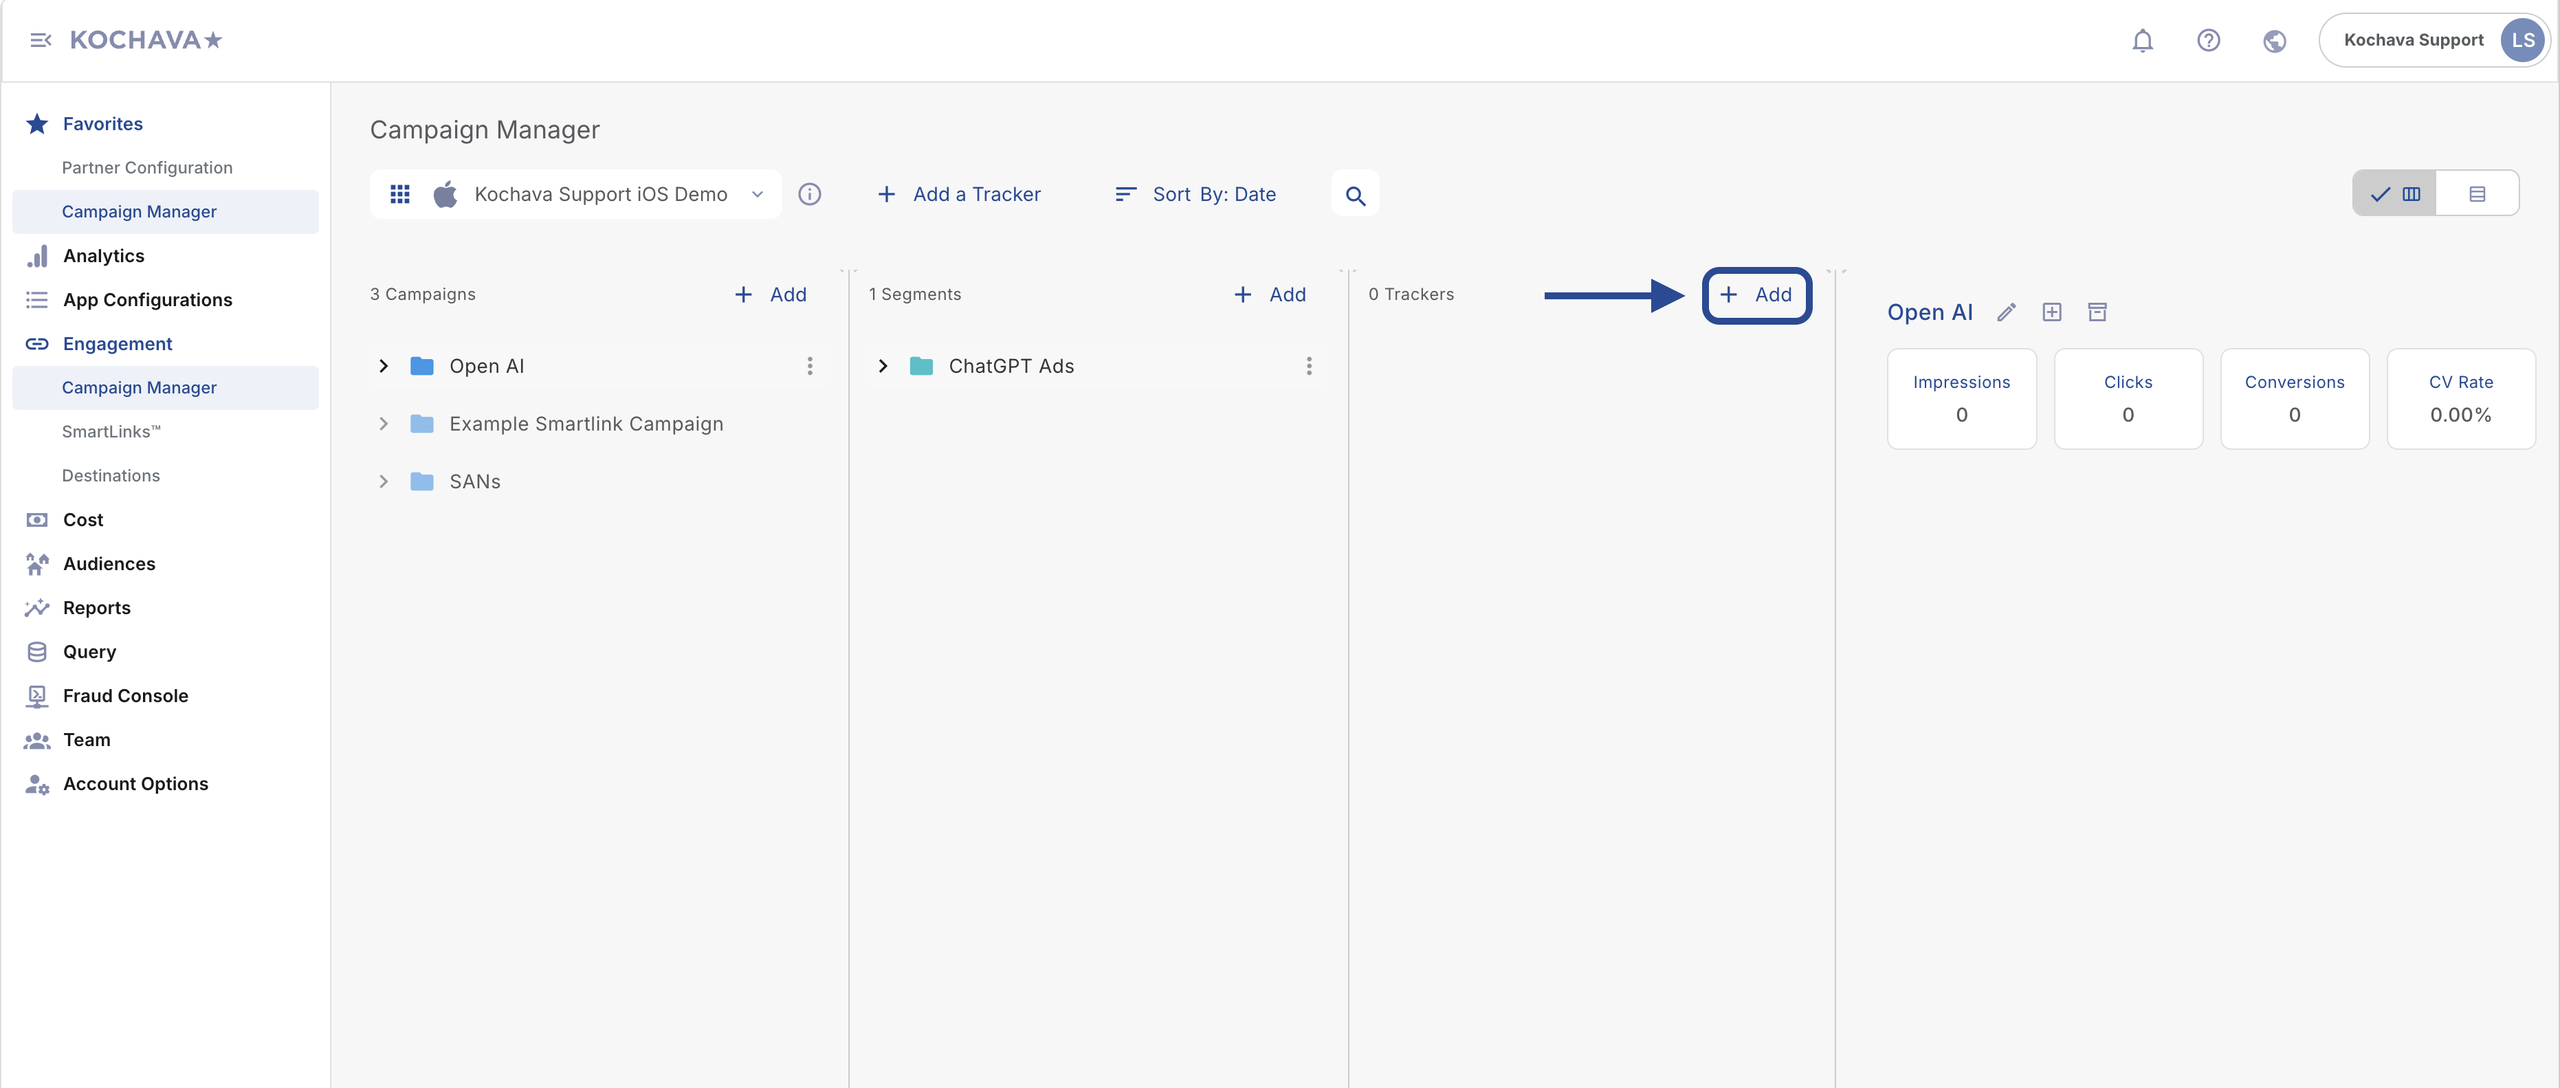
Create a Tracker
- Select the desired Campaign & Segment.
- Click + Add (Tracker).
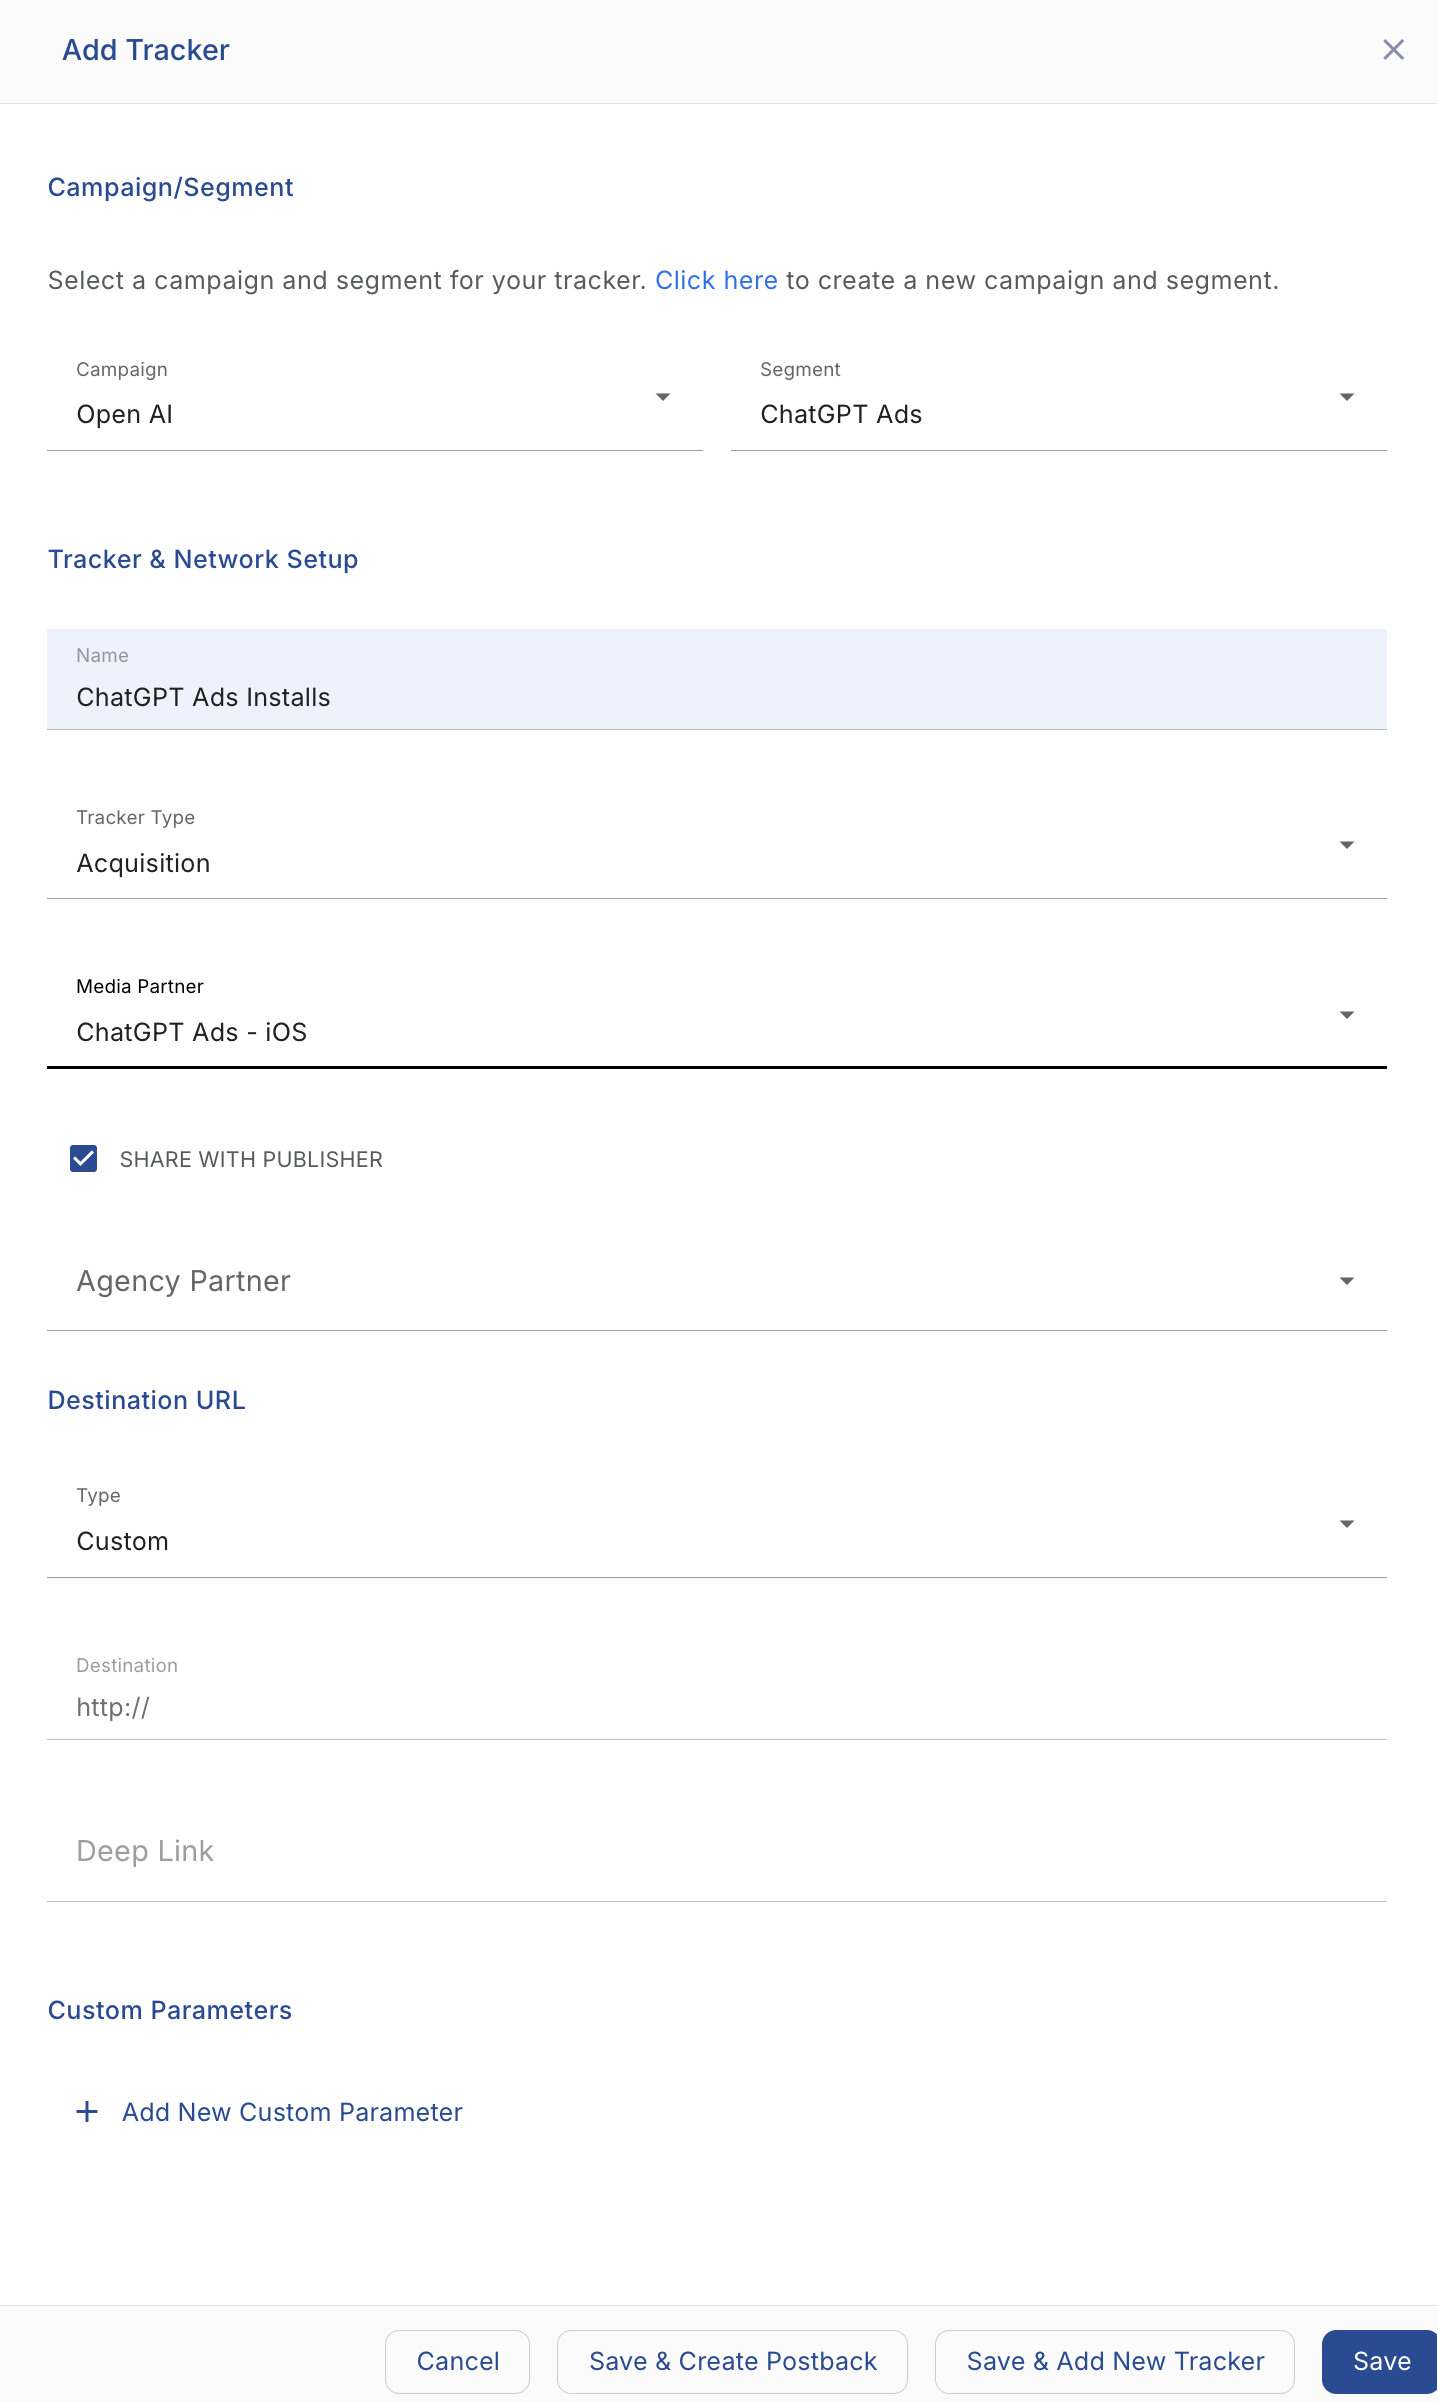
- Enter a Tracker Name.
- Select Tracker Type > Acquisition. (default)
Note: If creating a retargeting or re-engagement campaign, select Reengagement.
- Select the Media Partner matching your target platform:
- ChatGPT Ads – iOS
- ChatGPT Ads – Android
- ChatGPT Ads – Web
- Select an Agency Partner. (optional)
- Select the Destination URL Type:
- Custom (default for iOS and Web)
- Google Referrer (recommended default for Android apps)
- Enter the Install Destination URL.
- Enter a Deep Link URL. (optional)
- Add any desired Custom Parameters. (optional)
- Click Save (or select Save & Create Postback to proceed directly to postback configuration).
Retrieve Tracking URLs
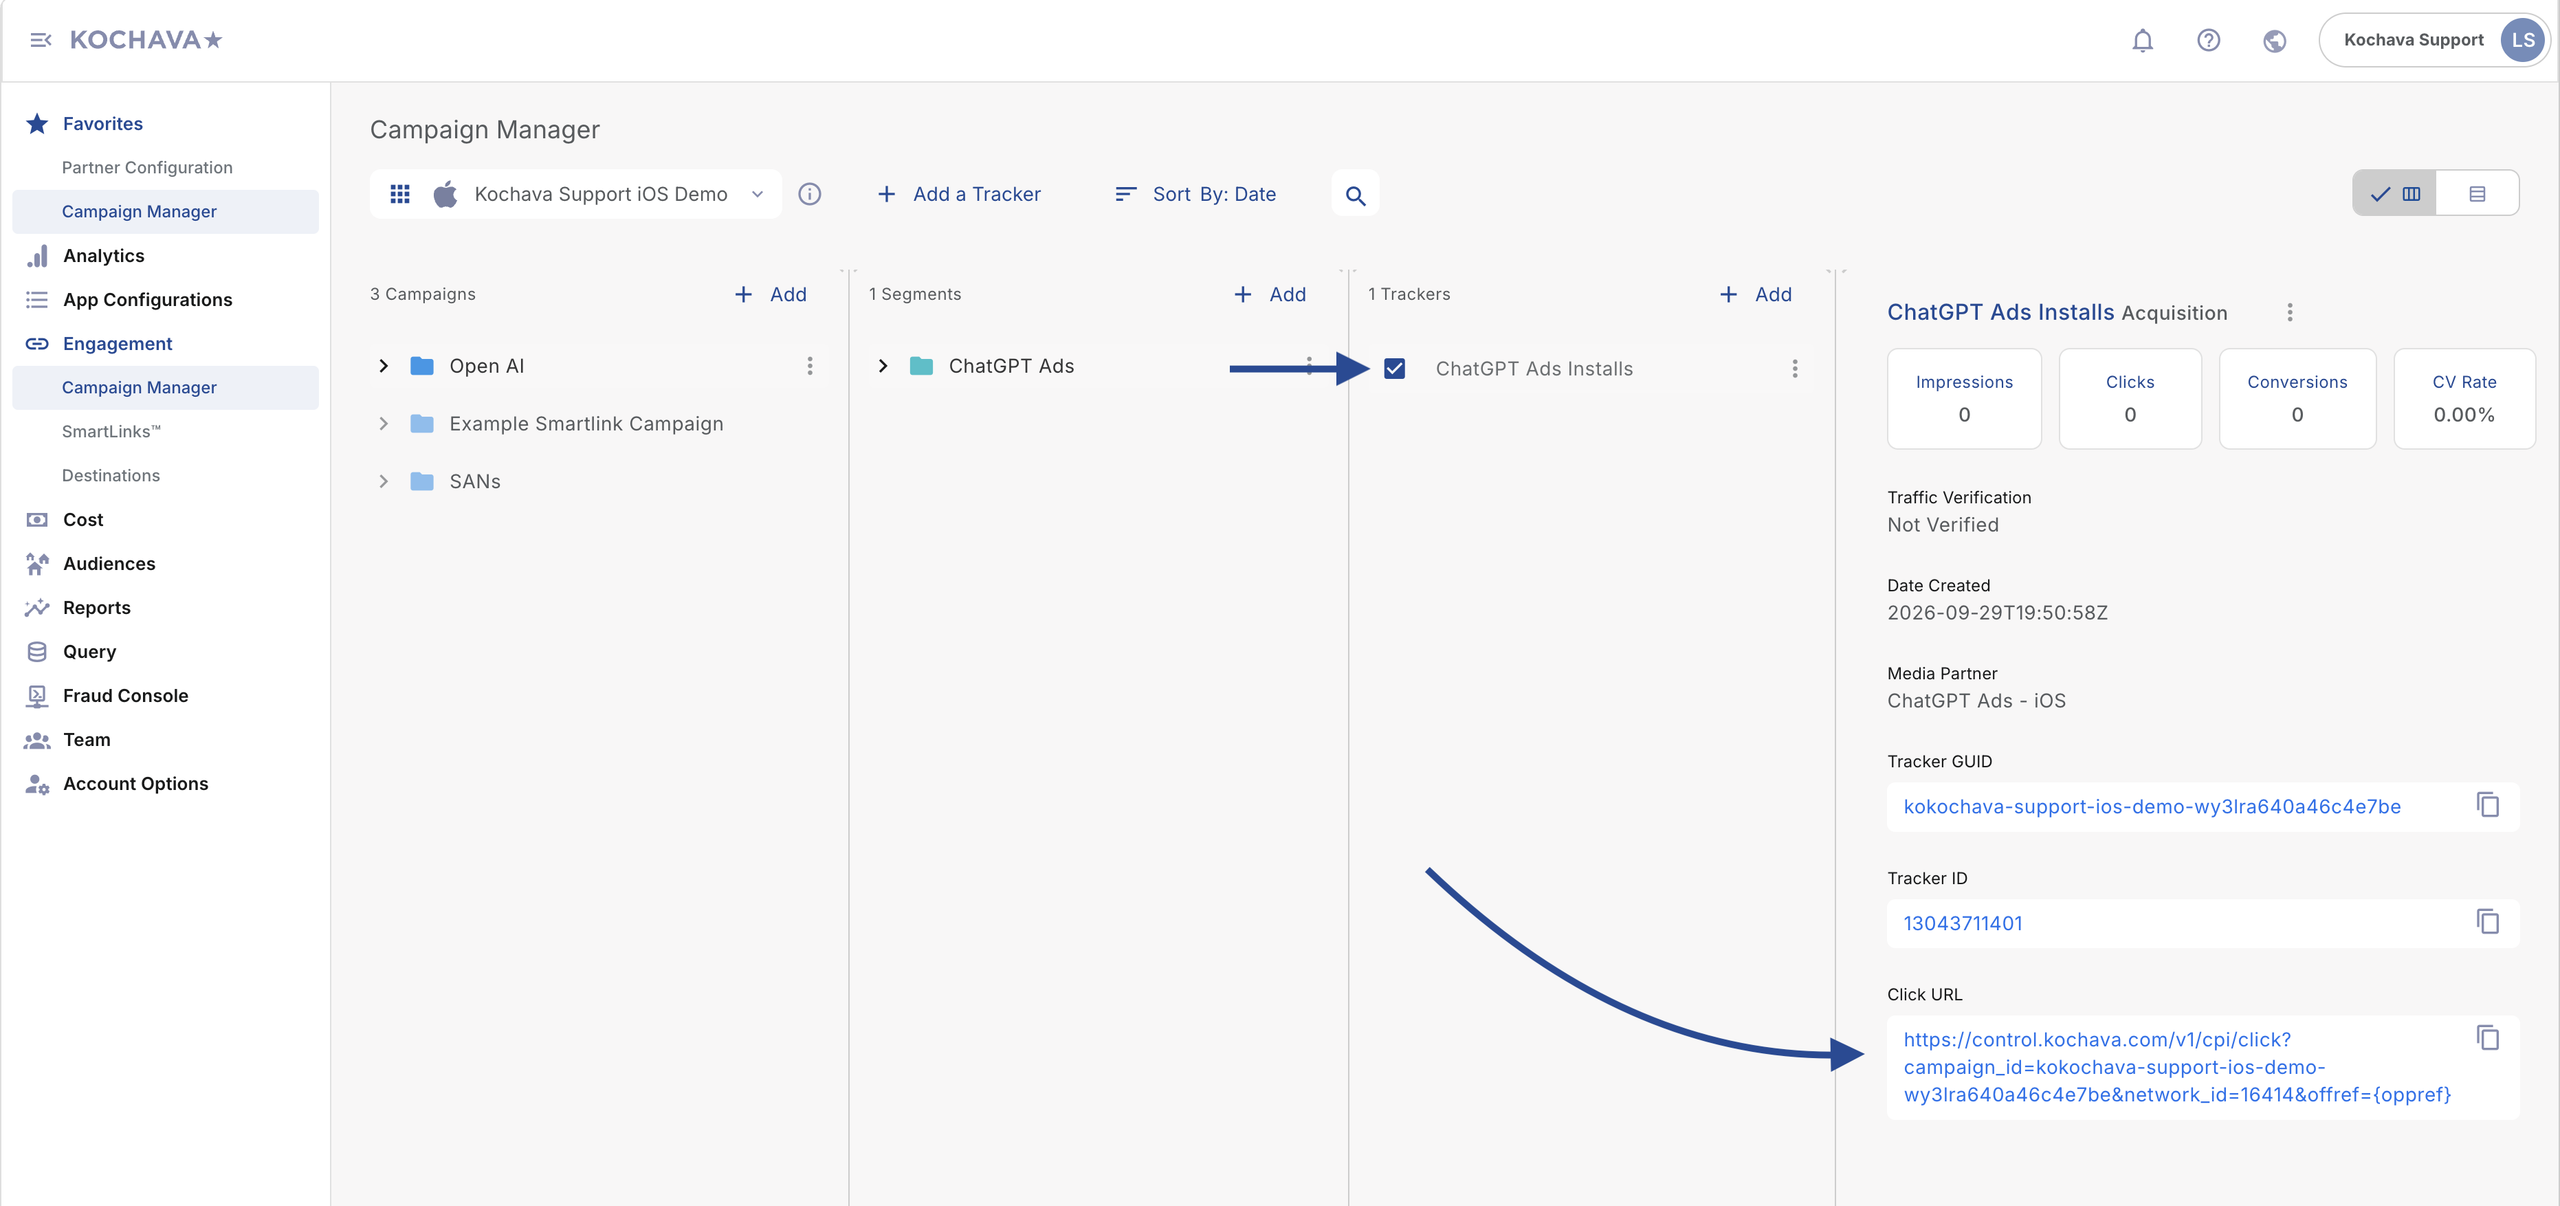
Once the tracker is saved, locate the tracker row in Campaign Manager to access your tracking URLs:
- Locate the tracker and expand its options (or select the checkbox next to the tracker).
- Copy the generated Click URL.
- Provide the copied Click URL to OpenAI Ads Manager when setting up your ad creative destination.
Create a Postback Configuration
Postbacks deliver attributed installs and post-install events from Kochava to OpenAI via the Conversions API. To enable postbacks for ChatGPT Ads, configure the partner integration in Kochava:
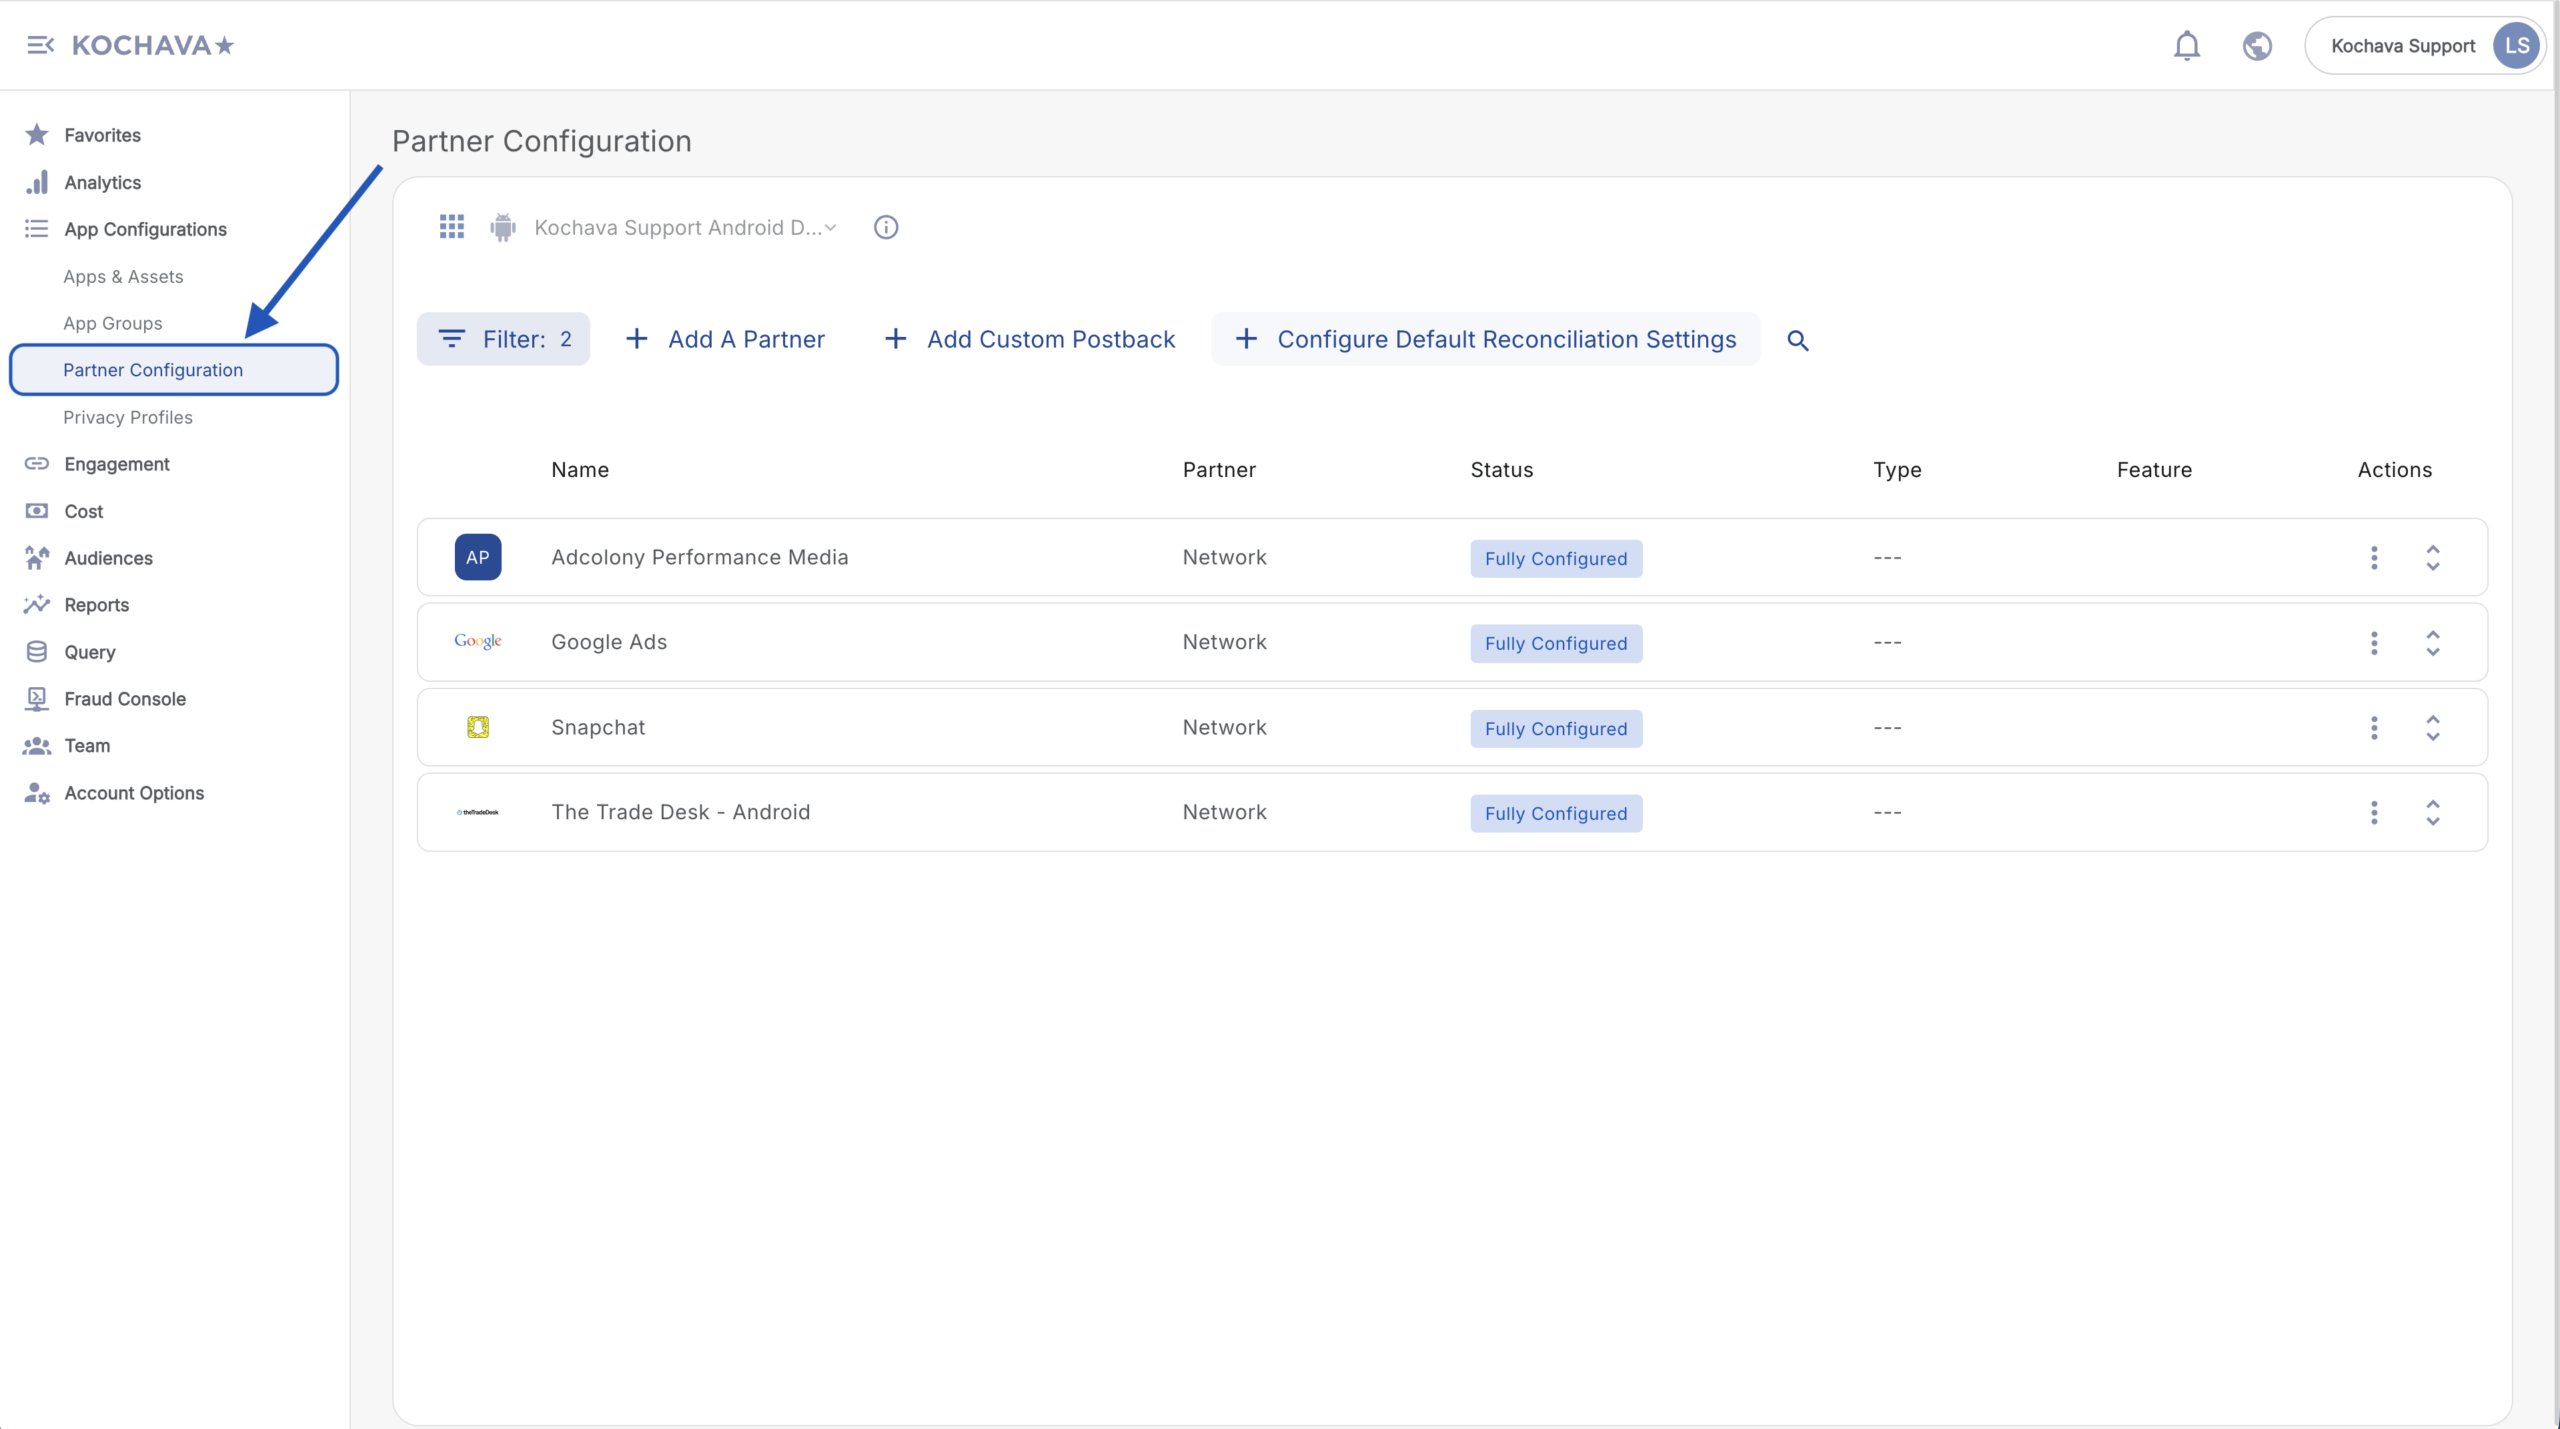
- Navigate to App Configurations > Partner Configuration.
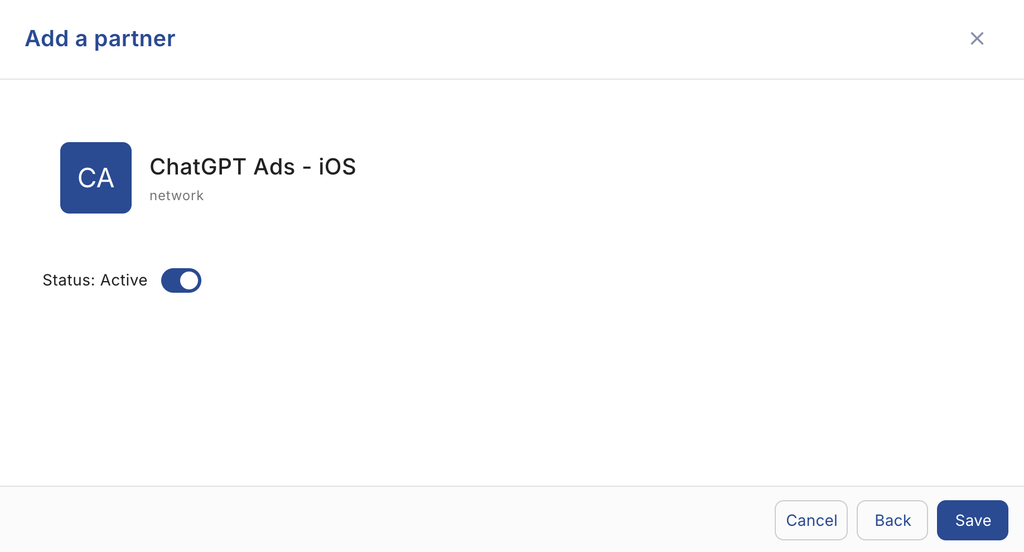
- Click + Add a Partner.
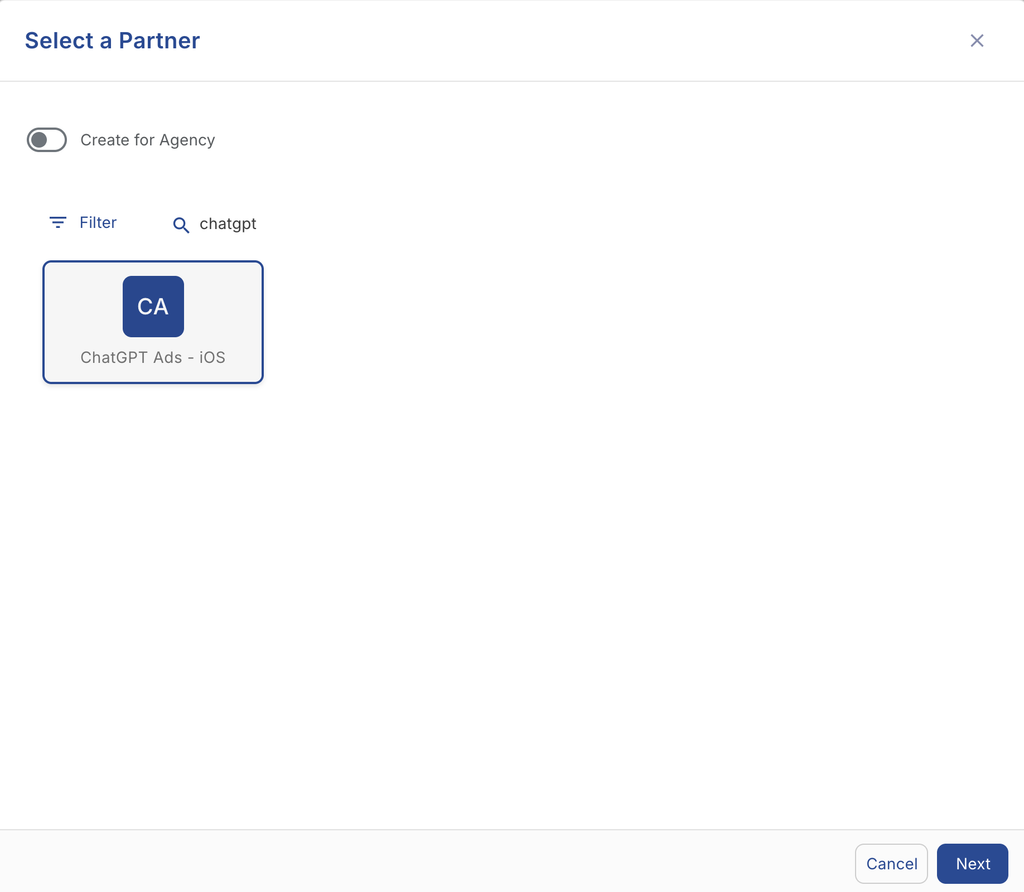
- Select the matching Network Partner:
ChatGPT Ads - iOSChatGPT Ads - AndroidChatGPT Ads - Web
- Click Next.
- Confirm the partner status is set to Active and click Save.
Configure Event Postbacks
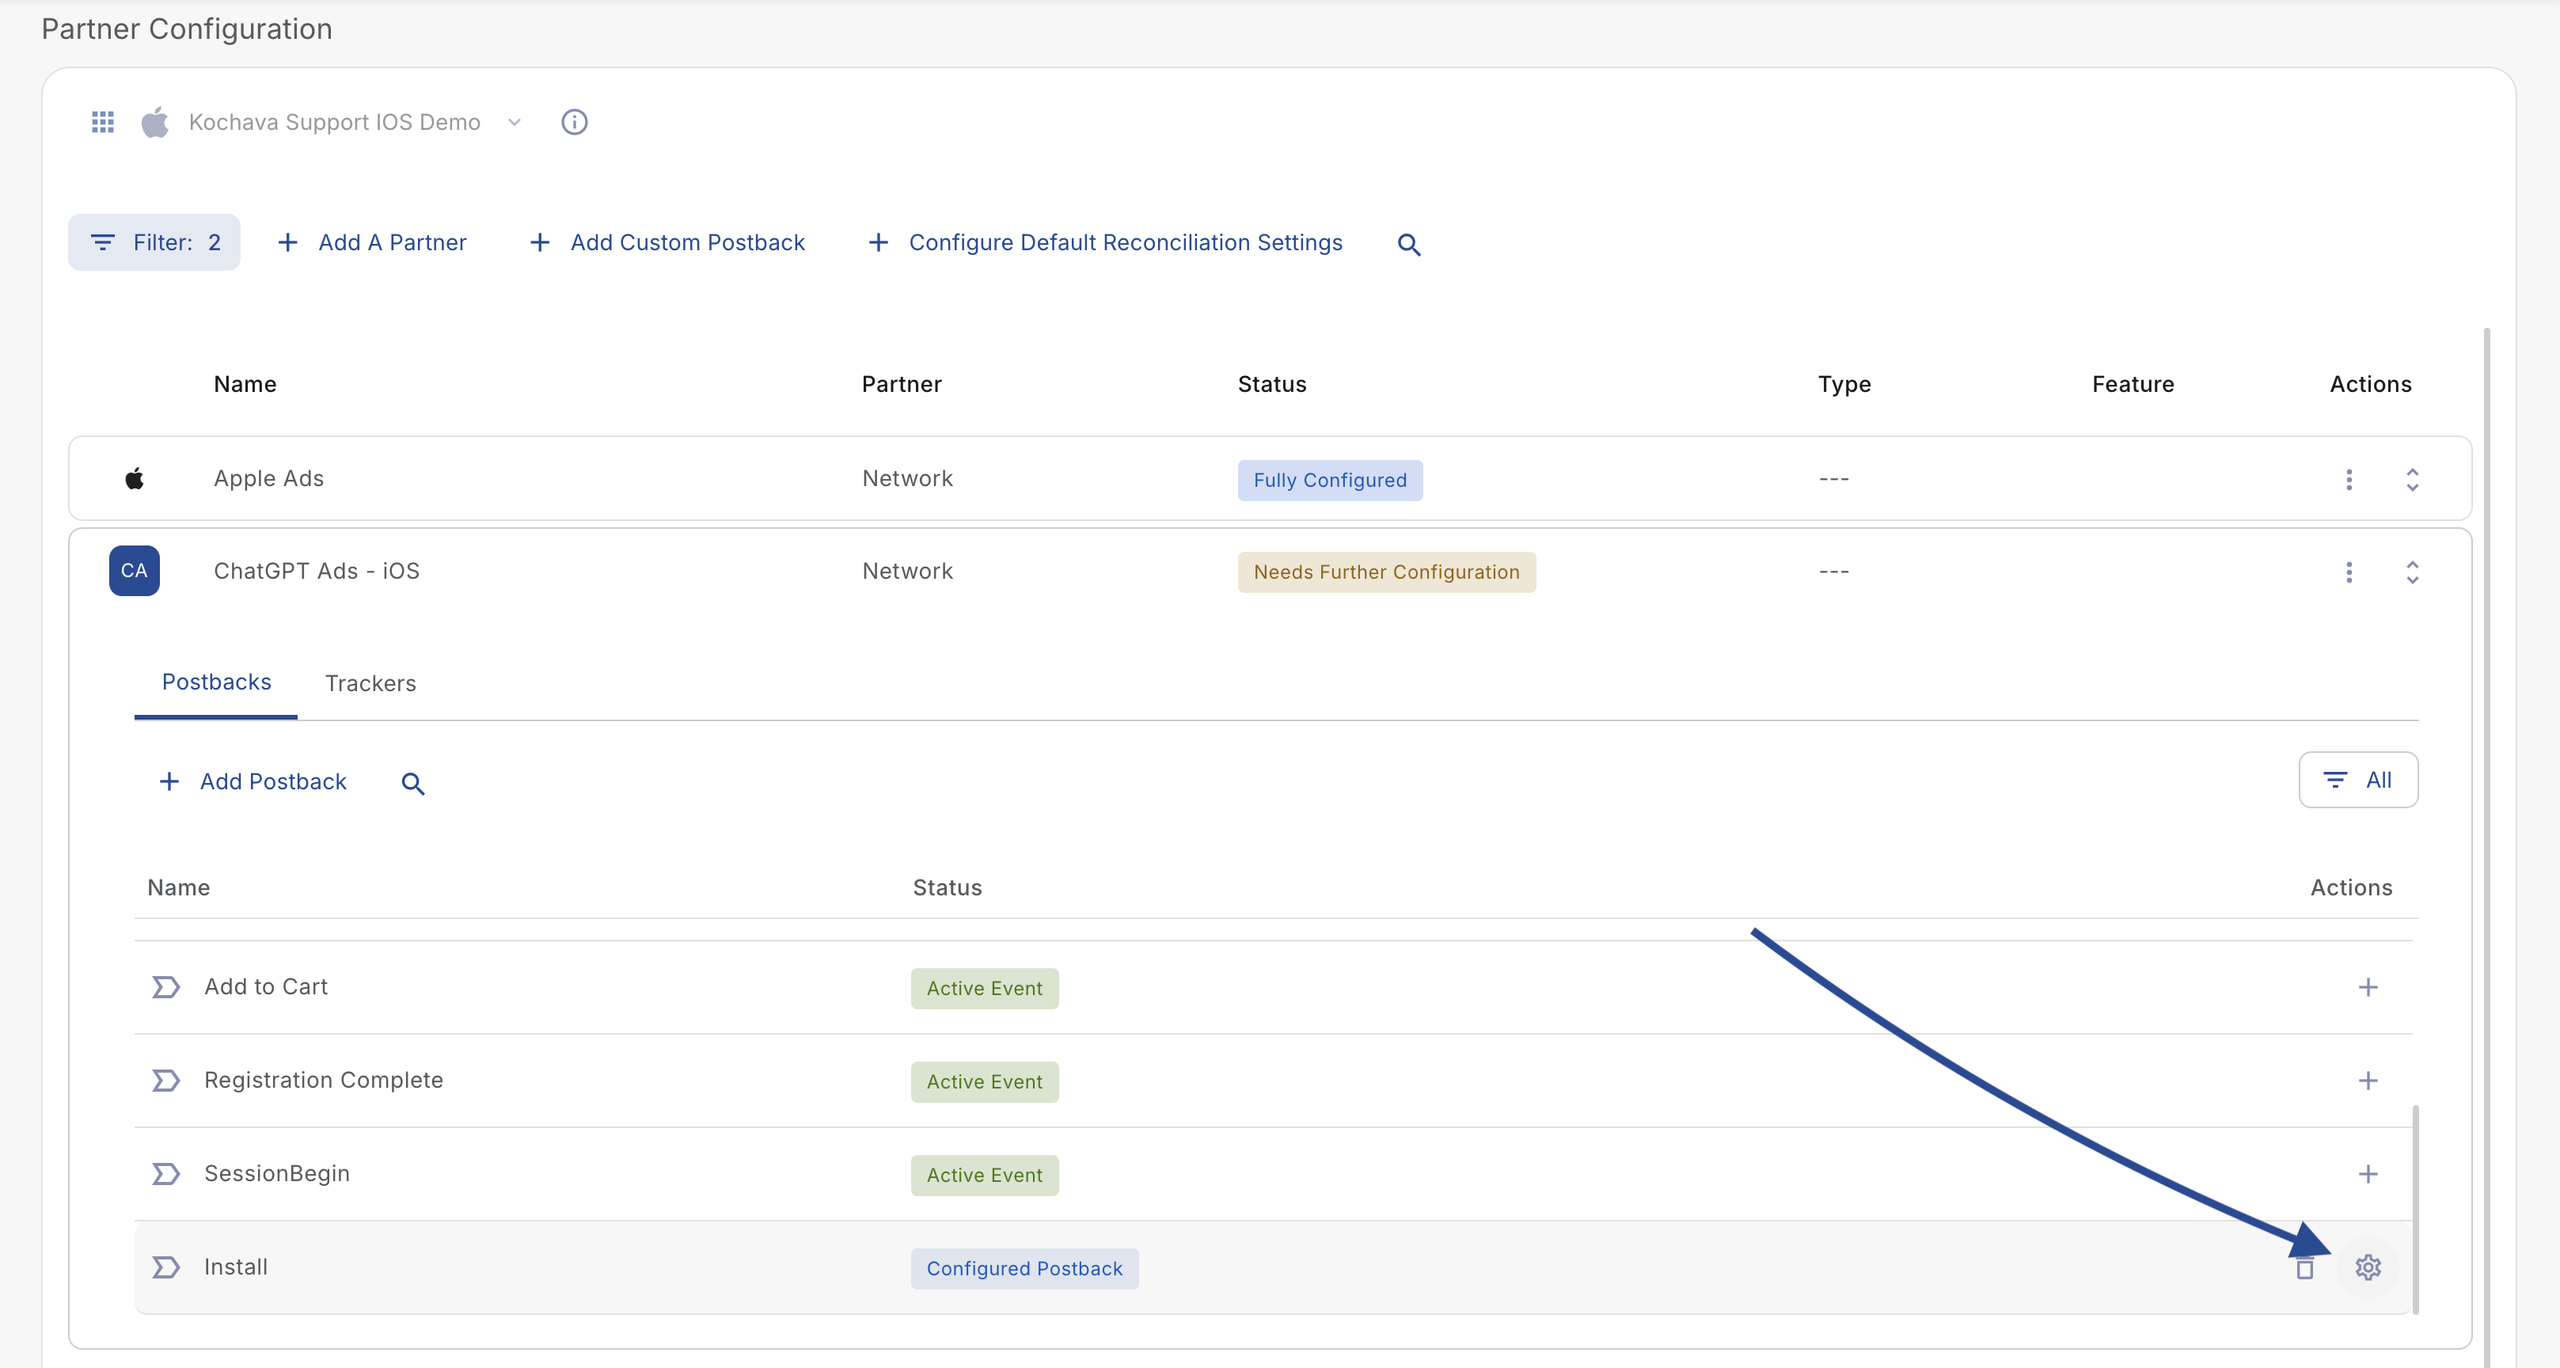
- Locate the ChatGPT Ads partner configuration row and click the expand arrow.
- Locate the desired event (e.g., Install, Purchase, Registration) and select ⚙ (Edit).
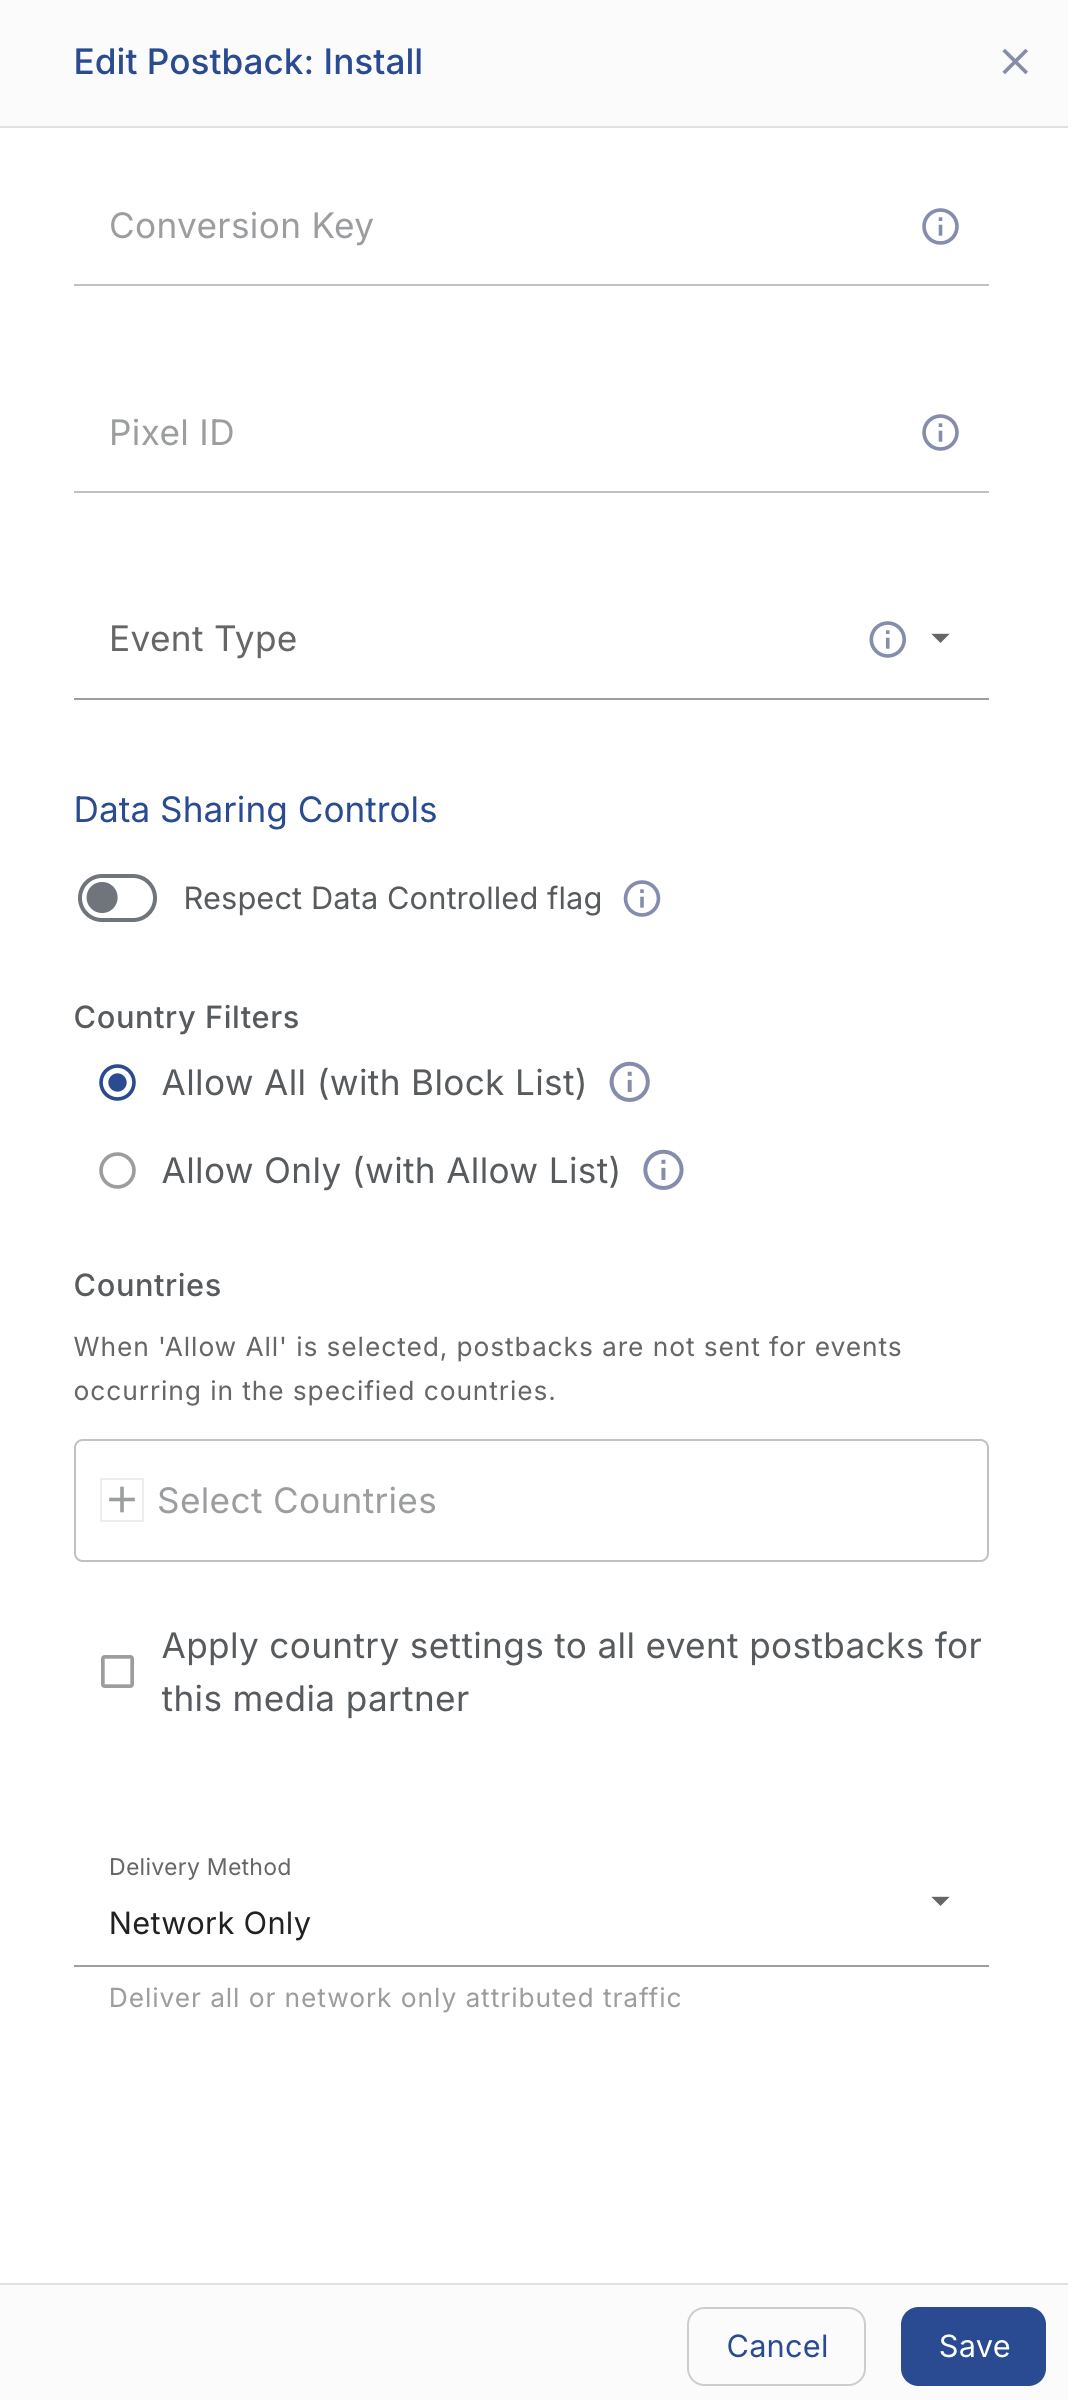
- Enter your Pixel ID retrieved from OpenAI Ads Manager.
- Enter your Conversions API Key generated in OpenAI Ads Manager.
- Select the Delivery Method:
- All — Sends all instances of the event to ChatGPT Ads regardless of attribution source (recommended for algorithmic optimization).
- Network Only — Sends only events attributed directly to ChatGPT Ads campaigns.
- Select the Delivery Delay and Retry Attempts. (optional)
- Click Save.