The following document defines the process for creating and editing App Groups and SmartLinks™ within Kochava. SmartLinks™ are URLs that send users to predefined destinations based on device platform, OS (Operating System) version, location, and a variety of other defined targeting criteria. Additionally, with the creation of SmartLinks a QR code will be generated.
Use Cases for SmartLink™ Creation:
A SmartLink™ enables Kochava users to perform tasks such as:
- Create a single link for off-network marketing (email, SMS, company website, social) enabling customers from different mobile platforms to reach the correct app store or download destination.
- Use a single link to redirect customers to geo-specific app stores.
- Create device OS version conditions to offer users the best experience for their device.
- Monitor performance of Campaigns utilizing SmartLinks™.
- Create a dynamic QR Code for use in OTT/CTV.
- Create a dynamic QR Code for print media.
Create an App:
- If not previously setup, create an app. For more information on creating an app, refer to Create/Edit Apps.
App Groups:
App Group User Interface:
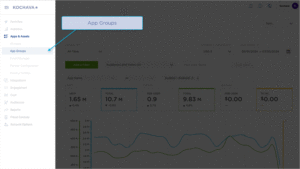
- Log in to Kochava.
- Select the desired Account and App.
- Select Apps & Assets > App Groups.
App Group Location and Organization Tools
App Groups can be easily located by utilizing the search and organization tools.
Live Search Tools:
App Groups can be located using the live search tool by typing part of all of the name of the app group.
App Group Organization:
App Groups can be organized by using one of the following:
Sort –
- Created (Newest)
- Created (Oldest)
- Name (A-Z)
- Name (Z-A)
- SmartLink Count (Asc)
- SmartLink Count (Desc)
- App Count (Asc)
- App Count (Desc)
Creating an App Group
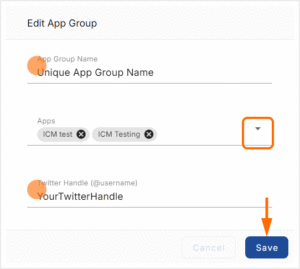
- Click + Add an App Group.
- Enter a unique App Group Name.
- Select at least two (2) apps from the drop-down lists.
- Click Save.
Create a SmartLink™
General Settings:
- Click + Add a SmartLink.
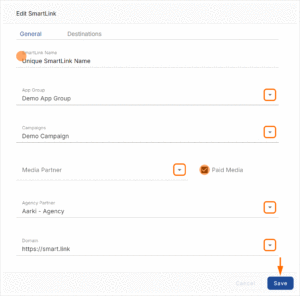
- Enter a unique SmartLink™ Name.
- Select an App Group.
- Select a Campaign.
- Select a Media Partner. (optional)
- Check Paid Media. (optional)
- Select an Agency Partner. (optional)
- Select the Domain.
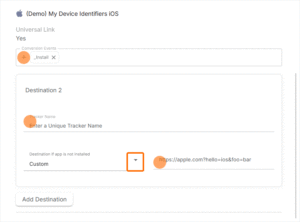
- Select the Universal Link or App Link Destination. (optional)
- Enter the Link Destination.
Destinations Settings:
- Select the desired Conversion Events.
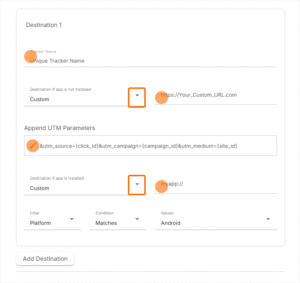
- Enter a unique Tracker Name.
- Select the Destination if App is Not Installed:
- App Default
- Custom
- App Store Link
- Install Link
- Select the Destination if App is Installed:
- Custom
- Deeplink
Add A Destination —
- Click Add a Destination.
- Enter a Tracker Name.
- Select the Destination if App is Not Installed:
- App Default
- Custom
- Select the Destination if App is Installed:
- Custom
- Deeplink
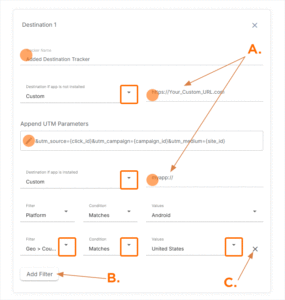
A. Enter Custom Destinations if needed.
B. Click to add an additional filter.
C. Click to remove the filter.
- Select a Filter:
- Device > Type
- Device > OS Version
- Geo > Country
- Select a Condition:
- Matches
- Dosen’t Match
- Select the desired Values.
iOS Universal Link and Android App Link Enabled Apps:
- Click on the Destinations tab.
- Select the desired Conversion Events.
- Enter the Tracker Name.
- Select the Destination if App is Not Installed:
- App Default
- Custom
- App Store Link
- Install Link
- Edit the UTM Parameters. (optional – Android Only)
All Other Platforms (Catch-all):
- Enter a Destination.
- Enter a Target App for tracking.
- Add a Custom Parameter. (optional)
- Click Save.

A. Click to add a Custom Parameter.
B. Enter Custom Parameter.
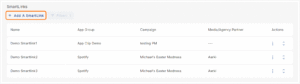
Locating SmartLink™ Click and Impression URLs, and QR Codes
Once a SmartLink™ has been created, the associated Click, Impression URLs and QR code can be easily located from the main SmartLinks™ page.
- Click on the desired SmartLink™.
- The associated SmartLink™ URLs and QR code will be displayed in the detail card.
- Click Copy URL to copy the URL to your local clipboard.
- Click the SVG or JPEG button next to the QR code to download the image.
- Click the QR Code to see a larger preview.
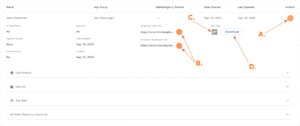
A. Click on desired SmartLink™.
B. Click to copy associated SmartLink™ URL.
C. Click on the QR code to view a larger image. Right-clicking on the image provides the ability to download the QR code.
D. Click to download the QR code in SVG or PNG format.
Editing a SmartLink™
- Log in to Kochava.
- Select the desired Account.
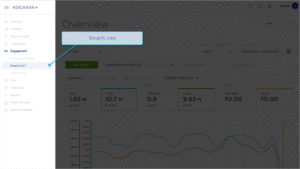
- Select Engagement > SmartLinks™.
- Locate and Click on the desired SmartLink™.
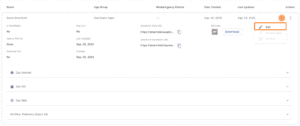
- Click the SmartLink™ Tools menu (⋮) > Edit.
- Update the desired settings.
- Click Save.
Tracking SmartLinks™
Once a SmartLink™ has been created, a tracker for the SmartLink™ and All Other Platforms (Catch-all) will be created, and those trackers can be easily viewed through the Campaign Manager.
Locating QR Code Data
Once Kochava has started receiving data associated with the QR codes, that data will be propagated in the following ways:
Reporting:
- Summary Reports (Campaign/Network): traffic > optional
qr_code.
Two new fields will be added to the reportinstall_matched_to_click_from_qrcode_countandclick_from_qrcode_count. The volume in these two fields is a subset of theinstall_matched_to_clickandclick_count.
- Install Report: optional click column
click_from_qr_code— true or blank - Click Report: optional column
click_from_qr_code— true or blank - Event Report: optional click column
click_from_qr_code— true or blank - Reengagement Report: optional column
click_from_qr_code— true or blank - Click Multi-Touch Attribution Report: included by default
clickwin_from_qr_code— true or blank
Analytics:
- Events Volume: Split by > QR Code — true or false
- Event Detail: Split Event Volume By > QR Code — true or false
- Cost & ROI: Split by > QR Code — true or false
- LTV: Split by > QR Code — true or false
- Retention: Split by > QR Code — associated retention data displayed
- Retention Advanced: Split by > QR Code — associated retention data displayed
- Explorer: Dimensions > QR Code — true or false
Query:
- Click Primary Table:
qr_code— true or false