Feature Summary: Roku OneView is a single platform leveraging TV identity data to manage advertising across Over the Top TV (OTT), desktop and mobile campaigns. The following document describes the process for creating a Roku OneView campaign within Kochava.
Data Needed Before Beginning Process:
- App Name
- Activity ID
Best Practices for OneView Reconciliation Settings:
- Since Roku CTV inventory is also available, in Kochava’s partner reconciliation settings for OneView or at the tracker level, set the IP only lookback window to its maximum of 24 hours. This is a recommendation pointed at the nature of matching on IP only within the OTT/CTV environment.
- Set the Device Attribution Behavior to inclusive on impressions so that Kochava will always try to match on modeled reconciliation even when device IDs are available.
Create Roku OneView Install Campaign
- Log in to Kochava.
- Select the desired Account and App.
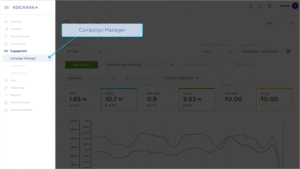
- Select Engagement > Campaign Manager.
- Click + Add (Tracker) or Select Segment Tools (⋮) > Add Tracker.
- Enter a unique Tracker Name.
- Select Tracker Type > Acquisition. (default setting)
- Select Select a Network > Roku OneView:
- Roku OneView – Android
- Roku OneView — iOS
- Select an Agency Partner. (optional)
- Enter the Install Destination URL.
- Enter a Deep Link. (optional)
- Enter Custom Parameters. (not required)
- Click Submit. (If no further trackers need to be created).
- Click Save & Add Another Tracker. (If additional trackers need to be created).
- Click Save & Create Postback. (To navigate directly to the Partner Configuration page).
Create a Postback Configuration
- Select Apps & Assets > Partner Configuration.

- Click Add a Configuration.
- Select Network Partner > Roku OneView.
- Click Save.
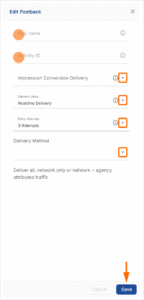
- Select Install > 🖉 (Edit).
- Enter the App Name.
- Enter the Activity ID.
- Select the Impression Conversion Delivery:
- Select the Delivery Delay. (optional)
- Select the Retry Attempts. (optional)
- Select the Delivery Method. (optional)
- Click Save.