Overview
The AIM MMM Configuration page is where you manage your marketplace configurations and validate your onboarding data.
To access the Configuration page, log in to the Kochava dashboard, then navigate to AIM MMM > Configuration in the left navigation menu.
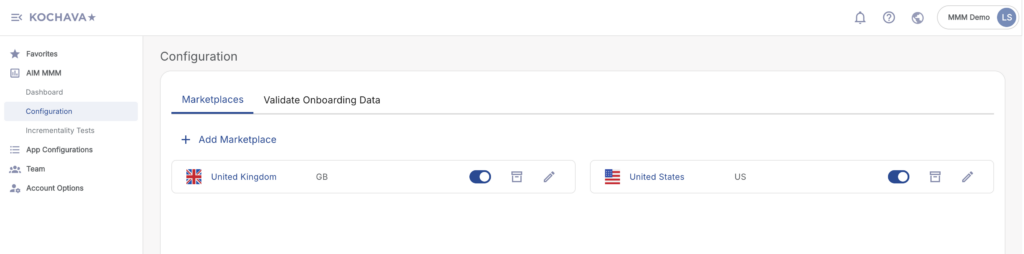
Marketplaces
The Marketplaces tab is the default view of the Configuration page. It displays all configured marketplaces for your account, each shown as a card with its associated country flag, name, and region alias. From this view, you can add new marketplaces, toggle their active status, edit their settings, or archive them.
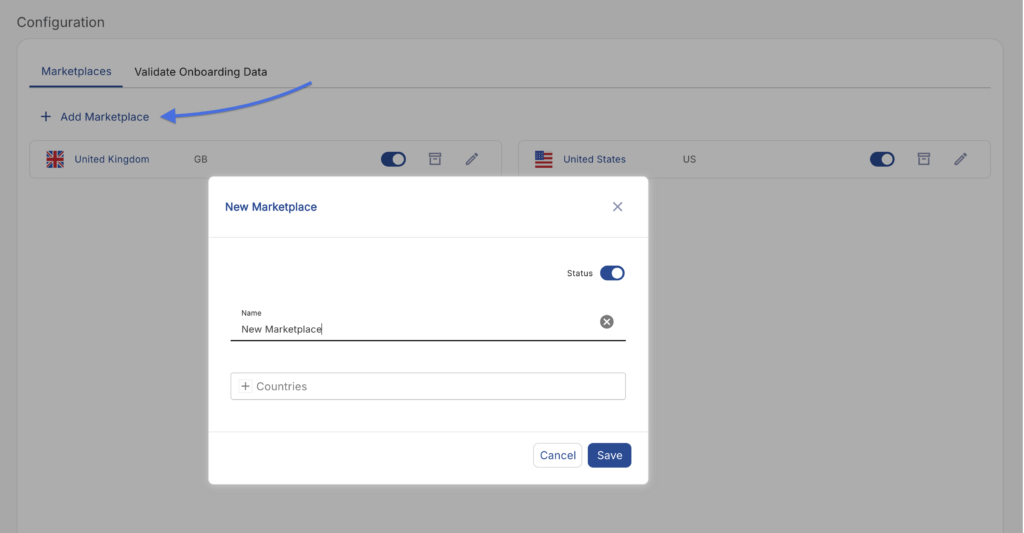
Adding a Marketplace
- Navigate to AIM MMM > Configuration in the left navigation menu.
- On the Marketplaces tab, click + Add Marketplace.
- In the New Marketplace dialog that appears, configure the following:
- Status — Toggle the status switch to set the marketplace as active or inactive upon creation. Active is enabled by default.
- Name — Enter a descriptive name for the marketplace (e.g., United States, United Kingdom).
- Countries — Add one or more country codes associated with this marketplace (e.g., US, GB, DE). Type a country code and select from the list.
- Click Save to create the marketplace.
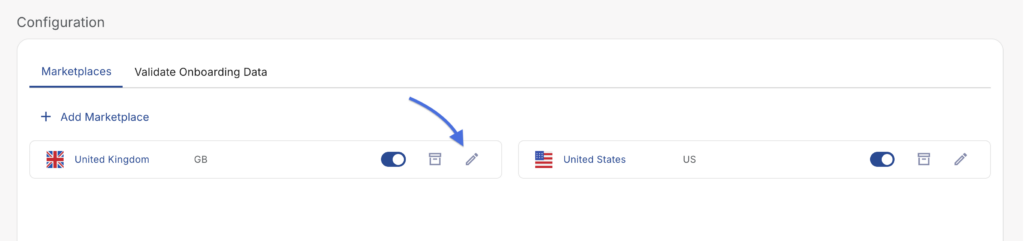
Editing a Marketplace
- Navigate to AIM MMM > Configuration.
- On the Marketplaces tab, locate the marketplace card you wish to update.
- Click the pencil (edit) icon on the right side of the marketplace card.
- In the Edit Marketplace dialog, update any of the following as needed:
- Status — Toggle to activate or deactivate the marketplace.
- Name — Update the marketplace name.
- Countries — Add or remove country codes associated with the marketplace.
- Click Save to apply your changes.
Archiving a Marketplace

- Navigate to AIM MMM > Configuration.
- On the Marketplaces tab, locate the marketplace card you wish to archive.
- Click the archive icon on the right side of the marketplace card.
- Confirm the action when prompted.
Toggling Marketplace Status
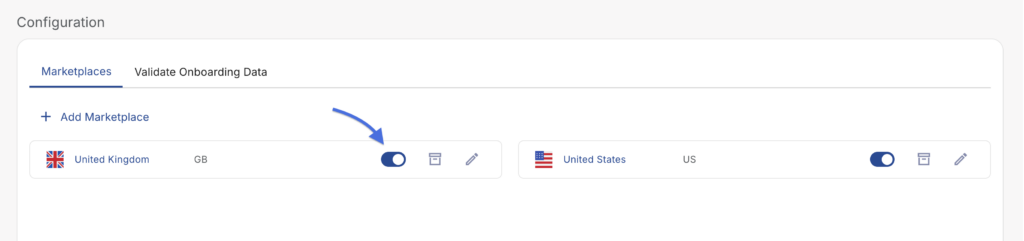
Each marketplace card on the Marketplaces tab includes an inline status toggle that allows you to quickly activate or deactivate a marketplace without opening the full edit dialog.
- Navigate to AIM MMM > Configuration.
- Locate the desired marketplace card.
- Click the status toggle switch to enable or disable the marketplace.
Validate Onboarding Data
The Validate Onboarding Data tab provides a tool to check your onboarding data file before submission, ensuring it is properly formatted and ready for processing. The validation tool does not store your file — it is used only for format verification.
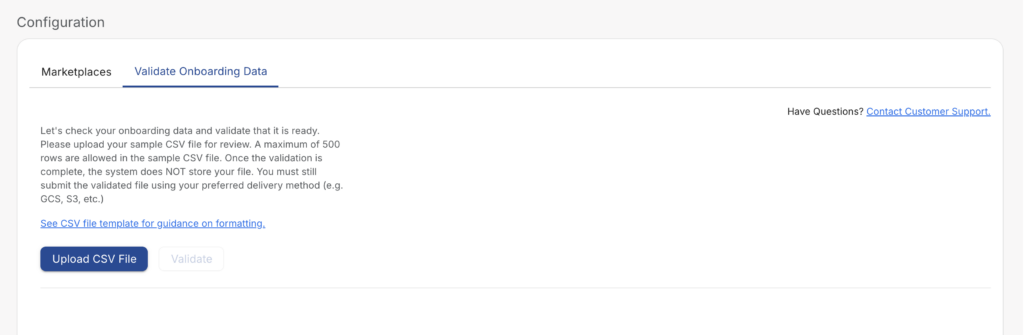
Once validation is complete, you must still submit the validated file through your configured delivery method (e.g., GCS, S3, etc.).
- Navigate to AIM MMM > Configuration.
- Click the Validate Onboarding Data tab.
- Review the instructions and, if needed, click See CSV file template for guidance on formatting to review the expected file structure.
- Click Upload CSV File and select your sample CSV file.
- A maximum of 500 rows are allowed in the sample CSV file.
- Once a file is uploaded, click Validate to run the validation check.
- Review any errors or confirmations returned by the validation tool.