Kochava Cost provides access to daily spend reports across all of your (Kochava Cost-integrated) network partners, all in one place. Once a configuration has been established with an API-connected partner (or a Manual Upload partner), Kochava Cost records and displays the daily spend in an easy-to-consume graphical representation – so your team can get a quick view of the overall Cost across apps, platforms, partners or campaigns.
Cost Overview Interface
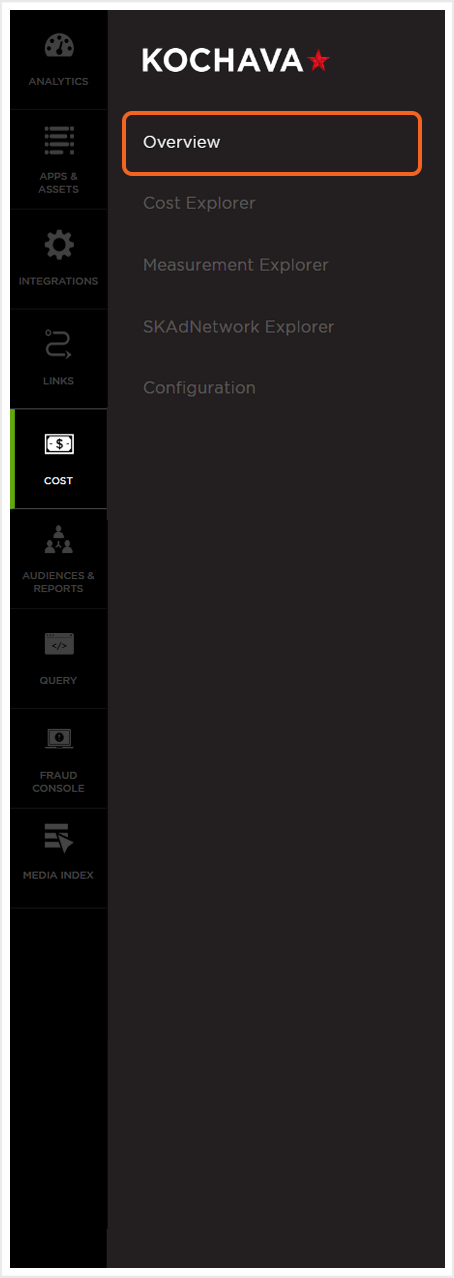
- Log in to Kochava.
- Select the desired Account.
- Select Cost > Cost Overview.
Using Filters
The date range filter provides the option to refine the window of data that is displayed. The following range types and time ranges are available for selection:
- Last:
- last day
- last week
- last month
- last quarter
- last year
- Previous:
- previous calendar week
- precious calendar month
- previous calendar year
- Custom:
- Start (Inclusive):
- Relative Date/Time — This option provides a text field in which a number can be manually entered and a drop-down box where the following options:
- Days Before
- Seconds Before
- Minutes Before
- Hours Before
- Weeks Before
- Months Before
- Quarters Before
- Years Before
- Specific Date/Time — A manual date/time may be entered or the calendar and time selection tool may be used.
- Now — This is the selection of the current date and time.
- Midnight — This is the selection of the current date and the time selection of midnight or (24:00hrs).
- Relative Date/Time — This option provides a text field in which a number can be manually entered and a drop-down box where the following options:
- End (Exclusive):
- Specific Date/Time — A manual date/time may be entered or the calendar and time selection tool may be used.
- Relative Date/Time — This option provides a text field in which a number can be manually entered and a drop-down box where the following options:
- Days After
- Seconds After
- Minutes After
- Hours After
- Weeks After
- Months After
- Quarters After
- Years After
- Now — This is the selection of the current date and time.
- Midnight — This is the selection of the current date and the time selection of midnight or (24:00hrs).
- Start (Inclusive):
- Advanced:
- Start (Inclusive) — Manually enter today or a specific desired start date.
- End (Exclusive) — Manually enter today or a specific desired end date.
- Previous:
- previous calendar week
- previous calendar month
- previous calendar year
- No filter:
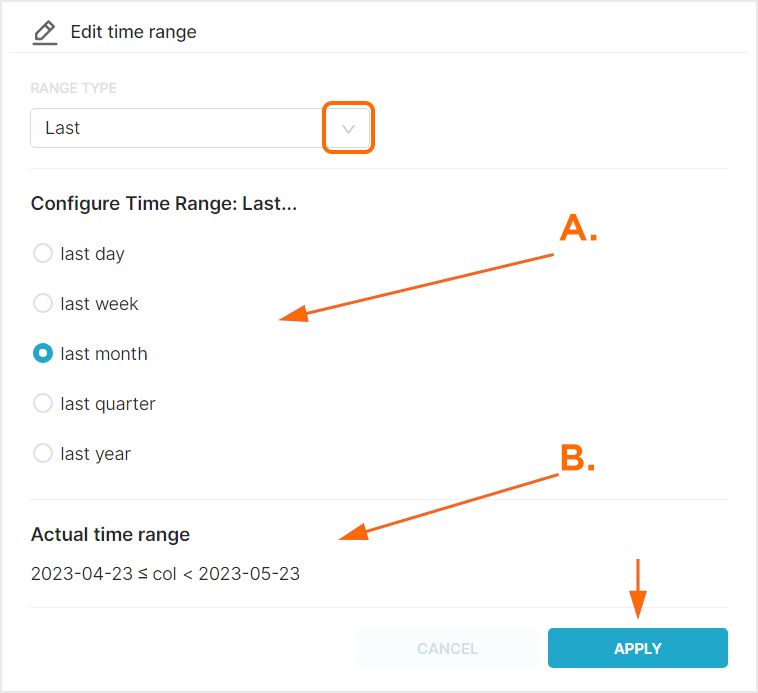
B. Time range that will be displayed.
By default cost data is displayed in US Dollars, however cost data may be displayed in a variety of other currency.
From the Currency drop-down menu select one of the following:
- AED
- AFN
- ALL
- AMD
- ANG
- AOA
- ARS
- AUD
- iOS
- AWG
- AZN
- BAM
- BBD
- BDT
- BGN
- BHD
- BIF
- BMD
- BND
- BOB
- BRL
- BSD
- BTC
- BTN
- BWP
- BYN
- BYR
- BZD
- CAD
- CDF
- CHF
- CLF
- CLP
- CNH
- CNY
- COP
- CRC
- CUC
- CUP
- CVE
- CZK
- DJF
- DKK
- DOP
- DZD
- EEK
- EGP
- ERN
- ETB
- EUR
- FJD
- FKP
- GBP
- GEL
- GGP
- GHS
- GIP
- GMD
- GNF
- GTQ
- GYD
- HKD
- HNL
- HRK
- HTG
- HUF
- IDR
- ILS
- IMP
- INR
- IQD
- IRR
- ISK
- JEP
- JMD
- JOD
- JPY
- KES
- KGS
- KHR
- KMF
- KPW
- KRW
- KWD
- KYD
- KZT
- LAK
- LBP
- LKR
- LRD
- LSL
- LTL
- LVL
- LYD
- MAD
- MDL
- MGA
- MKD
- MMK
- MNT
- MOP
- MRO
- MRU
- MTL
- MUR
- MVR
- MWK
- MXN
- MYR
- MZN
- NAD
- NGN
- NIO
- NOK
- NPR
- NZD
- OMR
- PAB
- PEN
- PGK
- PHP
- PKR
- PLN
- PYG
- QAR
- RON
- RSD
- RUB
- RWF
- SAR
- SBD
- SCR
- SDG
- SEK
- SGD
- SHP
- SLL
- SOS
- SRD
- SSP
- STD
- STN
- SVC
- SYP
- SZL
- THB
- TJS
- TMT
- TND
- TOP
- TRY
- TTD
- TWD
- TZS
- UAH
- UGX
- USD
- UYU
- UZS
- VEF
- VES
- VND
- VUV
- WST
- XAF
- XAG
- XAU
- XCD
- XDR
- XOF
- XPD
- XPF
- XPT
- YER
- ZAR
- ZMK
- ZMW
- ZWL
Apps:
This option provides the option for selecting the desired app(s).
Media Partners:
This option provides the ability to select a specific media partner or selecting all of the available media partners.
Partner Campaign Names:
This option provides the ability to select a specific partner campaign name or selecting all of the available partner campaign names.
After filters have been selected, you must click Apply Filters before the graphic displays or row level data will be updated.
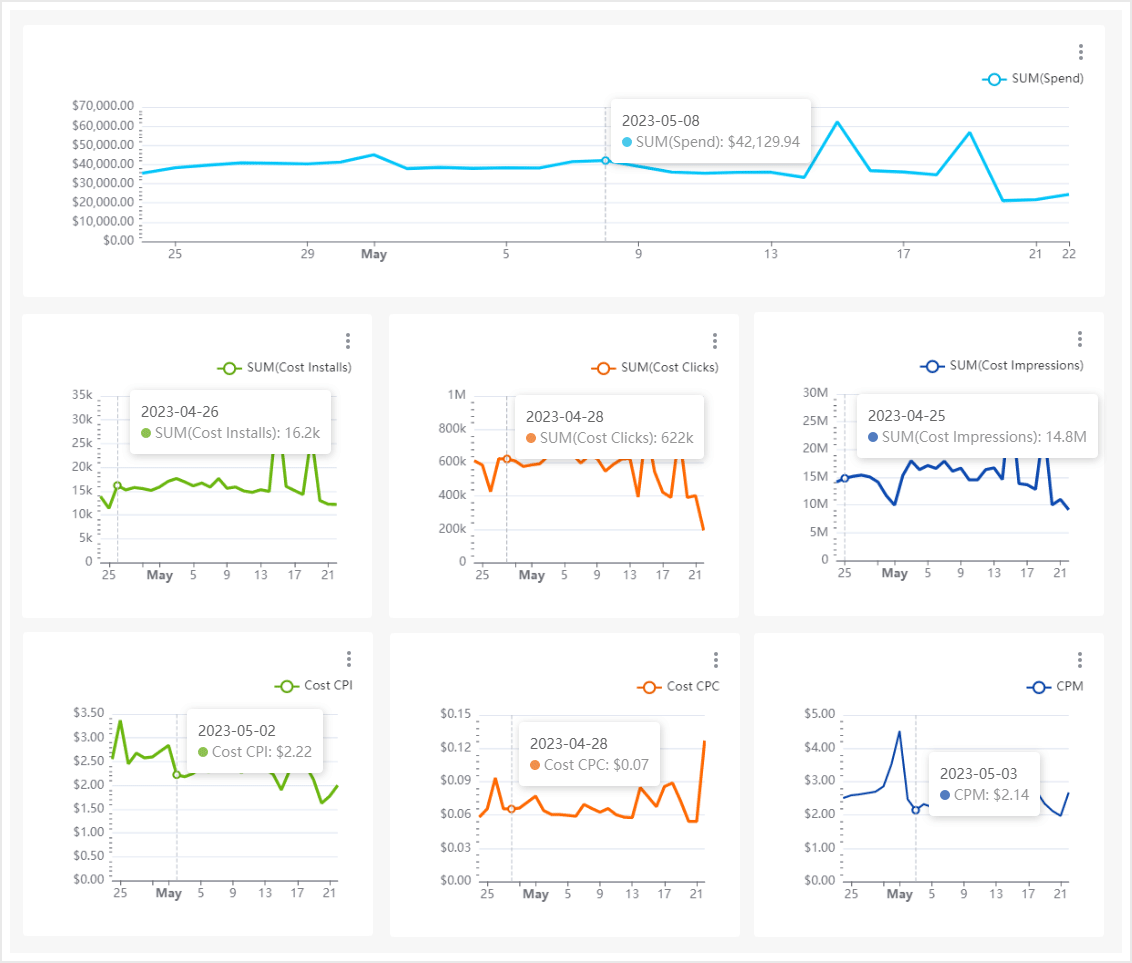
Cost Overview Chart
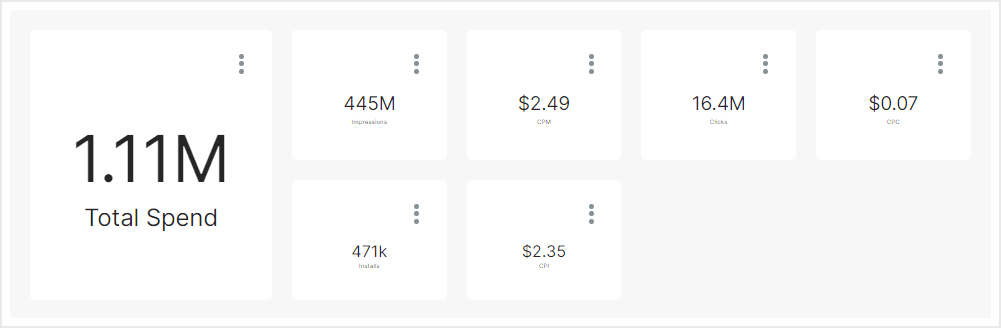
The Cost Overview chart is divided into two main sections. The first section is a numeric display of the Total Spend, Impressions, CPM, Clicks, CPC, Installs and CPI. The second section provides a large interactive Spend chart and smaller Cost Installs, Cost Clicks, Cost Impressions, Cost CPI, Cost CPC and CPM interactive charts.
Numeric Display:
The numeric display provides a quick reference for the latest cost data for the following:
- Total Spend — The total amount of money spent within the selected time frame in USD.
- Impressions — The total number of impressions associated with the selected cost campaign(s).
- CPM — The cost per thousand impressions.
- Clicks — The total number of clicks associated with the selected cost campaign(s).
- CPC — The cost per click.
- Installs — The total number of installs associated with the selected cost campaign(s).
- CPI — The cost per install.
Graphic Display:
The graphic display provides a visual overview of the spend, cost of installs, cost of clicks, cost of impressions, CPI, CPC and CPM over the selected time frame. Each graph has a vertical axis which represents the monetary value for the corresponding data and the horizontal axis represents the selected time frame. Mousing over any part of the interactive chart will display the corresponding data for each metric for the corresponding date within the display. Moving the cursor along the horizontal axis will display the data for any of the dates within the selected time frame.