The following document defines the process for creating an Apple Search Ads campaign within Kochava. Apple Search Ads is a mobile advertising platform which allows advertisements to be embedded into Apple products such as iPhones, iPods and iPads.
iAd Framework vs AdServices Framework
While both the iAd framework and AdServices framework produce attribution claims for Apple Search Ads claims, there are a number of notable differences.
The AdServices Framework:
- Supports attribution claims for devices on iOS14.3+ only.
- Supports attribution claims for devices where the AppTrackingTransparency (ATT) setting is Opt-Out.
- Has two types of payloads; a standard payload for cases where the ATT setting is Opt-Out and a detailed payload for cases where the ATT setting is Opt-In. The difference between the standard and detailed payload is that the standard payload does not contain a click timestamp.
- Provides less campaign metadata than the iAd framework.
- Will be the only source of Apple Search Ads attribution claims once the iAd framework is deprecated.
- Requires that first an attribution token be generated on the client, which can then be used to retrieve attribution results.
Overview of Attribution Claim Payload Differences:
| AdServices Detailed (Opt-In) | AdServices Standard (Opt-Out) | iAd |
|---|---|---|
| attribution | attribution | iad-attribution |
| orgId | orgId | iad-org-id |
| campaignId | campaignId | iad-campaign-id |
| conversionType | conversionType | iad-conversion-type |
| clickDate | Not included on original payload. Optionally manufactured for the purpose of attribution. | iad-click-date |
| adGroupId | adGroupId | iad-adgroup-id |
| countryOrRegion | countryOrRegion | iad-country-or-region |
| keywordID | keywordId | iad-keyword-id |
| creativeSetId | creativeSetId | iad-creativeset-id |
| iad-purchase-date | ||
| iad-keyword | ||
| iad-creativeset-name | ||
| iad-lineitem-id | ||
| iad-conversion-date | ||
| iad-org-name | ||
| iad-campaign-name | ||
| iad-adgroup-name | ||
| iad-keyword-matchtype | ||
| iad-lineitem-name | ||
| iad.iad-impression-date |
NOTES:
- Apple Search Ads was formerly called iAd.
- Apple Search Ads Campaigns are available for iOS apps only, no Postback is required and a tracking URL does not need to be provided to Apple Search Ads.
Data Needed Before Beginning Process:
- Kochava SDK must be implemented.
- For retrieving claims via the AdServices framework, SDK version 4.4.0 or later must be implemented within the app. (Recommended)
Use Cases for Apple Search Ads Campaign:
- An app marketing campaign with Apple Search Ads has been created.
Credentials — Apple Search Ads
With the update to the AdServices framework for Apple Search Ads and shift from human-readable keywords and campaign metadata to numerical IDs, Kochava has released an update which retrieves and populated human-readable keywords and metadata. For descriptions of AdServices Attribution Payload, refer to their support documentation.
- Log in to Kochava.
- Select the desired Account and App.
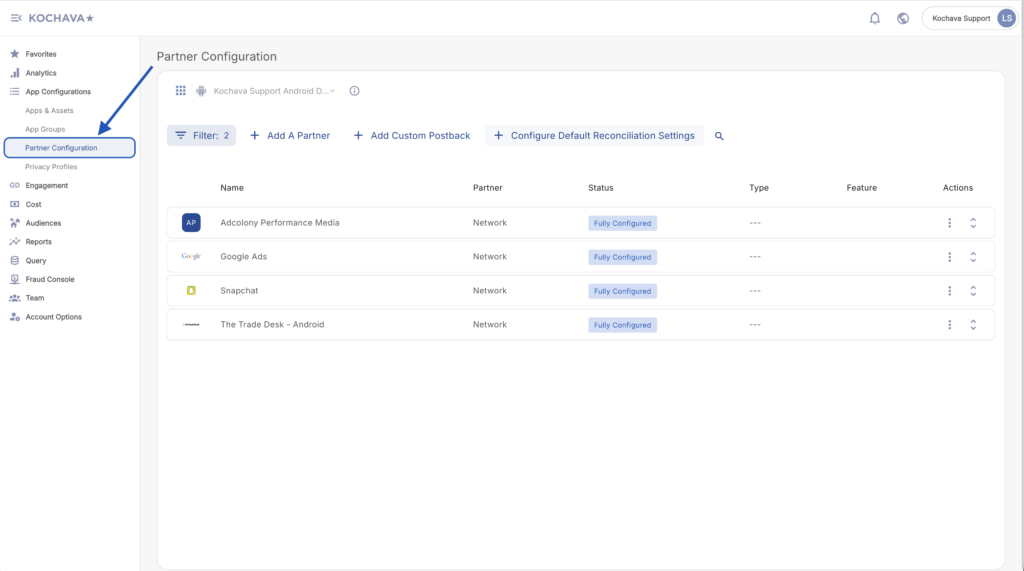
- Select App Configurations > Partner Configuration.

- In the available search box, type Apple Search Ads.
- Click on the Partner Configuration menu (⋮) > Credentials.
- Click Sign in with Apple.
- Enter the login credentials.
- Select the desired account.
- Select Account Read Only.
- Click Grant Access.
- Click Save.
ASA Keyword Location within Kochava:
- Kochava query Match Object, attributed to Apple Search Ads.
- Analytics when splitting or filtering by keyword.
- Reporting, when the include SAN claim data specified.
Possible Causes for Missing Keywords:
- The user signed does not have the proper permissions for all campaigns associated to the app.
- The keyword has been deleted from AdServices campaigns.
- AdServices does not return a human readable keyword associated to the campaign ID/keyword ID combination.
Create an Apple Search Ads Campaign
- Select Engagement > Campaign Manager.
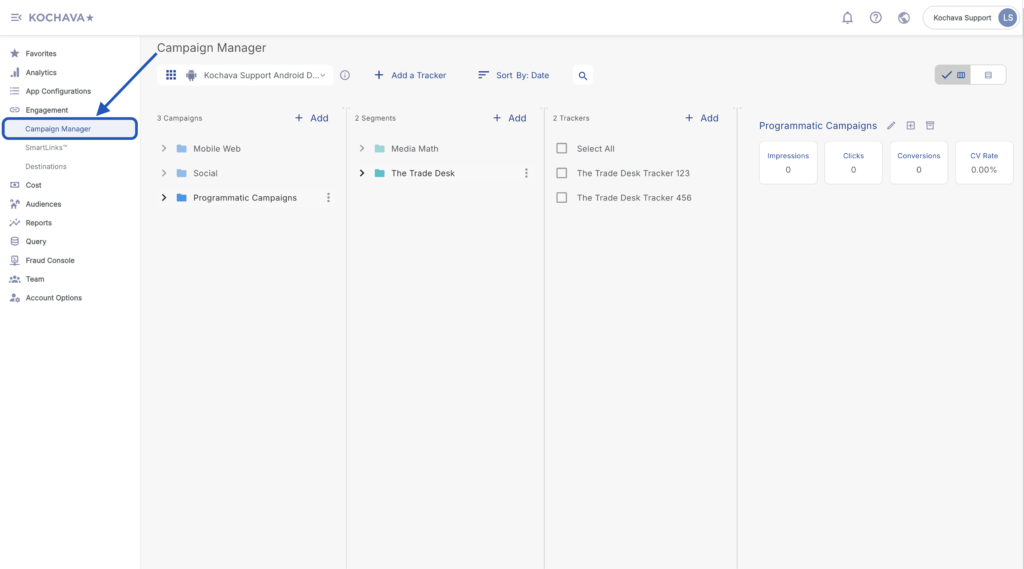
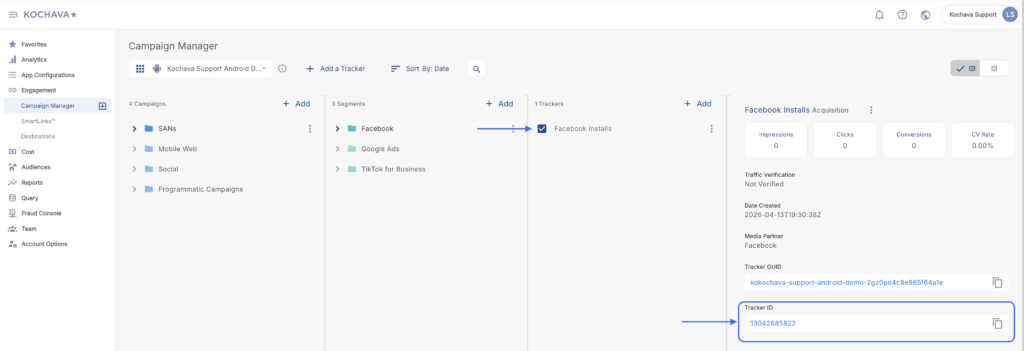
Locate Tracker ID:
- Once a tracker has been created, navigate to Campaign Manager.
- Locate and click on the desired Campaign.
- Select the desired Segment.
- Locate the desired Tracker, and Check the associated selection box.
- Locate and copy the Tracker ID.
- Click + Add (Tracker) or Select Segment Tools (⋮) > Add Tracker.
- Enter a unique Tracker Name.
- Select the Tracker Type > Acquisition.
- Select Media Partner > Apple Search Ads.
- Select an Agency Partner. (optional)
- Check Share with Publisher. (optional)
- Select Default Tracker:
- On
- Off (default)
- Enter the Install Destination URL.
- Enter a Deep Link. (optional)
- Click Save. (If no further trackers need to be created)
- Click Save & Add Another Tracker. (If additional trackers need to be created).
Install Postback Configuration (Optional)
This step is only needed if you wish to make changes to the default method of handling attribution for standard AdServices attribution payloads, which do not contain an impression and click timestamp. Apple will provide a standard payload in cases where the user did not opt in via the AppTrackingTransparency framework. Within Partner Configuration for Apple Search Ads, you can determine whether or not to attribute these claims. If you choose to attribute, you can determine the impression or click timestamp Kochava manufactures, relative to the user’s install timestamp. By default, this is set to attribute standard ATT opt-out payloads and manufacture an impression timestamp that is 23 hours prior and a click timestamp that is 29 days prior to the user’s install timestamp.
- Select App Configurations > Partner Configuration.
- Click Add a Configuration.
- Select Media Partner > Apple Search Ads.
- Click Go.
- Select Install > Postback Tools (⋮) > Edit.
- Check Respect Data Controlled Flag (optional). This setting informs Kochava what transactional app data can and can not be sent to the partner.
- Leave the ATTRIBUTION FOR ATT OPT-OUT USERS box checked if you wish to attribute Apple Search Ads claims for ATT opt-out users. Uncheck if you do not wish to attribute attribution claims on these users. By default this will be checked.
- Select the desired Manufactured Impression Timestamp. If this setting is set to 23 hours, Kochava will subtract 23 hours form the install timestamp to determine and manufacture the impression timestamp for standard payloads (ATT opt-out users).
- Select the desired Manufactured Click Timestamp. If the setting is 29 days, Kochava will subtract 29 days from the install timestamp to determine and manufacture the click timestamp for standard payloads (ATT opt-out users).
- Enter Organization IDs associated with this app.
- Select the desired Delivery Delay.
- Select the desired Retry Attempts
- Click Save.
Disabling View Through Attribution
- While in Partner Configuration, search for Apple Search Ads.
- Select Partner Configuration Tools (⋮) > Reconciliation.
- Set the following Impression Settings to Disabled:
- Device Lookback
- Modeled Lookback
- IP Lookback
- Partial IP Lookback
- Set Device Attribution Behavior to Standard.
Track Redownloads with Apple
Apply the Install Reprocessing Setting:
- Select App Configurations > Partner Configuration.
- In the upper right hand corner of the screen, Select Tools > Default Reconciliation Settings.
- Select the desired Install Reprocessing Lookback window.
- Click Save.
Create a Reengagement Tracker:
- Select Engagement > Campaign Manager.
- Click + Add (Tracker) or Select Segment Tools (⋮) > Add Tracker.
- Enter Tracker Name.
- Select Tracker Type > Reengagement.
- Select Media Partner > Apple Search Ads.
- Select an Agency Partner. (optional)
- Select the Destination URL Type > Custom.
- Enter an Install URL.
- Enter a Deep Link. (optional)
- Enter a Custom Parameter. (optional)
- Select Event > _install for Redownload attribution.
- Click Save (If no further trackers need to be created).
Apple Campaign Association to a Specific Tracker in Kochava (Optional):
Locate Tracker ID:
- Once a tracker has been created, navigate to Campaign Manager.
- Locate and click on the desired Campaign.
- Select the desired Segment.
- Locate the desired Tracker, and Check the associated selection box.
- Locate and copy the Tracker ID.
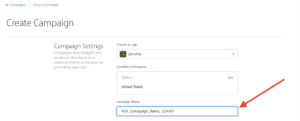
Adding the Kochava Tracker ID to a New Apple Search Ads Campaign —
- Enter Tracker ID along with campaign name during creation flow.
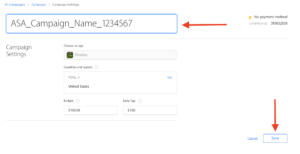
Adding the Kochava Tracker ID to an Existing Apple Search Ads Campaign —
- Log in to Apple Search Ads.
- Click on Campaign.
- Edit Campaign Settings.
- Add Kochava Tracker ID to the Campaign Name.
- Click Save.
Apple’s Custom Product Pages
Apple’s Custom Product Pages feature allows for the creations of additional versions of App Store product pages, each of which highlights a feature or specific content and allows the sharing of a page’s unique URL in corresponding marketing campaigns.
Example (Install Attributed to a Custom Product Page) —
"payload": {
"adId": 7772137742,
"creativeSetId": 0,
"conversionType": "Download",
"orgId": 7777680,
"campaignId": 1037771923,
"adGroupId": 1052146777,
"countryOrRegion": "PH",
"attribution": true
}The following document defines accessing data associated with Apple Search Ads campaign within Kochava. Apple Search Ads is a mobile advertising platform which allows advertisements to be embedded into Apple products such as iPhones, iPods and iPads. Apple Search Ads campaign data can be located with Analytics, Reporting and Query, details and suggestions for locating and organizing your data can be found below.
Analytics
Within Analytics filters may be used in order to organize and display Apple Search Ads data specifically.
- Log in to Kochava.
- Select the desired Account and App.
- Select Analytics > Dashboard > Events Volume.
- Click + Add a Filter.
- Select Network Name.
- Select Apple Search Ads.
A. Select Network Name > Apple Search Ads.
B. It is highly recommended to split the data by Site.
C. Remove metrics as needed.
D. Remove filter as needed.
Reporting
- Locate the desired report and Click Customize.
- Select Networks > Apple Search Ads.
- Adjust/Add/Remove any other settings.
- Click Create.
A. Including site and creative in the report can help organize your data.
Query
Below is a useful Query for understanding keyword and campaign-level performance for Apple Search Ads data. This Query must be run in Standard SQL dialect.
SELECT
    DATE(i.date_occurred) AS install_date,
    CASE
        WHEN COALESCE(i.site_id, '') = '' THEN '--no keyword provided--'
        ELSE i.site_id END
    AS keyword,
    JSON_EXTRACT_SCALAR(i.match_object, '$.iad-campaign-name') AS campaign_name,
    JSON_EXTRACT_SCALAR(i.match_object, '$.iad-adgroup-name') AS adgroup_name,
    COUNT(DISTINCT i.install_id) AS install_count,
    COUNT(DISTINCT(CASE WHEN e.event_name = '_SessionBegin' AND TIMESTAMP_DIFF(e.date_occurred, i.date_occurred, DAY) BETWEEN 0 AND 0 THEN e.event_id ELSE NULL END)) AS d0_session_count,
    COUNT(DISTINCT(CASE WHEN e.event_name = '_SessionBegin' AND TIMESTAMP_DIFF(e.date_occurred, i.date_occurred, DAY) BETWEEN 1 AND 1 THEN e.event_id ELSE NULL END)) AS d1_session_count,
    COUNT(DISTINCT(CASE WHEN e.event_name = '_SessionBegin' AND TIMESTAMP_DIFF(e.date_occurred, i.date_occurred, DAY) BETWEEN 2 AND 7 THEN e.event_id ELSE NULL END)) AS d2_d7_session_count,
    COUNT(DISTINCT(CASE WHEN e.event_name = '_SessionBegin' AND TIMESTAMP_DIFF(e.date_occurred, i.date_occurred, DAY) BETWEEN 8 AND 30 THEN e.event_id ELSE NULL END)) AS d8_d30_session_count,
    COUNT(DISTINCT(CASE WHEN e.event_name = 'Purchase_New' AND TIMESTAMP_DIFF(e.date_occurred, i.date_occurred, DAY) BETWEEN 0 AND 0 THEN e.event_id ELSE NULL END)) AS d0_purchase_count,  -- Adjust event names here
    COUNT(DISTINCT(CASE WHEN e.event_name = 'Purchase_New' AND TIMESTAMP_DIFF(e.date_occurred, i.date_occurred, DAY) BETWEEN 1 AND 1 THEN e.event_id ELSE NULL END)) AS d1_purchase_count,  -- Adjust event names here
    COUNT(DISTINCT(CASE WHEN e.event_name = 'Purchase_New' AND TIMESTAMP_DIFF(e.date_occurred, i.date_occurred, DAY) BETWEEN 2 AND 7 THEN e.event_id ELSE NULL END)) AS d2_d7_purchase_count,  -- Adjust event names here
    COUNT(DISTINCT(CASE WHEN e.event_name = 'Purchase_New' AND TIMESTAMP_DIFF(e.date_occurred, i.date_occurred, DAY) BETWEEN 8 AND 30 THEN e.event_id ELSE NULL END)) AS d8_d30_purchase_count,  -- Adjust event names here
    COUNT(DISTINCT(CASE WHEN TIMESTAMP_DIFF(e.date_occurred, i.date_occurred, DAY) BETWEEN 0 AND 0 THEN e.install_id ELSE NULL END)) AS d0_retention,
    COUNT(DISTINCT(CASE WHEN TIMESTAMP_DIFF(e.date_occurred, i.date_occurred, DAY) BETWEEN 1 AND 1 THEN e.install_id ELSE NULL END)) AS d1_retention,
    COUNT(DISTINCT(CASE WHEN TIMESTAMP_DIFF(e.date_occurred, i.date_occurred, DAY) BETWEEN 2 AND 7 THEN e.install_id ELSE NULL END)) AS d2_d7_retention,
    COUNT(DISTINCT(CASE WHEN TIMESTAMP_DIFF(e.date_occurred, i.date_occurred, DAY) BETWEEN 8 AND 30 THEN e.install_id ELSE NULL END)) AS d8_d30_retention
FROM
    (
          (
            SELECT
                '_Install' AS event_name,
                date_occurred,
                install_id,
                kochava_device_id,
                site_id,
                match_object
            FROM installs_primary
            WHERE network_name = 'Apple Search Ads'
                AND install_id <> '0'
                AND DATE(date_occurred) >= DATE_ADD(CURRENT_DATE(), INTERVAL -60 DAY) -- Adjust install cohort start date here
                AND DATE(date_occurred) <= DATE_ADD(CURRENT_DATE(), INTERVAL -30 DAY) -- Adjust install cohort end date here
          ) i
      LEFT OUTER JOIN
          (
            SELECT
                event_name,
                date_occurred,
                install_id,
                event_id,
                kochava_device_id
            FROM events_primary
            WHERE network_name = 'Apple Search Ads'
                AND install_id <> '0'
                AND DATE(date_occurred) >= DATE_ADD(CURRENT_DATE(), INTERVAL -60 DAY) -- Adjust to match install cohort start date here
                AND event_name IN ('_SessionBegin', 'Purchase_New') -- Adjust event names here
          ) e
      ON i.install_id = e.install_id AND e.date_occurred BETWEEN i.date_occurred AND TIMESTAMP_ADD(i.date_occurred, INTERVAL 30 DAY)
    )
GROUP BY install_date, keyword, campaign_name, adgroup_name
ORDER BY install_date, install_count DESC