The following document defines the process for creating an X Install campaign within Kochava. This setup allows Kochava to send installs to X to allow for attribution.
Data Needed Before Beginning Process:
- X Ads account.
- App Bundle ID (i.e., Package Name).
X AMMP (Advanced Mobile Measurement Program):
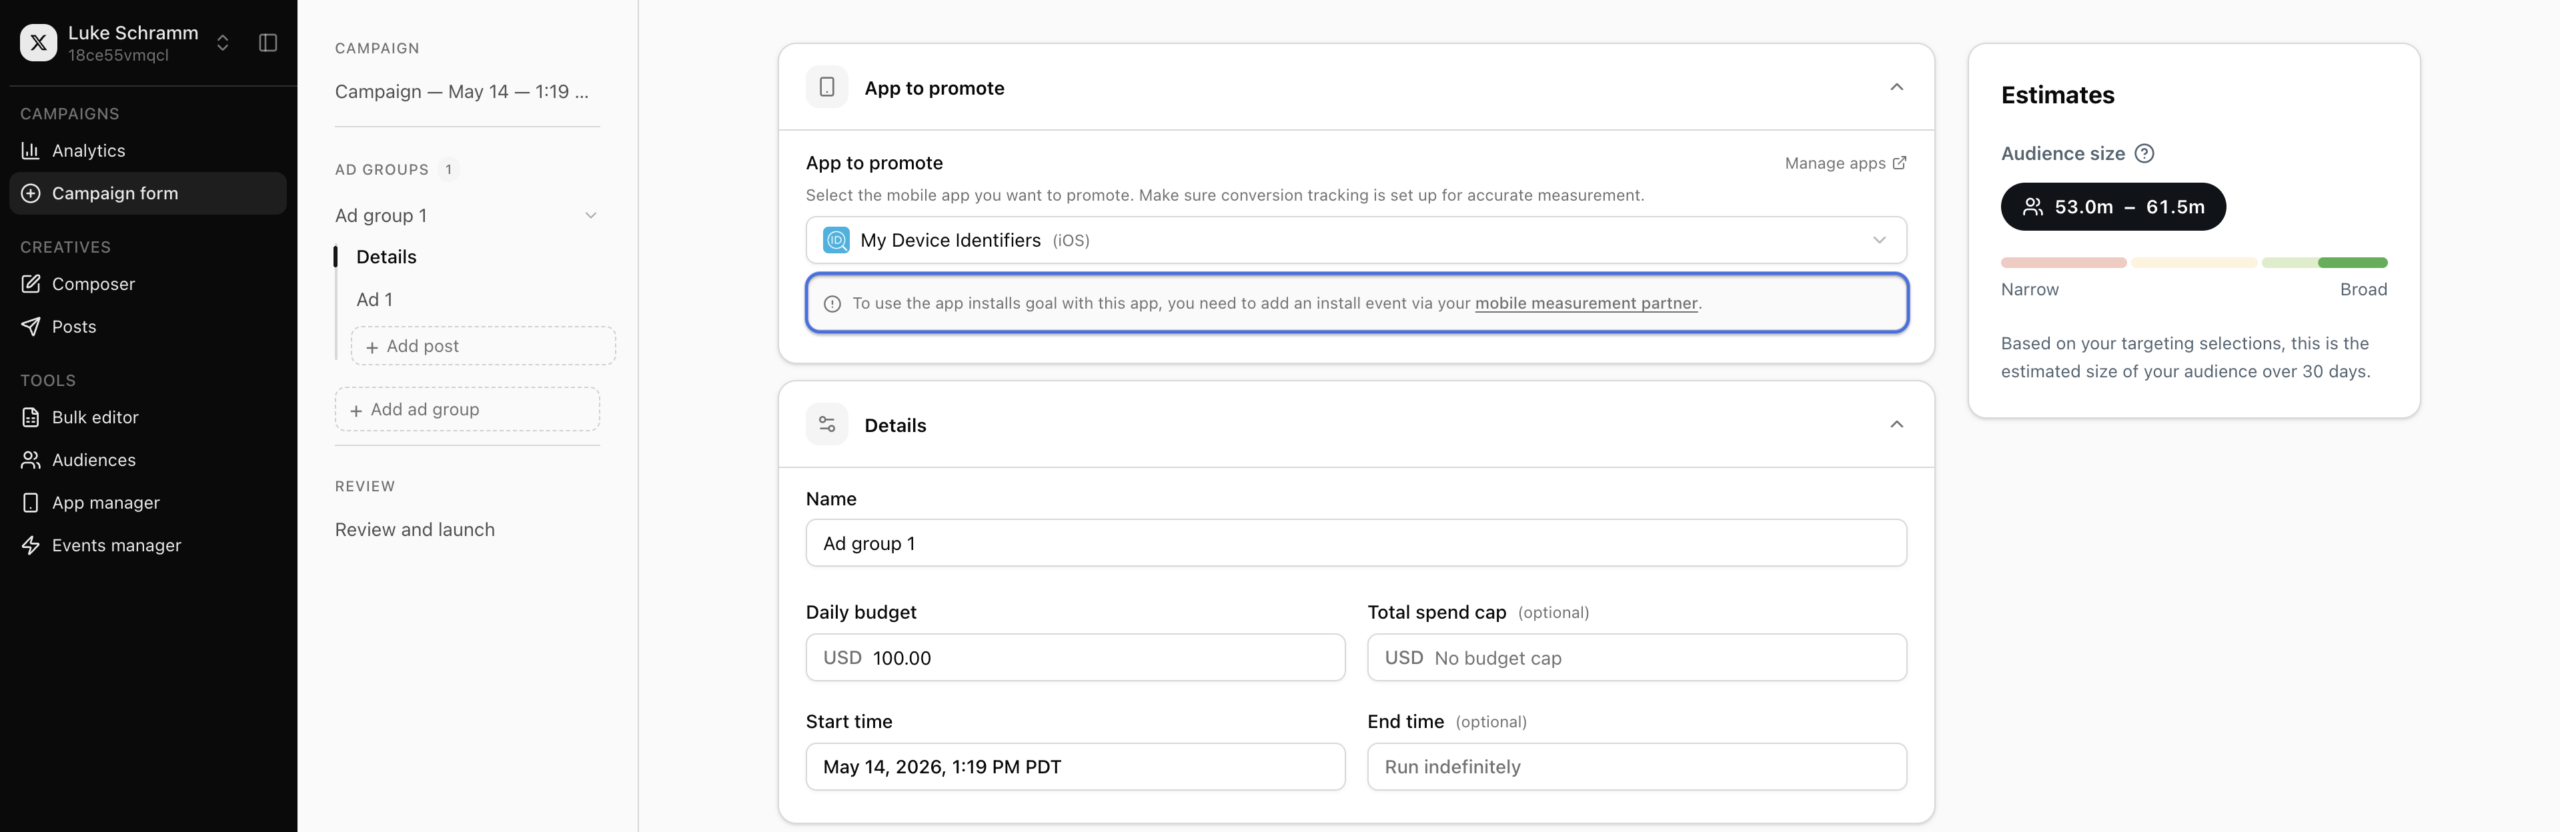
Kochava HIGHLY recommends that advertisers join the X Advanced Mobile Measurement Program (AMMP) > Mobile App, Conversion Tracking & Audience Manager > Advanced Mobile Measurement Program Agreement Form. Once the advertiser has joined AMMP, X can provide the data needed for accurate measurement and you may receive expanded device-level data after granting X the right to perform an audit to ensure that X data is being used exclusively for measurement purposes. This is consistent with common practices throughout the industry. By joining X’s AMM Program, you will receive more complete device-level data, which will in turn reduce the discrepancy between our report and X’s dashboard. If AMMP is not joined, discrepancies between Kochava and X reporting will exist.
Authenticating an X Account
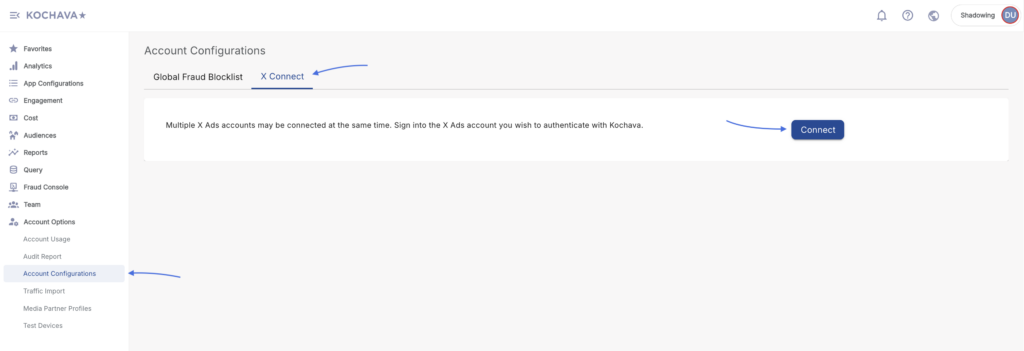
- Log into Kochava
- Navigate to Account Options > Account Configurations > X Connect.
- Select Connect.
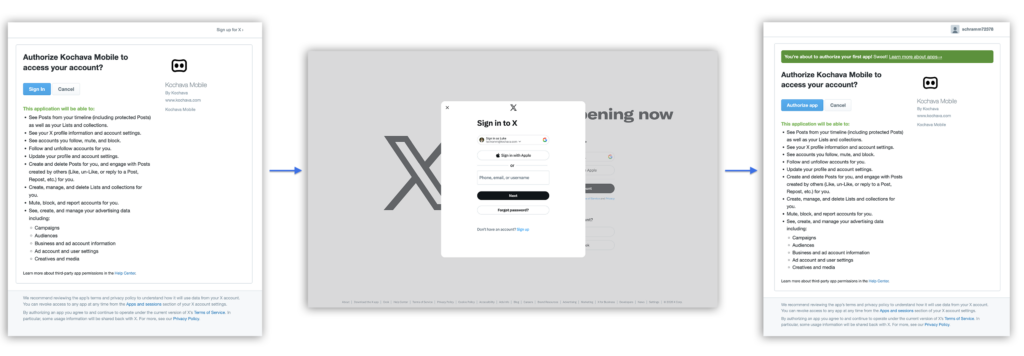
- Select Sign In.
- Enter your X Account credentials.
- Select Authorize App.
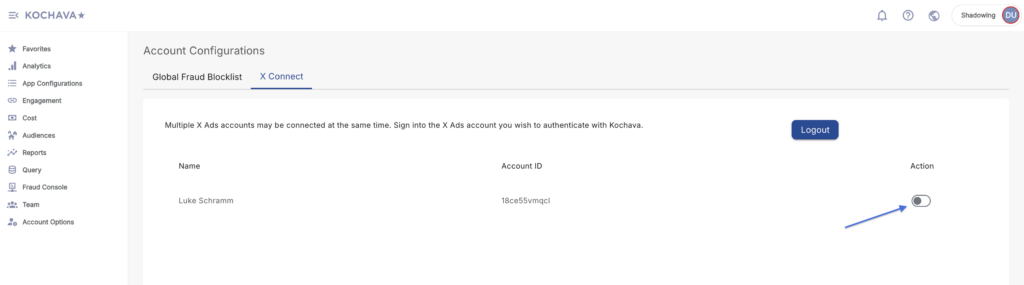
- Select the Action toggle to enable the account.
Create an X Install Tracker
Locate Tracker ID:
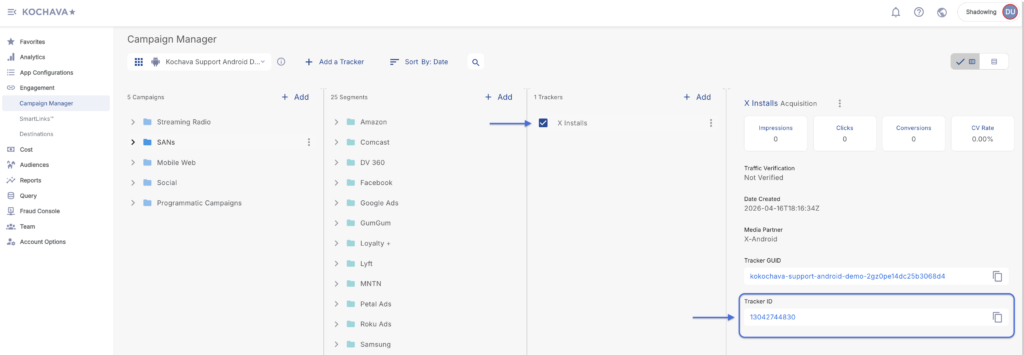
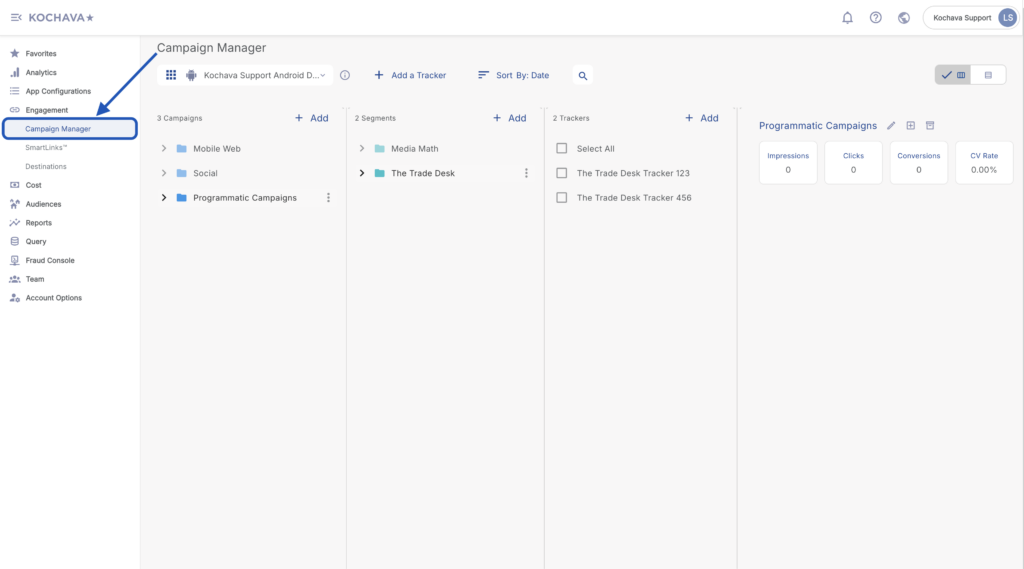
- Once a tracker has been created, navigate to Campaign Manager.
- Locate and click on the desired Campaign.
- Select the desired Segment.
- Locate the desired Tracker, and Check the associated selection box.
- Locate and copy the Tracker ID.
- Log in to Kochava.
- Select the desired Account and App.
- Select Engagement > Campaign Manager.
- Select the desired Campaign & Segment, or create new ones.
- Click + Add (Tracker).
- Enter a unique Tracker Name.
- Select Tracker Type > Acquisition. (default setting)
- Select a Network > X:
- X—Android (Android)
- X—iOS (iOS)
- Select Default Tracker:
- On
- Off (default)
- Select the desired X account(s).
- Enter the App Bundle ID (If not entered during app creation/editing). For further information about locating the Bundle ID, click here.
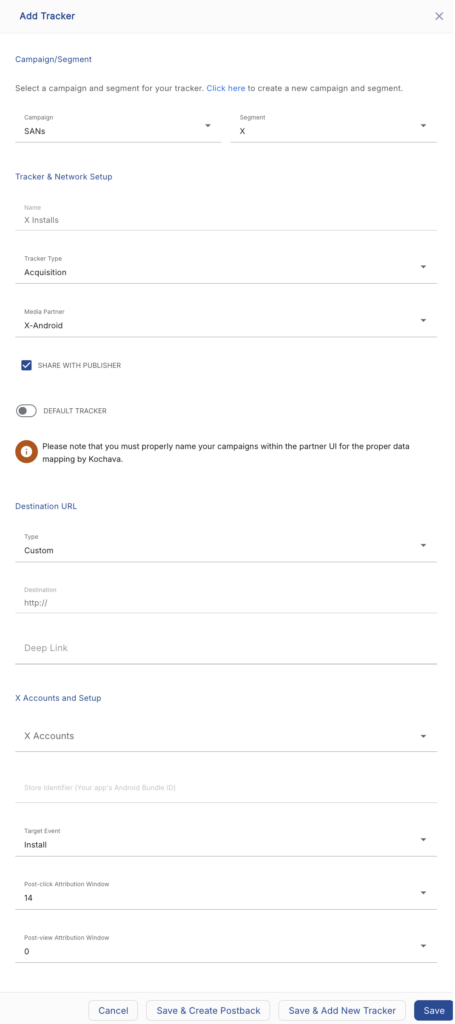
- Select a Target Event. (Default to “Install” for Acquisition Trackers)
- Select a Post-Click Attribution Window. (optional)
- Select a Post-View Attribution Window. (optional)
- Click Save. (If no further trackers need to be created)
- Click Save & Add Another Tracker. (If additional trackers need to be created)
- Click Save & Create Postback. (To navigate directly to the Partner Configuration page)
Create an X Install Postback Configuration
- Select App Configurations > Partner Configuration.
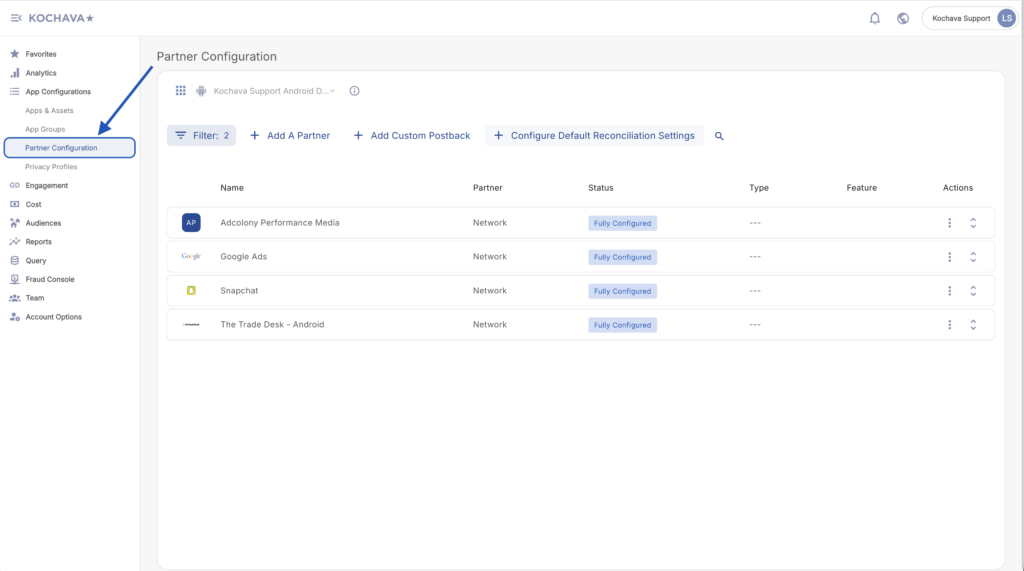
- Click + Add a Partner.
- Select Network Partner > X:
- X—Android (Android)
- X—iOS (iOS)
- Click Next.
- Verify Status: Active.
- Click Save.
- Expand the X Partner Configuration.
- Click Install > ⚙ (Edit).
- Enter the App ID:
- iTunes App ID (iOS)
- Package Name (Android)
- Select a Delivery Delay. (optional)
- Select the number of Retry Attempts. (optional)
- Click Save.
SKAdNetwork Reporting
Under Apple’s SKAdNetwork X will receive the postbacks directly from Apple, and then forward those SKAdNetwork postbacks to Kochava with some additional metadata for reporting.
| Attribute | Format | Description |
|---|---|---|
| in_timestamp | string | Install timestamp in milliseconds. This is when the postback was received by X. |
| transaction_id | string | Unique ID used for deduplication tied to a conversion. |
| app_id | string | ID for the advertised app. |
| redownload | boolean | Flag for a reinstall. |
| source_app_id | string | ID of app where ad was served. X’s App ID for X Ads inventory. For more information on TAP refer to X Audience Platform (TAP). |
| conversion_value | string | 0-63, must be sent in incremental values by the advertised app. This will be null for v1 postbacks or v2 postbacks without a conversion value due to Apple’s privacy minimum threshold. |
| version | string | Version of install validation postback. Will be 1.0 if source app uses pre-iOS14 SDK and 2.0 for all apps running iOS14. |
| partner_campaign_id | string | X campaign ID. |
| partner_campaign_name | string | X campaign name. |
| sub_campaign_id | string | A reference to the line item in X Ads that produced the ad event. |
| sub_campaign_name | string | Name of the line item in X Ads that produced the ad event. |
| fidelity_type | boolean | SKAdNetwork parameter indicating the type of conversion. 0 indicates a view, 1 indicates a click. |
| did_win | boolean | SKAdNetwork parameter indicating if the forward was the last touch before action or an influencing ad exposure (true, false). |
Parameter Mapping:
- in_timestamp maps to timestamp
- partner_campaign_id maps to campaign_id
- partner_campaign_name maps to campaign_name
- sub_campaign_id maps to line_item_id
- sub_campaign_name maps to line_item_name