The following document describes how to set up a campaign for Facebook or any FMP (Facebook Marketing Partner) formerly known as PMD (Preferred Marketing Developer).
Data Needed Before Beginning Process:
- Facebook App ID (15 digit id obtained in the Facebook power editor account)
Use Cases for Facebook or Facebook Marketing Partner Campaign:
- An app marketing campaign with Facebook has been created.
- An app marketing campaign with a Facebook Marketing Partner has been created.
Create a Facebook Campaign
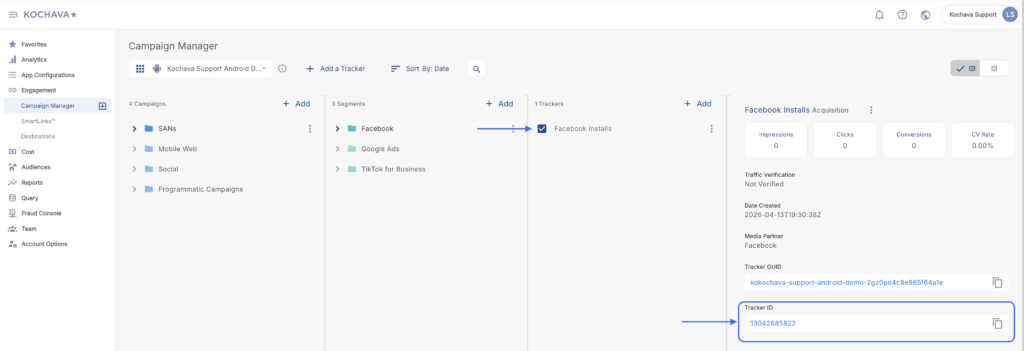
Locate Tracker ID:
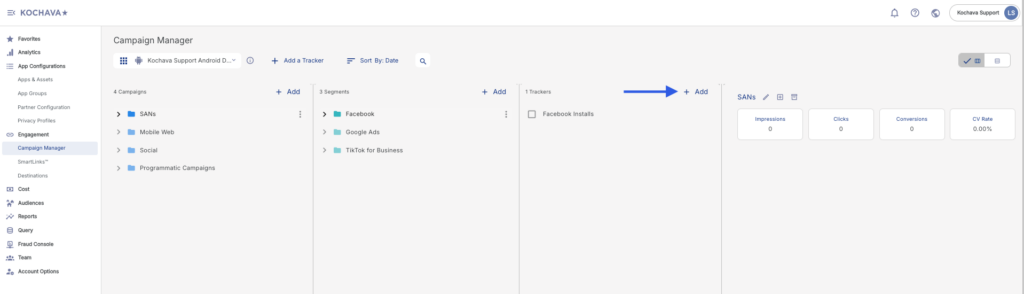
- Once a tracker has been created, navigate to Campaign Manager.
- Locate and click on the desired Campaign.
- Select the desired Segment.
- Locate the desired Tracker, and Check the associated selection box.
- Locate and copy the Tracker ID.
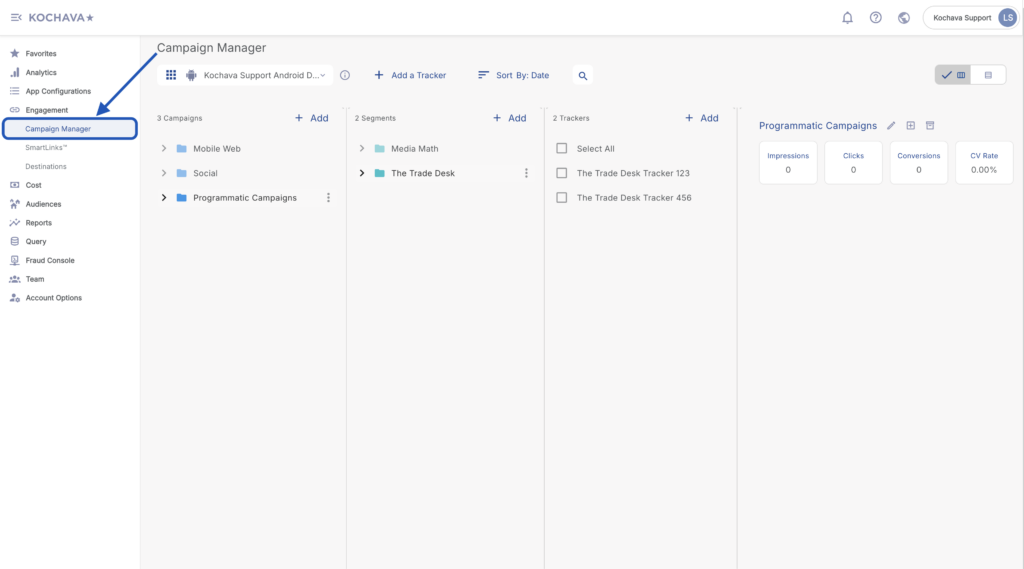
- Log in to Kochava.
- Select the desired Account and App.
- Select Engagement > Campaign Manager.
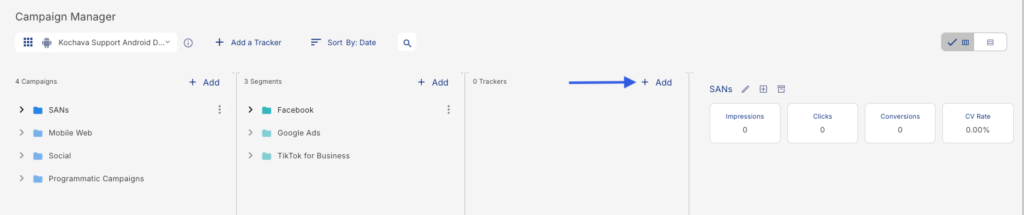
- Click + Add (Tracker).
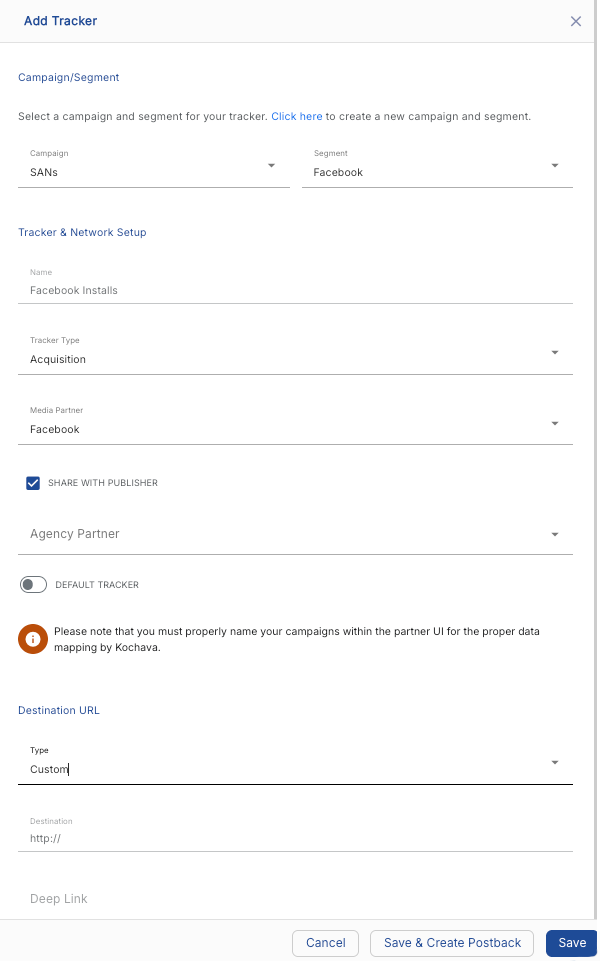
- Enter the Tracker Name.
- Select Tracker Type > Acquisition. (default setting)
- Select Media Partner > Facebook.
- Select Agency Partner. (optional)
- Select Default Tracker:
- On
- Off (default)
- Click Save. (If no further trackers need to be created)
- Click Save & Add Another Tracker. (If additional trackers need to be created)
- Click Save & Create Postback (to navigate directly to the Partner Configuration page).
Install Postback Configuration
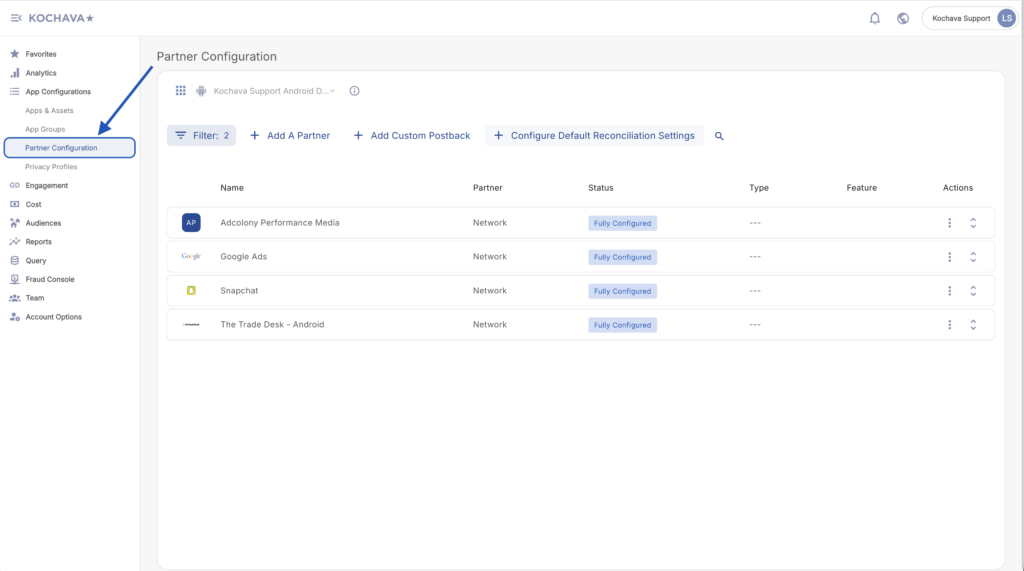
- Select App Configurations > Partner Configuration.
- Click + Add a Partner.
- Select Media Partner > Facebook.
- Click Next.
- Verify Status: Active
- Click Save.
- Expand Facbook Partner Configuration.
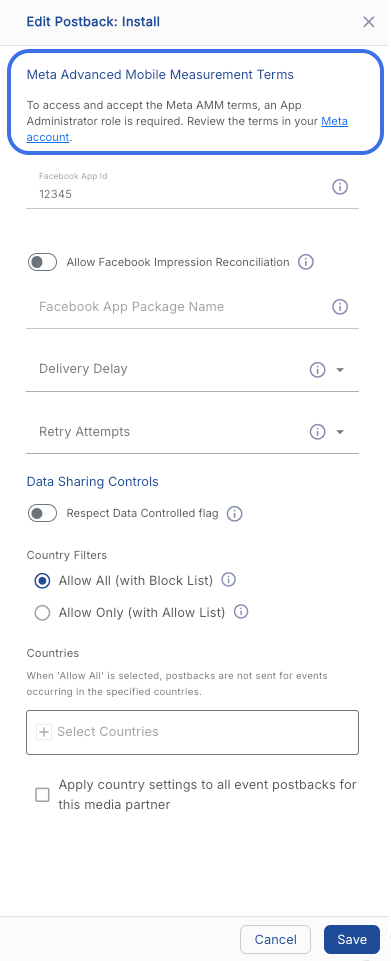
- Select Install > ⚙ (Edit).
- Enter the Facebook App ID.
- Check Allow Facebook Impression Reconciliation. (checked by default)
- Enter the Facebook App Package Name.
- Select a Delivery Delay.
- Select the number of Retry Attempts.
- Click Save.

Meta AMM:
Meta has re-enabled Advanced Mobile Measurement (AMM) reporting. We now are able to share attributed last touch information in non-aggregated form with advertisers who have signed Meta’s AMM terms. This update will enable app advertisers to measure ad performance more precisely within their own analytics and business intelligence tools, with inclusion of attributed Meta ads data in MMPs’ row level reporting. If you are interested in signing Meta’s Advanced Mobile Measurement Terms, you can do so via the Facebook Install Postback configuration.
In order to access/accept the Advanced Mobile Measurement Terms, Administrator role for an App is required.
- For more information on app roles, see this doc.
- Only App Administrators are able to modify app roles. For more information on how to manage roles for an app, see this Help article.
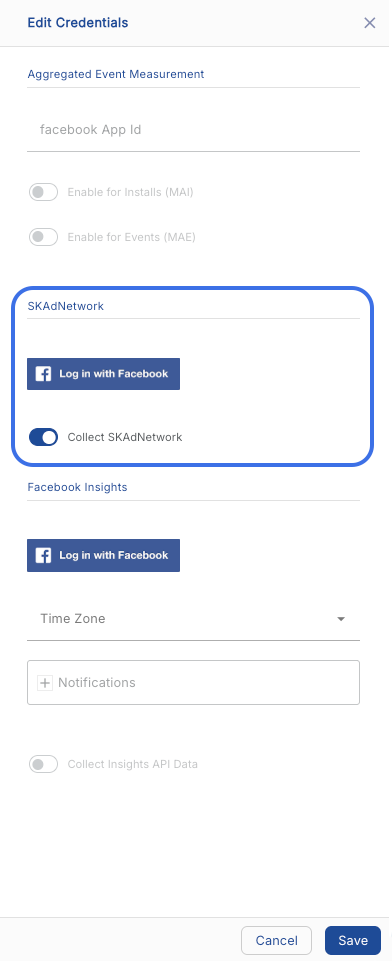
Partner Configuration – SKAdNetwork:
The network partner configuration section provides the ability to turn on or off SKAdNetwork Reporting.
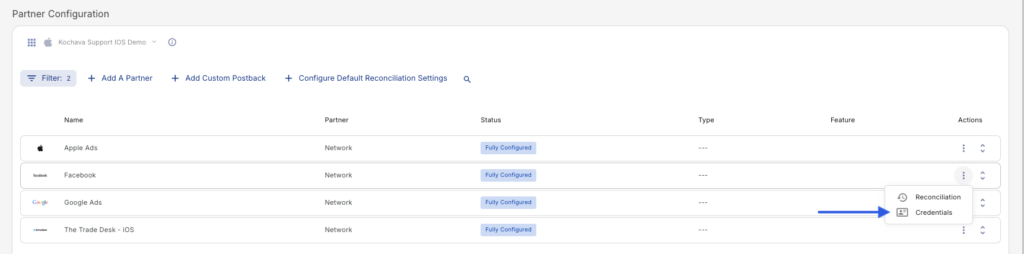
- Click on the Partner Configuration Tools (⋮).
- Click Credentials.
- Select Log in with Facebook.
- Toggle COLLECT SKAdNetwork to ON.
- Click Save.
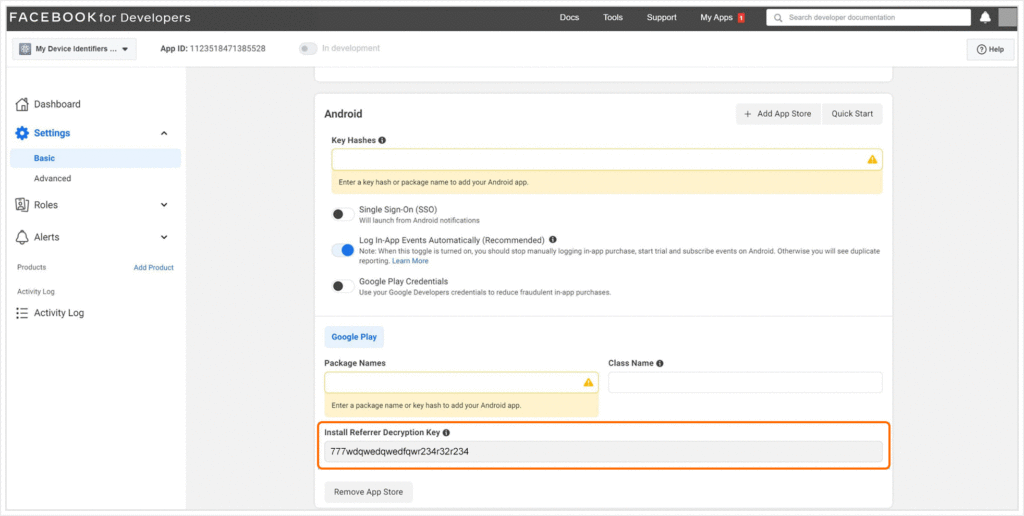
Facebook Install Referrer Decryption Key:
The network partner configuration section provides the ability to enter a Facebook Install Referrer Decryption Key.
Meta Install Referrer (MIR) is a specifically Android solution for measurement which attributes views and clicks from ads on Meta apps to corresponding app downloads within Google Play Store as well as, a third party app store. MIR supports click-through attribution that occurs in the same session, installs where a users viewed an ad but installed the app later (not same-session) as well as, view-through attribution. With the use of MIR, Kochava’s SDK can attribute activity to users that see ads on Meta apps and either directly or eventually clicks through to convert and install.
For more information on expanding the use of Install referrer, using MIR within the Kochava SDK, refer to our support documentation
Locating the Install Referrer Decryption Key in Facebook:
- Sign in to your Facebook for Developers dashboard.
- Select My Apps from the right side of the top menu bar and select the appropriate app.
- On the left sidebar menu, select Settings > Basic.
- Locate the Android section in the main panel.
- Locate the field labeled Install Referrer Decryption Key in the Google Play section.
- Copy the Install Referrer Decryption Key.
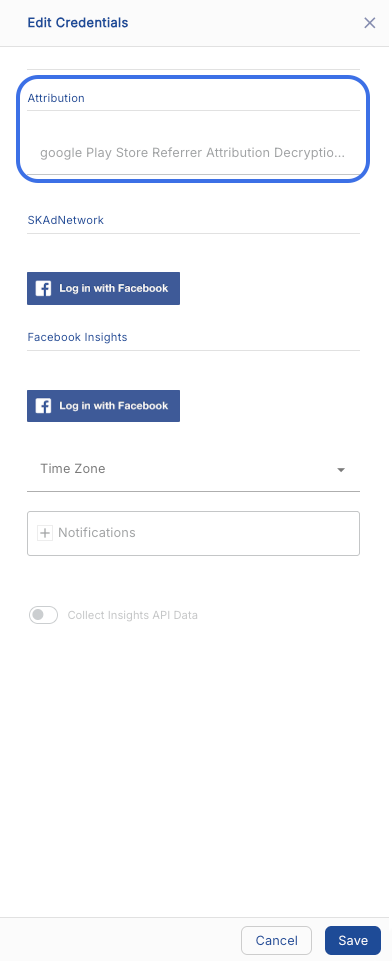
Entering the Decryption Key in Kochava:
- Click on the Partner Configuration Tools (⋮) button.
- Click Credentials.
- Enter the Google Play Store Referrer Attribution Decryption Key.
- Click Save.
Reengagement Configuration
The information within this section provides the steps necessary to establish a reengagement campaign. If a reengagement campaign does not need to be created, the information in this section may be disregarded.
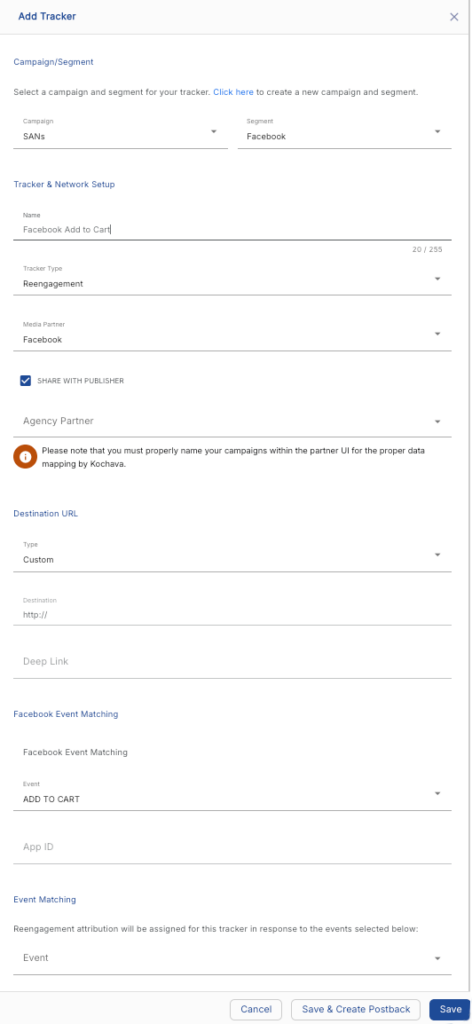
Create a Reengagement Tracker:
- Click + Add (Tracker).
- Enter a Tracker Name.
- Select Tracker Type > Reengagement.
- Select Media Partner > Facebook.
- Select an Agency Partner. (optional)
- Select the Facebook Event that will map to the selected Kochava event.
- Enter the Facebook App ID.
- Add Reengagement Event.
- Click Save (If no further trackers need to be created).
- Click Save & Add Another Tracker (If additional events need to be created).
- Click Save & Create Postback (to navigate directly to the Partner Configuration page).
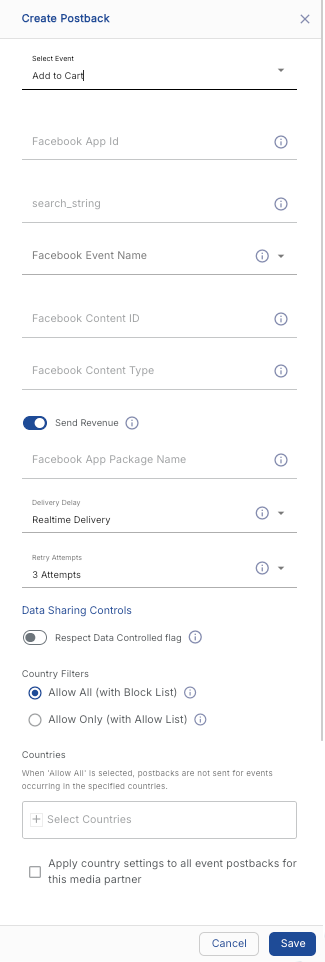
Post-install Event Postback Configuration:
.
- Select App Configurations > Partner Configuration.
- Expand the Facebook Partner Configuration.
- Select + Add Postback.
- Select desired Event.
- Enter the Facebook App ID.
- Enter the Facebook Event Name.
- Enter the Facebook Content ID.
- Enter the Facebook Content Type.
- Toggle Send Revenue. (optional)
- Enter the Facebook App Package Name.
- Toggle Respect Data Controlled Flag. (optional)
- Select the Delivery Delay. (optional)
- Select the number of Retry Attempts. (optional)
- Select the Delivery Method. (optional)
- Click Save.
App Aggregated Event Measurement (AEM):
Kochava supports clients that wish to leverage the optimized system performance of iOS 14.5+ campaigns that use Aggregated Event Measurement as the campaign attribution method. Refer to Meta’s support documentation for more information about the AEM program. Advertisers need to complete the following to enable support on Kochava:
AEM for Installs (MAI)
- Enable relevant settings in Privacy Profile or select ‘Modeled Attribution’ to send Attribution Data Points such as IP and User Agent to Meta.
- Alert Meta that your App supports AEM for Installs via Partner Configuration > Facebook Credentials.
- Enable Modeled Lookback Windows for clicks and impressions to allow AEM claims to be surfaced within Kochava.
AEM for Events (MAE)
- Implement and enable the _Deeplink event. For more information refer to our support documentation.
- Configure a Facebook reengagement tracker for the _Deeplink event using fb_mobile_activate_app as the Facebook Event Name.
- Configure a Facebook Postback for the _Deeplink event using:
- fb_mobile_activate_app as the Facebook Event Name.
- Delivery Method drop-down set to All.
- Ensure that a Facebook postback is configured with the Delivery Method drop-down set to All for all reengagement conversion events.
- Enable relevant settings in Privacy Profile or select ‘Modeled Attribution’ to send Attribution Data Points such as IP and User Agent to Meta
- Alert Meta that your App supports AEM for Events via Partner Configuration > Facebook Credentials.
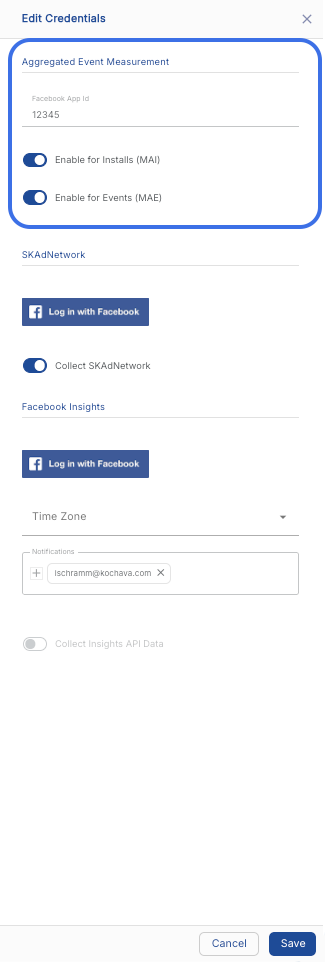
Facebook AEM Credentials
A valid Facebook App ID must be entered and the MAI and/or MAE toggles must be enabled to notify Meta that your app supports AEM.
- Log in to Kochava.
- Select the desired Account and App.
- Select App Configurations > Partner Configuration.

- Locate the Facebook Configuration.
- Click Partner Configuration Tools (⋮) > Credentials.
- Enter the Facebook App ID.
- Enable MAI for installs.
- Enable MAE for events.
- Click Save.
Custom Event Optimization (CEO)
When configured Kochava will send the non Facebook Standard event name being received which Facebook can use for campaign optimization. Please refer to the Facebook support document About Facebook App Event Optimization for additional information.
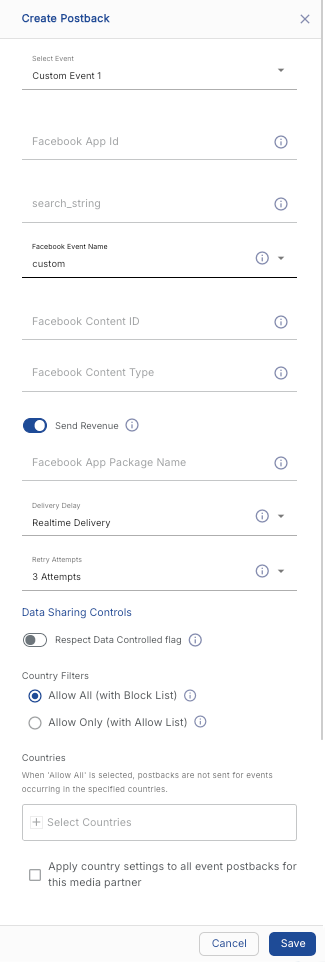
CEO Setup
- Select App Configurations > Partner Configuration.
- Expand the Facebook Partner Configuration.
- Select the desired Event.
- Enter the Facebook App ID.
- Select Facebook Event Name > custom.
- Click Save.
Facebook Dynamic Ads
Facebook Dynamic Ads are similar to other ads within Facebook, Instagram, Messenger and Audience Network. Instead of creating an individual ad for each product, and ad template that automatically uses images and details from a data feed for the advertisement. Dynamic ads use a Facebook pixel or SDK to display ads to people who have already shown interest or taken an action on an app.
- Send Kochava the three required events:
| Event Name | Description |
|---|---|
| fb_mobile_content_view | When a person has viewed a product. |
| fb_mobile_add_to_cart | When a item has been added to the cart. |
| fb_mobile_purchase | When a item/items have been purchased. |
- Send Kochava the required parameters:
| Field Name | Description | Type | Required |
|---|---|---|---|
| fb_content_type | either product or product_group. | string | yes |
| fb_content_id | The product or product group IDs. String containing a JSON-encoded array of ids. | string | yes |
| _valueToSum | Value of the product purchased. | string | no |
| fb_currency | Currency of the product or purchase amount. | string | no |
View Through Attribution for Advantage + App Campaigns
Beginning the week of February 20, 2023, Facebook started to bring back View Through attribution for Mobile App Install on Android and non-SKAN iOS campaigns. Currently, Facebook only supports 1-Day Click attribution for Mobile App Install Optimization goal within Advantage+ App Campaigns, but with this update, Facebook will begin supporting 1 Day Click + 1 Day View attribution as well.
Additionally, Facebook is launching a feature where they can automatically select the attribution window that is most relevant based on the app’s historical performance. For example if you typically optimize towards 1 Day Click, then we have that be the default attribution, or if you typically optimize for 1 Day View, then that will be the choice.
If you would ever like to change the default attribution for Mobile App Installs, you can do so by changing the attribution setting selection in app settings. This selection will then apply for all Advantage+ App Campaigns with Mobile App Install optimization goal for the selected app. Please see the below Help Center articles for how to access these settings.
- About App Advertising Settings in Business Manager
- Permissions Required to View and Edit App Advertising Settings
The feature is gradually rolling out to all ad accounts globally and you can expect to have access no later than the week of April 10, 2023.