The following document defines the process for creating a Google Ads reengagement campaign.
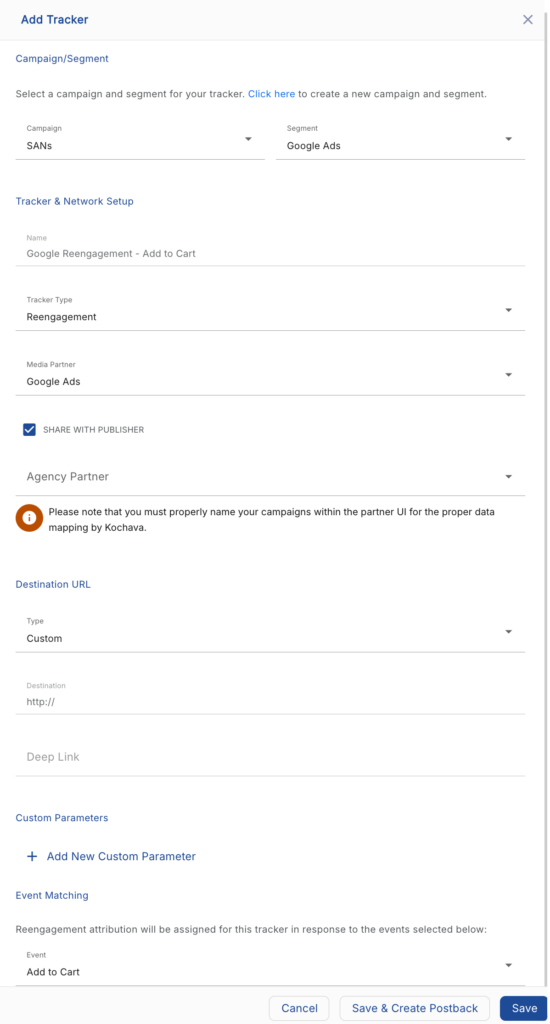
Create a Reengagement Tracker
- Select Engagement > Campaign Manager.
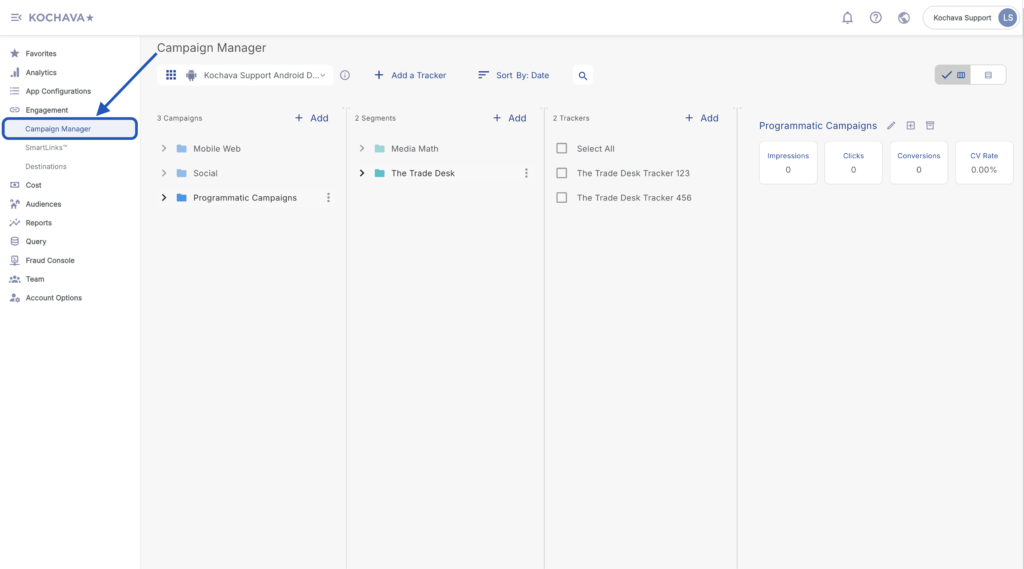
- Select + Add a Tracker.
- Enter a unique Tracker Name.
- Select the Tracker Type > Reengagement.
- Select Media Partner > Google Ads.
- Select the Destination URL Type > Custom. (default setting)
- Enter a Deep Link. (optional)
- Enter any Custom Parameters. (optional)
- Add desired reengagement Event.
- Click Save if no additional trackers need to be created.
- Click Save & Add Another Tracker if additional trackers need to be created.
- Click Save & Create Postback. (To navigate directly to the Partner Configuration page)
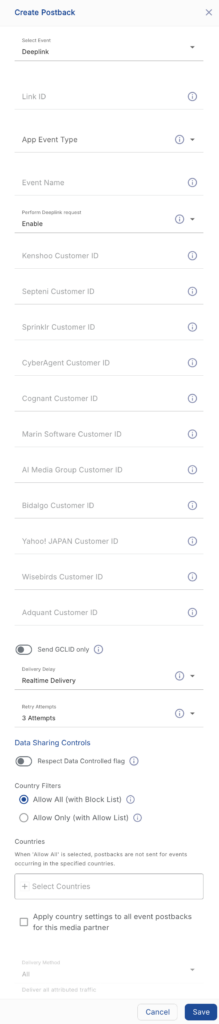
Create a Reengagement Postback
Post-install events sent to Google must be designated with the corresponding Google App Event Type using the drop down menu within the Partner Configuration UI. Google has eight event types to select:
- Custom
- Session Start
- In_App Purchase
- View Item List
- View Item
- View Search Results
- Add to Cart
- eCommerce Purchase
- Select App Configurations > Partner Configuration.
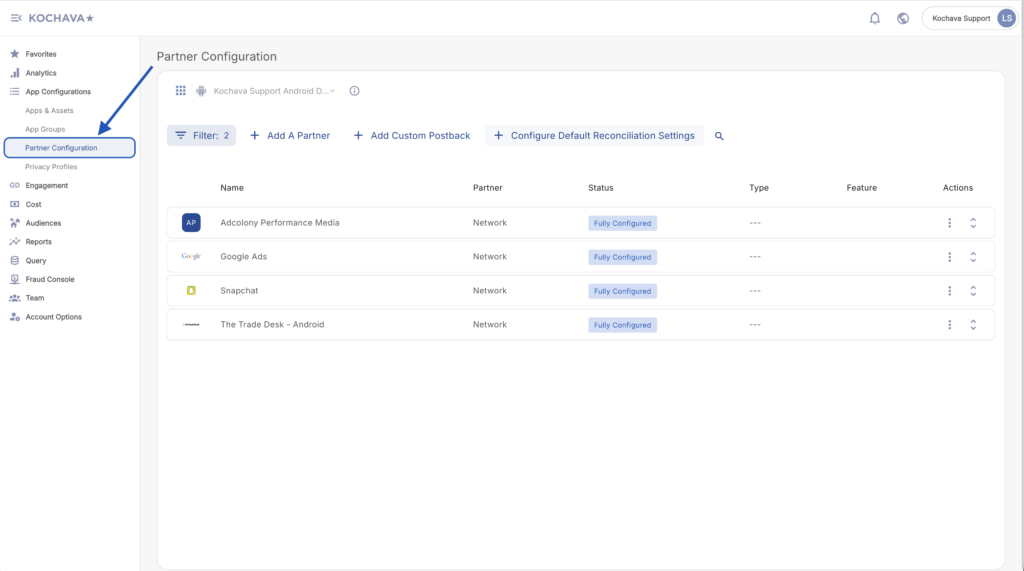
- Expand the Google Ads Partner Configuration.
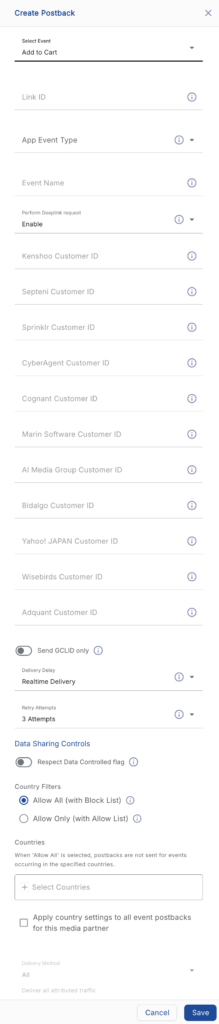
- Click + Add a Postback.
- Select the desired Event.
- Enter the Link ID.
- Select the App Event Type.
- If using the Custom Event Type, Enter an Event Name. (optional)
- Enter the Kenshoo Customer ID. (optional)
- Enter the Septini Customer ID. (optional)
- Enter the Sprinkler Customer ID. (optional)
- Enter the Cyberagent Customer ID. (optional)
- Enter the Cognant Customer ID. (optional)
- Enter the Marin Software Customer ID. (optional)
- Enter the AI Media Group Customer ID. (optional)
- Enter the Bidalgo Customer ID. (optional)
- Enter the Yahoo! Japan Customer ID. (optional)
- Enter the Wisebirds Customer ID. (optional)
- Enter the Adquant Customer ID. (optional)
- Select the Delivery Delay.
- Select the number of Retry Attempts.
- Select the Delivery Method.
- Click Save.
Deeplinks & Google Ads Web to App Connect
Google Ads requires click parameters to attribute third-party app conversions resulting from non-app campaign ad clicks. If auto-tagging and deeplinking are enabled in Google Ads, Google will append the GCLID (Google Click Identifier) to the landing page url. Once redirected into the app, the GCLID can be extracted by Kochava, and passed to Google Ads, allowing Kochava to attribute app conversions to a specific ad campaign click.
Additionally, Google has introduced a new cohort identifier called gBraid, which enables privacy safe measurement under ATT of iOS app conversions driven by Search, Shopping, Display, & Performance Max campaigns . The gBraid parameter is also appended to the landing page url, allowing Kochava to attribute activity to a device in a group of devices, without identifying that particular user.
- Implement and enable _Deeplink event. For more information refer to our support documentation.
- For details on enabling auto-tagging, refer to Google’s support documentation.
- For more information on gBraid, refer to Google’s overview and set up.
Google Universal App Campaign for Engagement Setup
Linking Google UAC to Google Play:
- Log in to Google Ads Account.
- Click Tools>Setup>Linked accounts.
- Click Google Play>Details.
- If Google Play Developer and Ads Account has not been linked, Click Link.
- Enter the email address of the Google Play Developer administrator.
- Click Send.
- Once the Google Play Developer administrator has approved the request, the accounts will be linked.
- If Google Play Developer and Ads Account have been linked, Click “+” to link additional accounts.
- Enter the email address of the Google Play Developer administrator.
- Click Send.
- Once the Google Play Developer administrator has approved the request, the accounts will be linked.
- If Google Play Developer and Ads Account has not been linked, Click Link.
A. Enter the email address of the Google Play Developer administrator.

A. Enter the email address of the Google Play Developer administrator.
Creating a Deeplink Event:
For Google to track UACe campaigns, Google requires the advertiser to have a _deeplink event that has the deeplink listener included in that call. Once this is done correctly, Kochava will parse out the GCLID from the _deeplink event metadata and pass it on to Google. The GCLID is a parameter that is appended to the end of a deeplink URI and helps Google optimize the UACe campaigns.
- Select App Configurations > Partner Configuration.
- Expand the Google Ads Partner Configuration.
- Select + Add a Postback
- Select the Deeplink Event.
- Enter the Link ID.
- Select App Event Type > Session Start.
- Enter the Event Name. (optional)
- Enter the Kenshoo Customer ID. (optional)
- Enter the Septini Customer ID. (optional)
- Enter the Sprinkler Customer ID. (optional)
- Enter the Cyberagent Customer ID. (optional)
- Enter the Cognant Customer ID. (optional)
- Enter the Marin Software Customer ID. (optional)
- Enter the AI Media Group Customer ID. (optional)
- Enter the Bidalgo Customer ID. (optional)
- Enter the Yahoo! Japan Customer ID. (optional)
- Enter the Wisebirds Customer ID. (optional)
- Enter the Adquant Customer ID. (optional)
- Select the Delivery Delay.
- Select the number of Retry Attempts.
- Click Save.