NOTE: Traffic Verifier must be enabled to filter the traffic associated with the Site IDs, IP Addresses and/or Device IDs added to the Account Blocklist. For more information about enabling Traffic Verifier, refer to our Traffic Verifier support documentation.
Fraud Console Interface
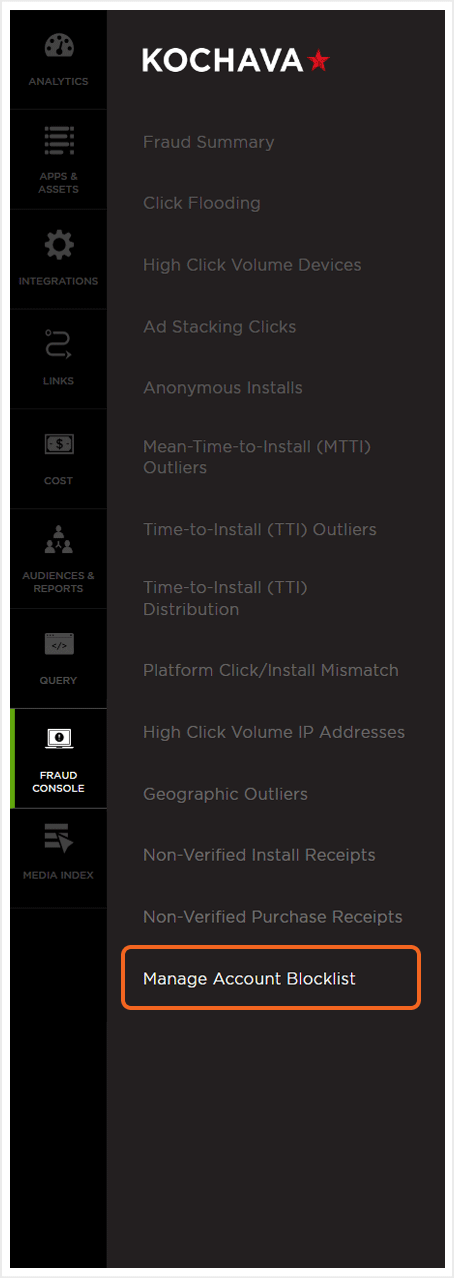
- Log in to Kochava.
- Select the desired Account.
- Select Fraud Console > Manage Account Blocklist.
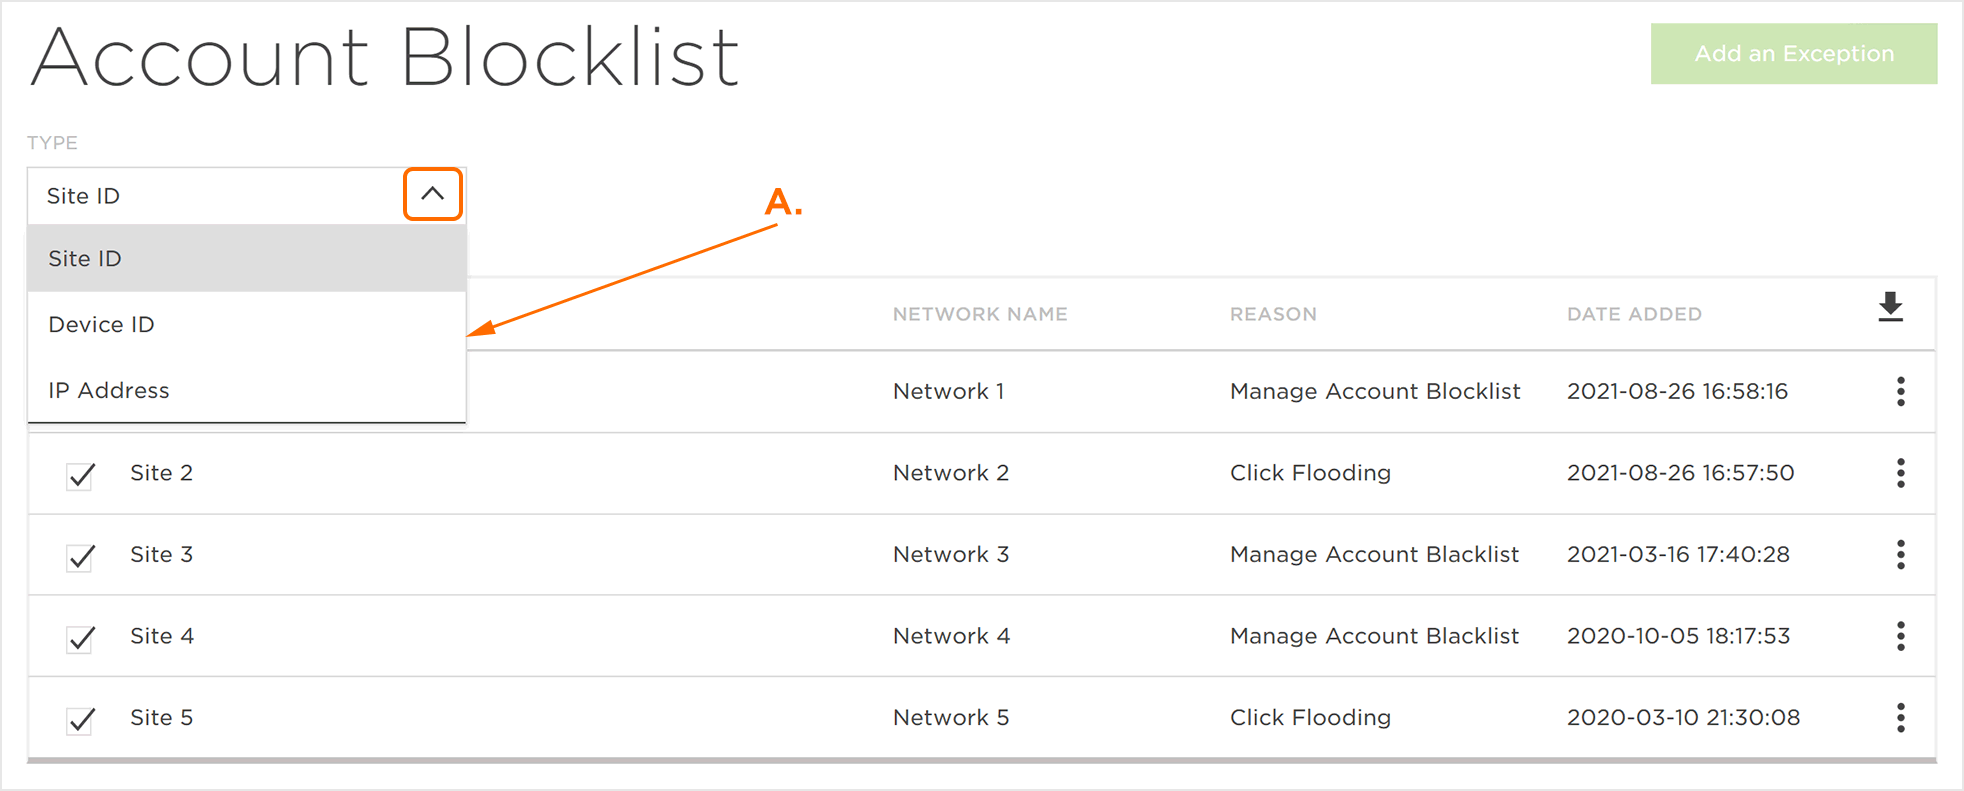
Manage Account Blocklist
Once site IDs, IP addresses or device IDs have been added to the Account Blocklist through one of the Fraud Console pages, blocklisted IDs may be viewed, organized and removed through the Account Blocklist page. Exceptions may also be added manually to the Account Blocklist.
Blocklist Categories:
The sites within the Account Blocklist can be displayed by Site ID, Device ID or IP Address.
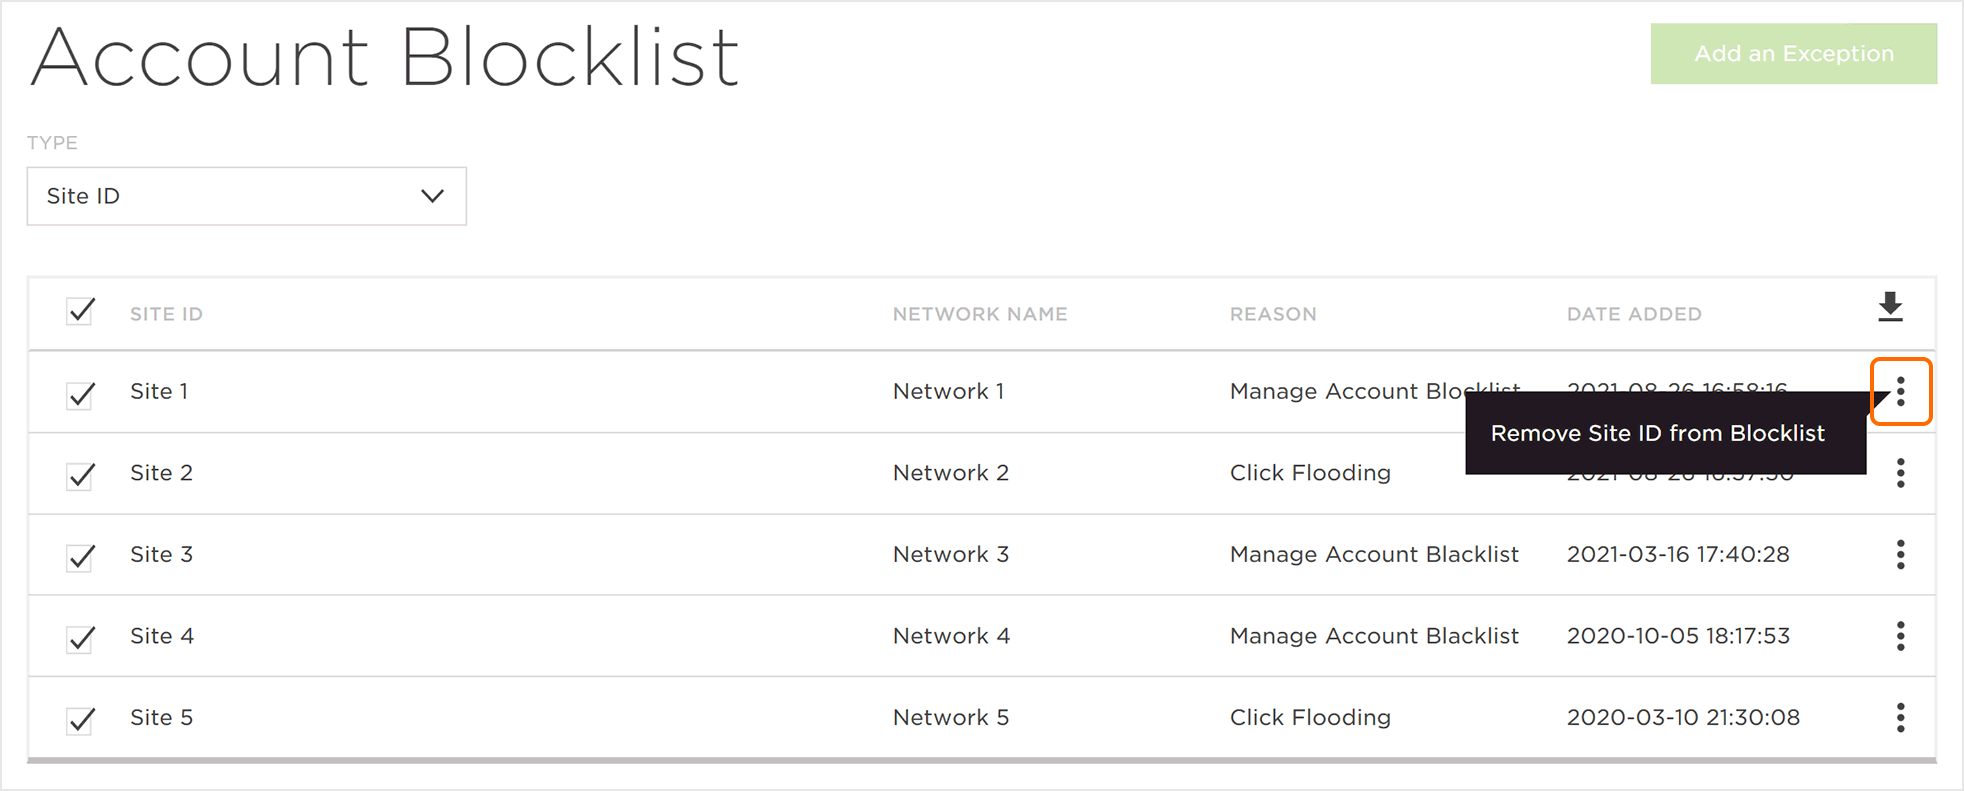
Remove Site from Blocklist
Once a site, device ID or IP address has been added to the Account Blocklist through one of the Fraud Console pages, the site may be removed.
- Locate the desired Site, Device ID or IP Address.
- Click the Remove Site ID from Blocklist.
NOTE: Removing the site from the Blocklist may take up to one week to complete.
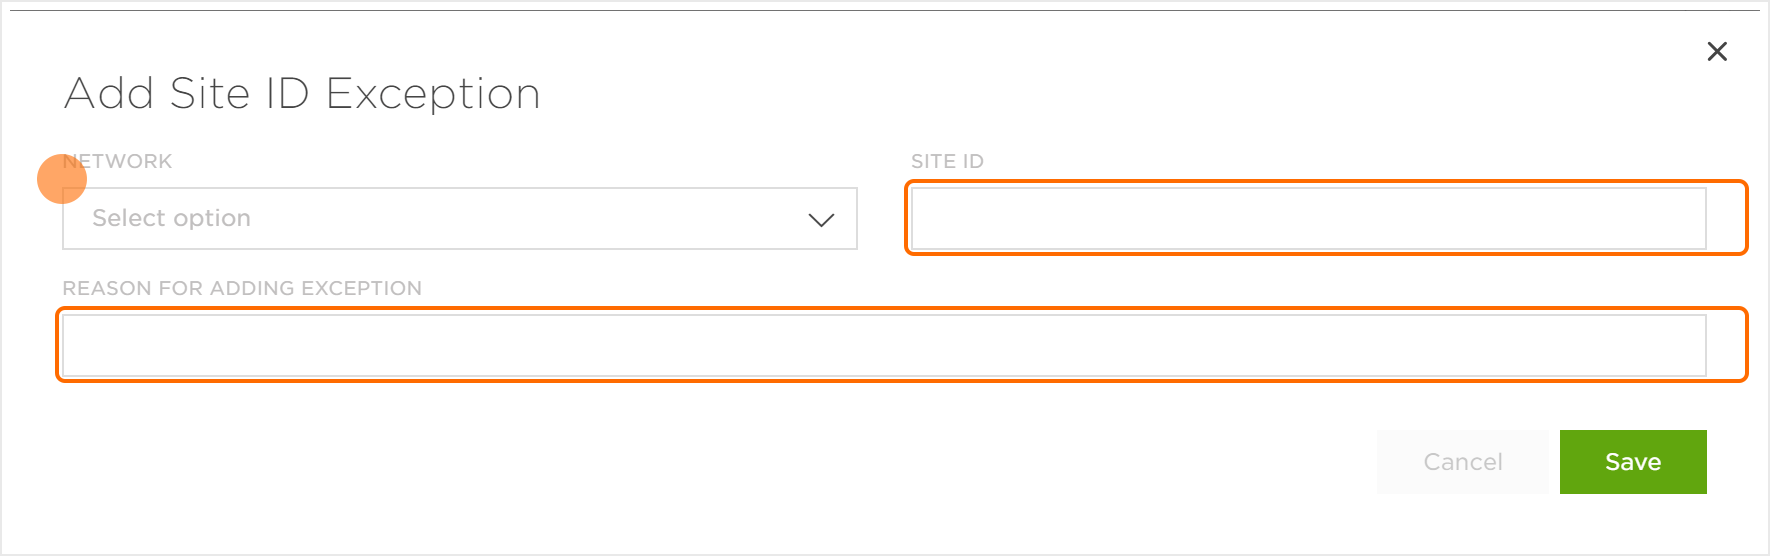
Adding an Exception
Sites may be added manually to the Account Blocklist.
- Click Add Exception.
- Select a Network.
- Enter a Site ID.
- Enter a Reason for Adding Exception.
- Click Save.