Learn how to create and configure Pinterest campaigns in Kochava with this comprehensive guide. Follow these step-by-step instructions to streamline tracking, postbacks, and campaign optimization for your Pinterest ads.
Data Needed Before Beginning Process:
- Pinterest Account ID
- App Store App ID
- Pinterest Authentication Token
- Get your token within Pinterest Ads Manager by visiting Conversions > Set Up API. More info can be found here.
Use Cases for Pinterest Campaign:
- An app marketing campaign with Pinterest has been created.
Create a Pinterest Campaign
- Log in to Kochava.
- Select the desired Account and App.
- Select Engagement > Campaign Manager.
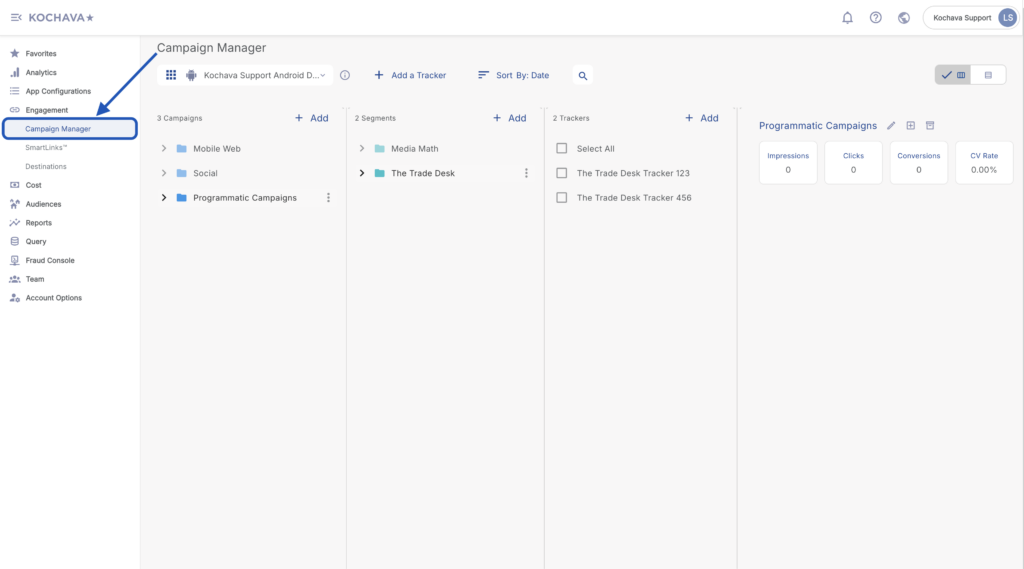
- Click + Add (Tracker) or Select Segment Tools (⋮) > Add a Tracker.
- Enter the Tracker Name.
- Select Tracker Type > Acquisition. (default setting)
- Select Media Partner:
- Pinterest — iOS
- Pinterest — Android
- Select an Agency Partner. (optional)
- Select the Destination URL Type:
- Custom
- Google Referrer (Android Only)
- Enter or update the Install Destination URL.
- Enter a Deep Link. (optional)
- Enter Custom Parameters. (not required)
- Click Save (if no further trackers need to be created).
- Click Save & Add Another Tacker (if additional trackers need to be created).
- Click Save & Create Postback (to navigate directly to the Partner Configuration page).
Create a Postback Configuration
- Select App Configurations > Partner Configuration.
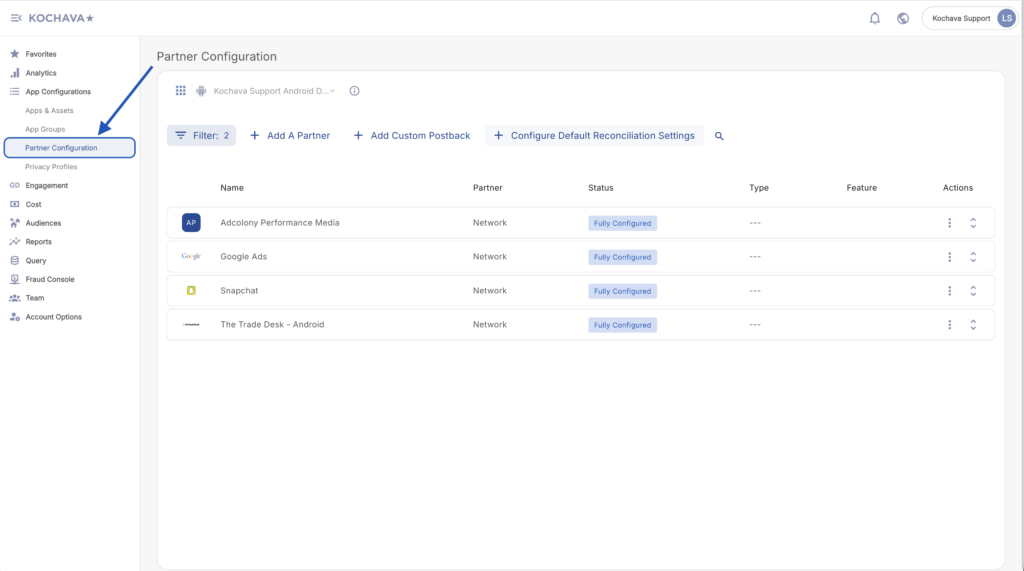
- Click Add a Configuration.
- Select Network Partner:
- Pinterest — iOS
- Pinterest — Android
- Click Go.
- Select Install > 🖉 (Edit).
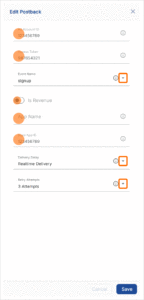
- Enter the Ad Account ID. (obtained from Pinterest)
- Enter the Access Token.
- Select the desired Event Name. This will be mapped to the corresponding conversion event within Pinterest.
- Check Is Revenue. (optional)
- Enter the App Name.
- Enter the Store App ID.
- Select the Delivery Delay. (optional)
- Select the number of Retry Attempts. (optional)
- Select the Delivery Method.
- Click Save.