NOTE: Before the Twitter reengagement campaign can be setup within Kochava, ensure that a Twitter Ads account has been created, target events within Twitter have been created and at least one Twitter Ads account has been authenticated within Kochava. For more information on authenticating with Twitter, refer to our Create a Twitter Campaign support documentation.
NOTE: The reengagement campaign set up in Kochava sends event data to Twitter in order to build audiences and/or retarget known users and to know when those efforts are successful. If no corresponding reengagement campaigns are setup within Twitter, Kochava will only send event data to Twitter for audience construction and targeting, but will not “convert” based on reengagement campaigns.
Create a Kochava Tracker
- Log in to Kochava.
- Select the desired Account and App.
- If not already created, create a new Twitter campaign. For more information about creating campaigns, refer to our Create an Install Campaign support documentation.
- Enter a Tracker Name.
- Select Segment Tools (⋮) > Add a Tracker.
- Select Tracker Type > Reengagement.
- Select a Network > Twitter:
- Twitter — iOS
- Twitter — Android
- Select the Twitter Account to associate with this tracker.
- Enter the app Apple ID (iOS) or Bundle ID (Android). For further information about locating the Bundle ID, click here.
- Select the Target Event.
- Select the Post-Engagement Attribution Window.
- Select the Post-View Attribution Window.
- Select the Event Matching Event.
- Click Submit. (If no further trackers need to be created).
- Click Save and Add Another Tracker. (If additional trackers need to be created).
- Click Save & Create Postback. (To navigate directly to the Partner Configuration page).
NOTE: Multiple Twitter accounts may be selected.
NOTE: In the Kochava UI (User Interface) the terms “Package Name” and “Bundle ID” are both used to represent the app ID. The same ID number should be used for both fields.
NOTE: The Twitter Target Event should match the event that will be tracked through Kochava. If there is not an exact match for the events listed in the Event Matching section, choose the closest match to maintain a handle on changes to event naming convention between Twitter/Kochava.
NOTE: By default, the Post-Engagement Attribution Window is set to 14 days.
NOTE: By default, the Post-View Attribution Window is set to 0 days. The Attribution Window setting selected here is reccomended to match the attribution window that is within Twitter. If the attribution windows do not match, there will be discrepancies in the data reported.
NOTE: Reengagement attribution will be assigned for the created tracker in response to the event that is selected within in the Event Matching drop-down.
![]()
B. Select the Twitter Account(s)
Create a New Kochava Postback Configuration
- Log in to Kochava.
- Select the desired Account and App.
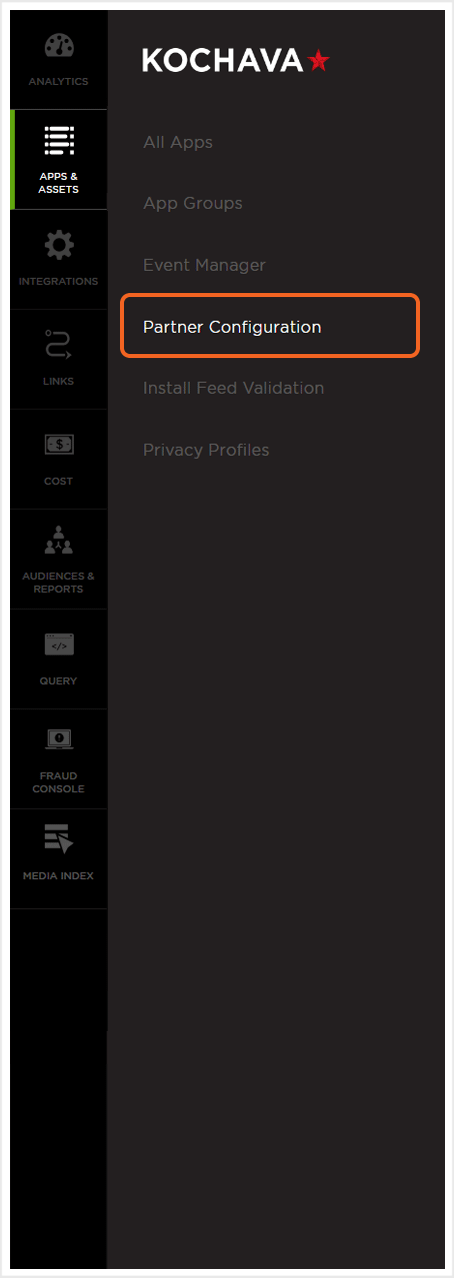
- Select Apps & Assets > Partner Configuration.

- Click Add a Configuration.
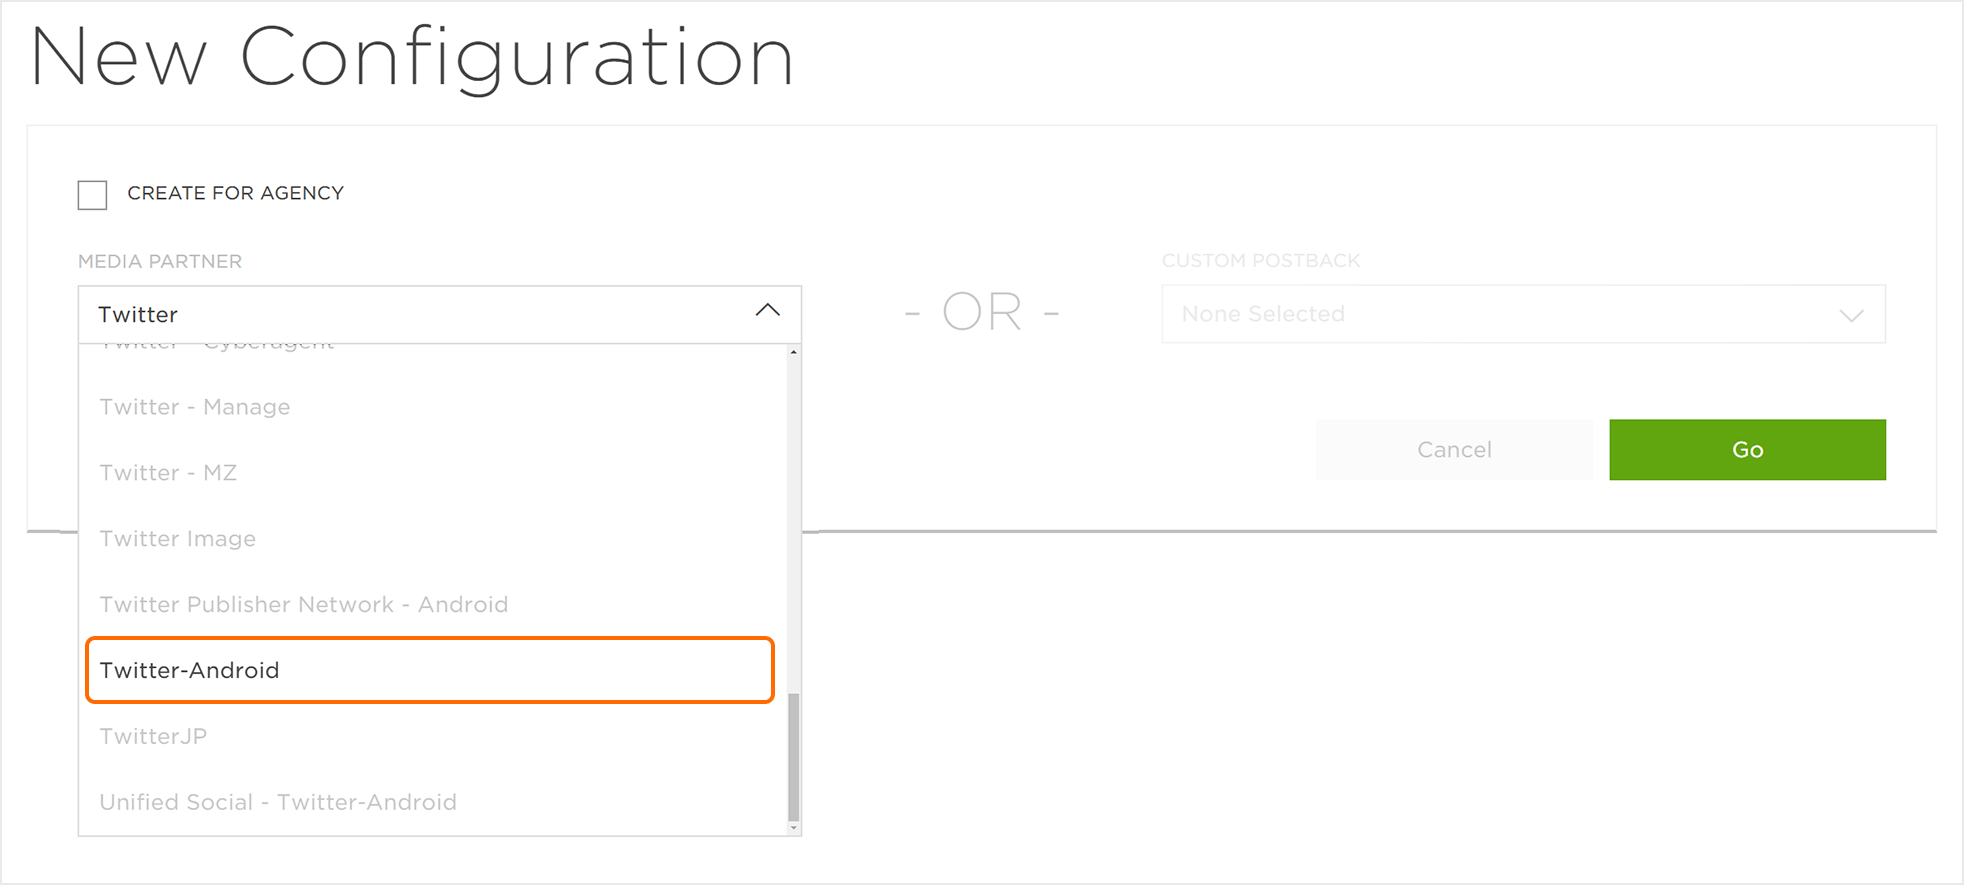
- Select Network Configuration > Twitter:
- Twitter—iOS
- Twitter—Android
- Locate the desired postback event and Select Postback Tools (⋮) > Create.
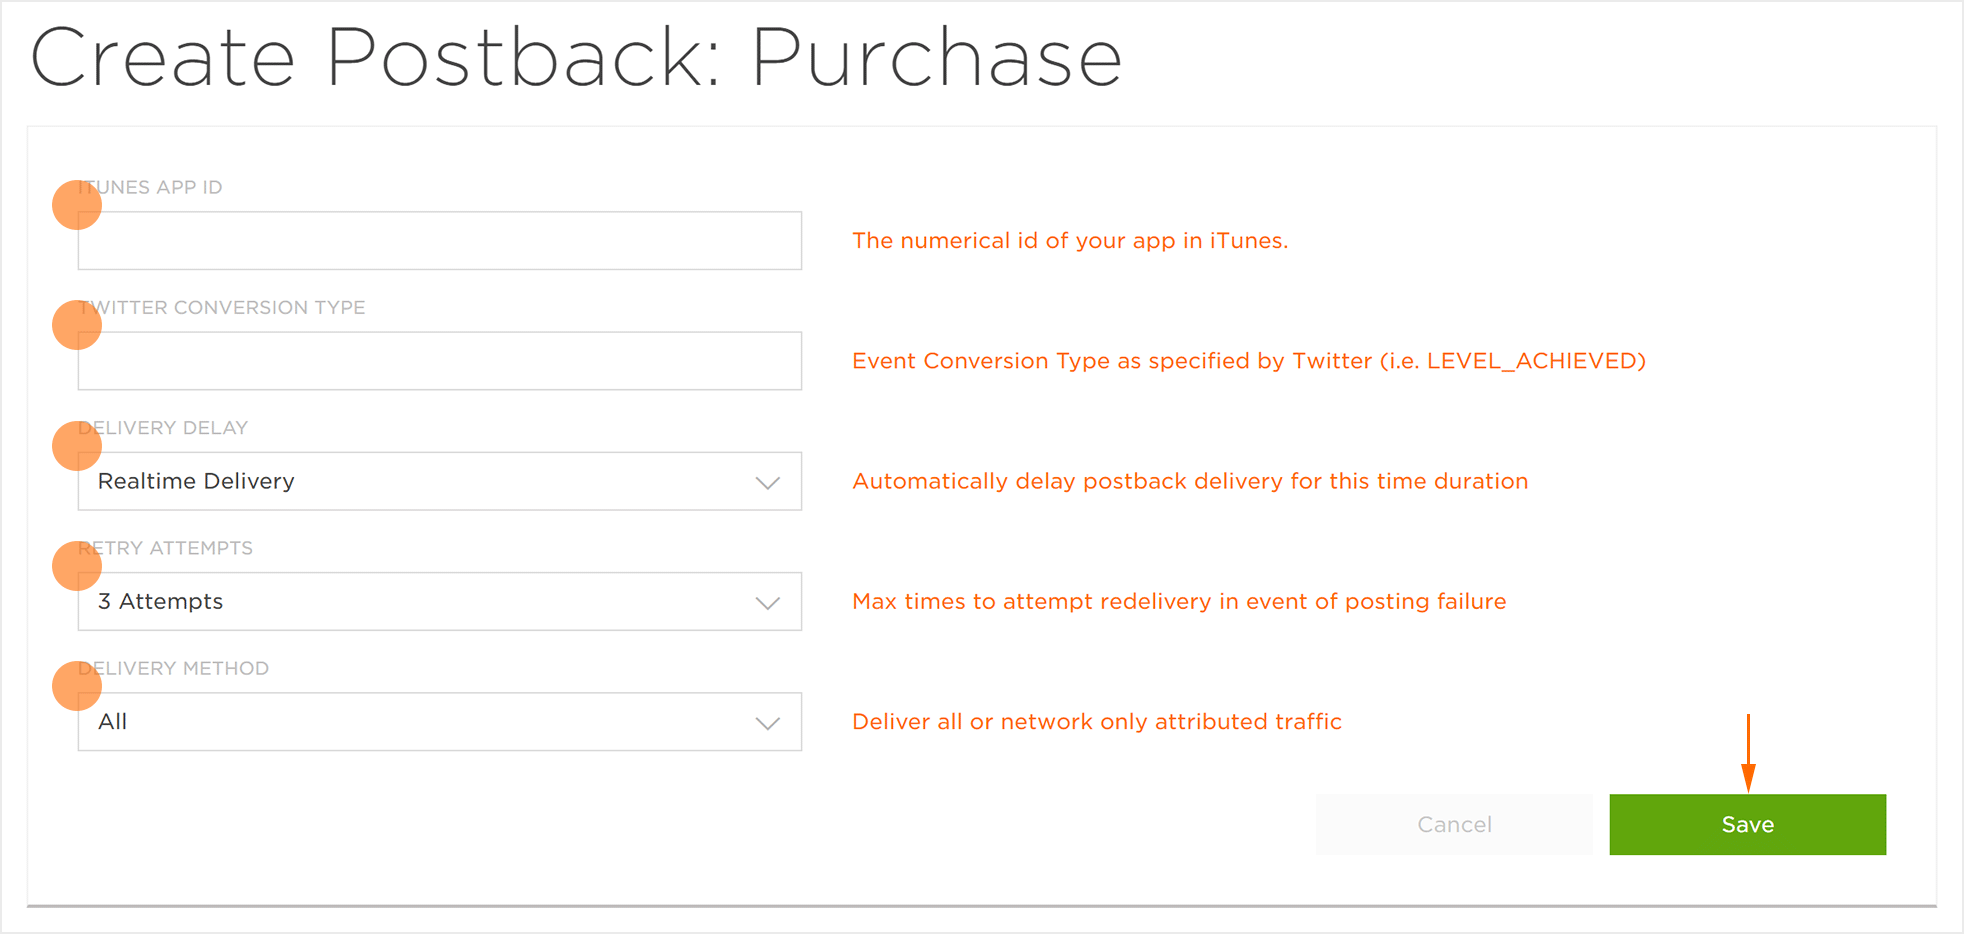
- Enter the App ID:
- iTunes App ID (iOS)
- Package Name (Android)
- Enter the Twitter Conversion Type.
- Select a Delivery Delay.
- Select the number of Retry Attempts.
- Select the Delivery Method.
- Click Save.

NOTE: The Twitter Conversion Type must match the conventions established by Twitter. For a list of Twitter events, click here.
NOTE: By default, the Delivery Delay is set to Realtime Delivery.
NOTE: By default, the number of Retry Attempts is set to 3 Attempts.
NOTE: By default, the Delivery Method is set to All.

