The following document defines the process for creating an Instagram and/or Instagram FMPs (Facebook Marketing Partners) campaign within Kochava.
Data Needed Before Beginning Process:
- Instagram App ID (15 digit id obtained in the Facebook power editor account)
Create a Facebook Campaign
If not previously setup, create a Facebook campaign within Kochava. For more information on creating a Facebook Campaign, refer to our Create a Facebook Campaign support documentation.
Create an Instagram Segment
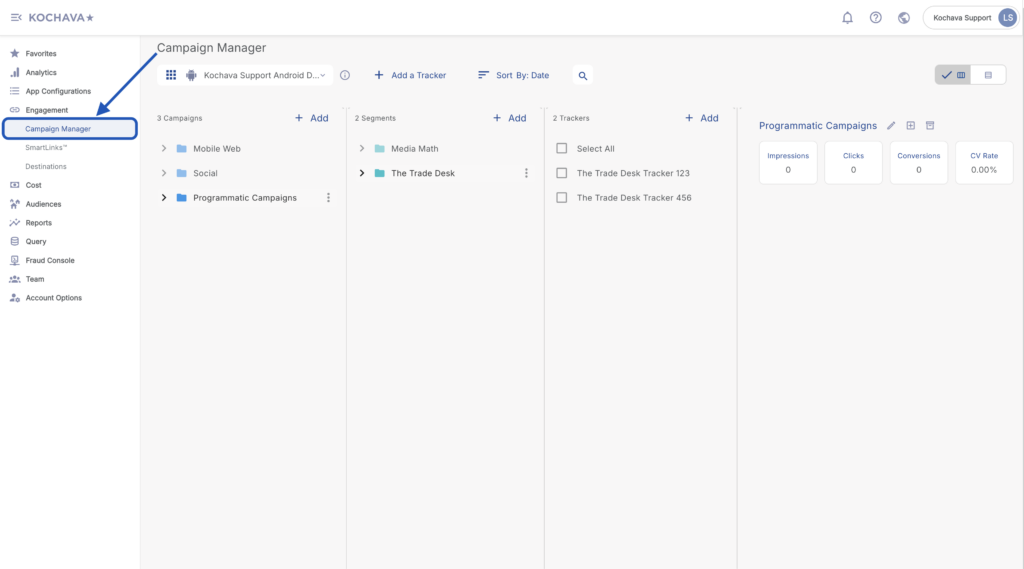
- Log in to Kochava.
- Select the desired Account and App.
- Select Engagement > Campaign Manager.
Create a Tracker
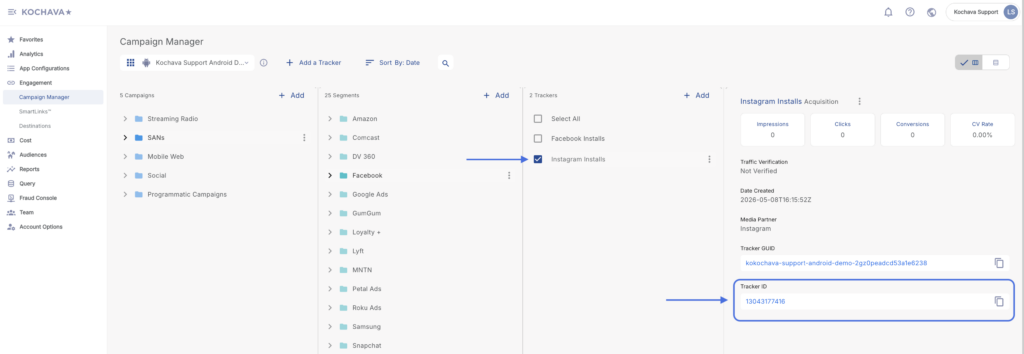
Locate Tracker ID:
- Once a tracker has been created, navigate to Campaign Manager.
- Locate and click on the desired Campaign.
- Select the desired Segment.
- Locate the desired Tracker, and Check the associated selection box.
- Locate and copy the Tracker ID.
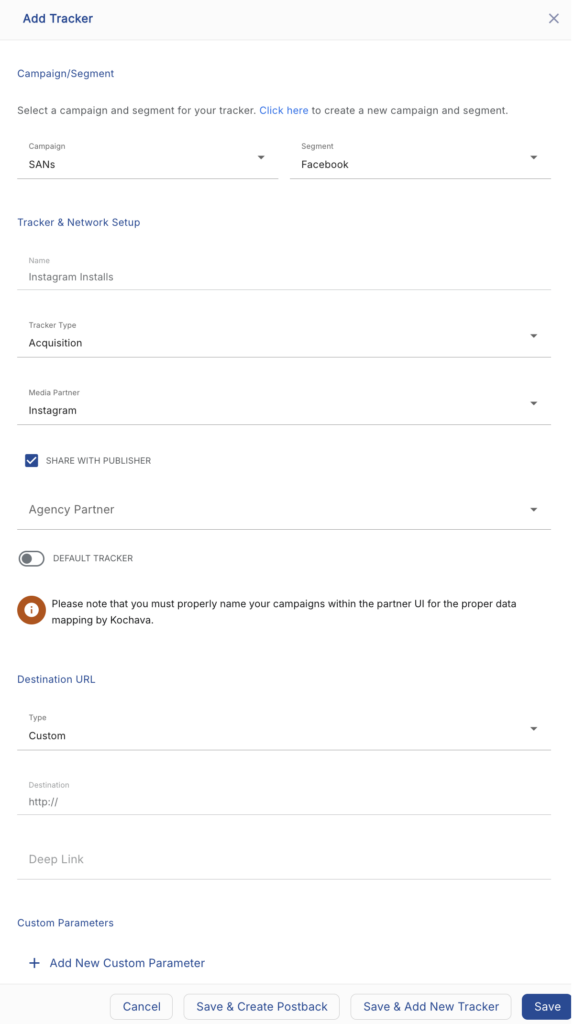
- Select the desired Campaign & Segment, or create new ones.
- Click + Add (Tracker).
- Enter a Tracker Name.
- Select Tracker Type > Acquisition. (default setting)
- Select Select a Network > Instagram.
- Select Default Tracker:
- On
- Off (default)
- Enter a Deep Link. (optional)
- Enter any Custom Parameter(s). (optional)
- Click Submit. (If no further trackers need to be created)
- Click Save & Add Another Tracker. (If additional trackers need to be created)
- Click Save & Create Postback. (To navigate directly to the Partner Configuration page).
Install Postback Configuration
- Select App Configurations > Partner Configuration.
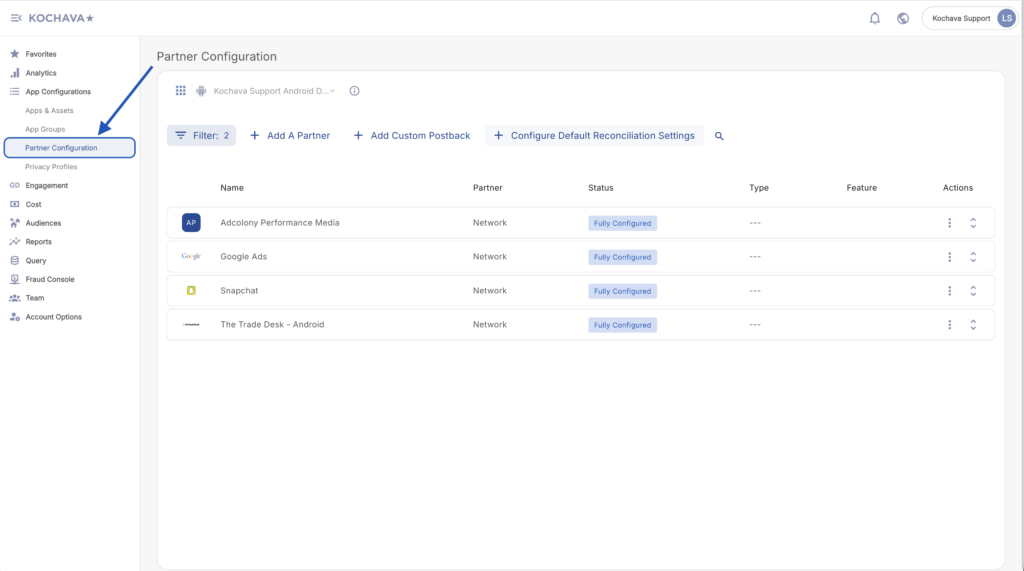
- Click + Add a Partner.
- Select Network Partner > Instagram.
- Click Next.
- Verify Status: Active.
- Click Save.
- Expand the Instagram Partner Configuration.
- Select Install > ⚙ (Edit).
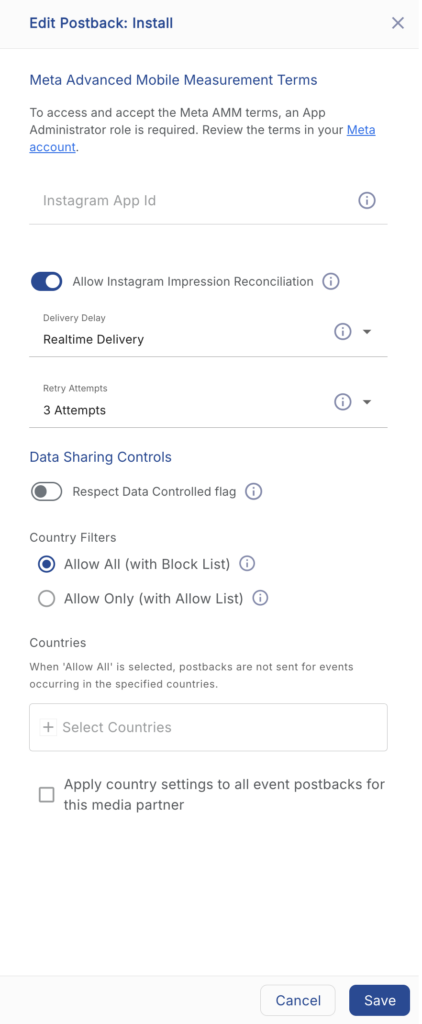
- Enter the Instagram App ID.
- Toggle Allow Instagram Impression Reconciliation. (optional)
- Select a Delivery Delay. (optional)
- Select a Retry Attempts. (optional)
- Click Save.
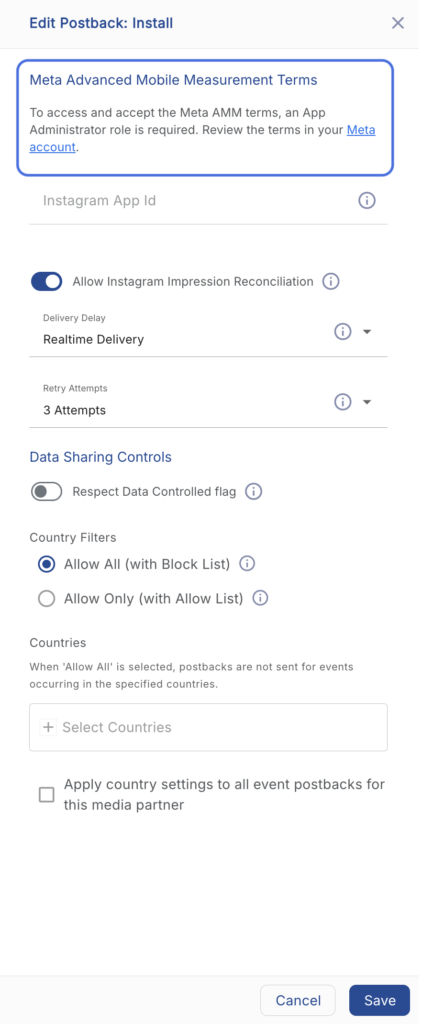
Meta AMM
Meta has re-enabled Advanced Mobile Measurement (AMM) reporting. We now are able to share attributed last touch information in non-aggregated form with advertisers who have signed Meta’s AMM terms. This update will enable app advertisers to measure ad performance more precisely within their own analytics and business intelligence tools, with inclusion of attributed Meta ads data in MMPs’ row level reporting. If you are interested in signing Meta’s Advanced Mobile Measurement Terms, you can do so via the Facebook Install Postback configuration.
In order to access/accept the Advanced Mobile Measurement Terms, Administrator role for an App is required.
- For more information on app roles, see this doc.
- Only App Administrators are able to modify app roles. For more information on how to manage roles for an app, see this Help article.
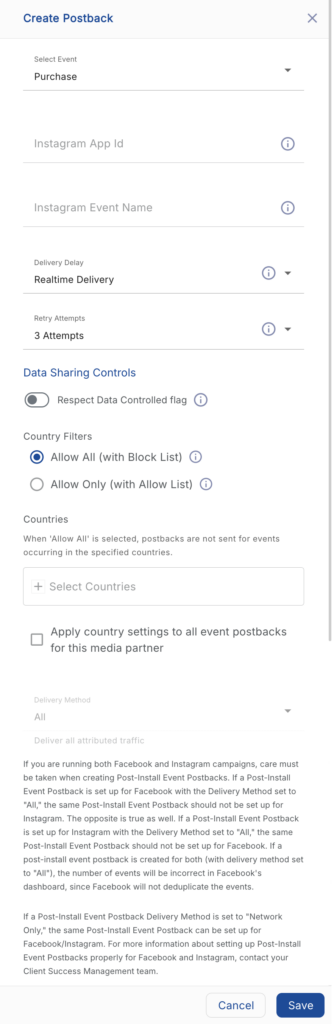
Post-Install Event Postback Configuration
If a Post-Install Event Postback Delivery Method is set to “Network Only,” the same Post-Install Event Postback can be set up for Facebook/Instagram. For more information about setting up Post-Install Event Postbacks properly for Facebook and Instagram, contact your Client Success Management team.
- Select App Configurations > Partner Configuration.
- Locate and expand the Instagram Partner Configuration.
- Select + Add a Postback.
- Select the desired Event.
- Enter the Instagram App ID.
- Enter the Instagram Event Name.
- Select a Delivery Delay. (optional)
- Select a Retry Attempts. (optional)
- Select a Delivery Method. (optional)
- Click Save.