Apple, via their SKAdNetwork framework, will now ingest ad signals and conversion signals, and report back anonymized deterministic attribution data. The following document describes the setup requirements for advertisers to prepare their apps, configure their conversion model, and start viewing SKAdNetwork data in the Kochava dashboard.
SKAdNetwork Certified Partners
To see a list of SKADNetwork certified partners, please refer to the following support document. If you are running or plan to run campaigns through SKAdNetwork with a partner that is not listed, please refer them to the following integration support document.
Prepare Your App to Report Conversions to SKAdNetwork
If Leveraging the Kochava SDK:
Implement minimum SDK version:
mParticle/Kochava Hybrid SDK Kit:
If you are currently leveraging the mParticle/Kochava hybrid SDK kit, and only plan to track install conversions (registerAppForAdNetworkAttribution) in the SKAdNetwork framework, implement the hybrid SDK kit with minimum Kochava iOS 4.1.1. SDK version.
If you plan to leverage the mParticle/Kochava hybrid SDK kit for conversion model support (includes updateConversionValue), please follow the steps outlined in this support doc. Implement the hybrid SDK kit with minimum Kochava iOS 4.2.0. SDK version. With the hybrid kit solution, installs are syndicated via the Kochava SDK, while events are syndicated via the mParticle SDK. For SKAdNetwork tracking, you will need to configure identical events in the Kochava SDK and use a boolean to indicate that the Kochava SDK events should not be sent off the device. This will ensure that the Kochava SDK can utilize the events for conversion model support, while preventing duplication of event feeds.
SKAdNetwork 4.0 Updates
- Now supports Web-to-App Attribution
- Multi-Tier Crowd Anonymity Scale (Low, Medium, High) Privacy Thersholding
- 3 Total Postbacks Available
- New Conversion Values (Fine-Grained (0-63) or Coarse-Grained (3 Values)
- New fixed window Delay Intervals at close of day (0-2, 3-7, & 8-35)
- Availability dependent on crowd anonymity and day interval
- New 4-digit Source Identifier (Campaign ID deprecated):
- Last 2 digits are always available, 3rd and 4th digits subsequently unlocked based on crowd anonymity
Coarse and Fine Conversion Values:
- Fine-Grained Conversion Values — The fine-grained values remain unchanged, in that, they are a 6-bit value providing up to sixty-four (64) combinations (0-63) which can collect user behavior signals and enhance campaign performance.
- Coarse-Grained Conversion Values — As of SKAdNetwork 4.0 the coarse-grained conversion values are new. These values are one of the following, Low, Medium or High and should contain the events that correlate to the value of a user’s in-app activity. These values are present when the attributed conversion values are not high enough to meet the privacy threshold needed to unlock the fine-grained values. The coarse-grained will never be sent in tandem with the fine-grained value.
For more information, Kochava has provided a SKAdNetwork 4.0 Checklist.
Configure Your SKAdNetwork Settings in the Kochava Dashboard
- Log in to Kochava
- Select desired Account.
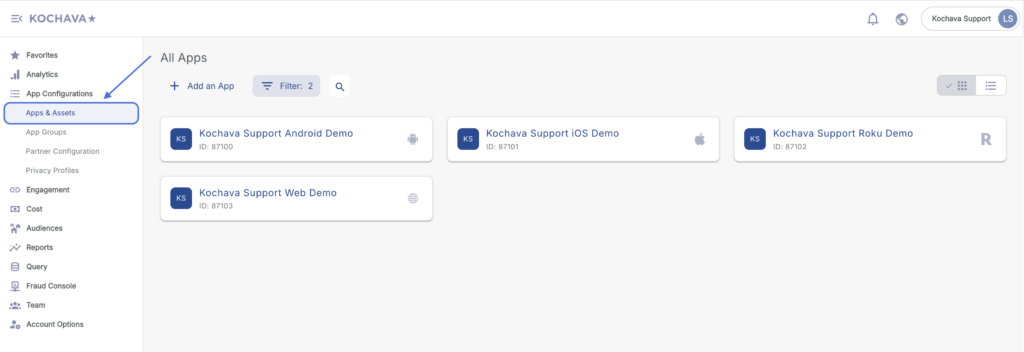
- Navigate to App Configurations > Apps & Assets.
- Select iOS App.
- Select SKAdNetwork tab.
- Toggle Enable SKAdNetwork Reporting.
- Select the Method of Sending Conversion Data to SKAdNetwork:
- Kochava SDK
- Facebook SDK
- Other
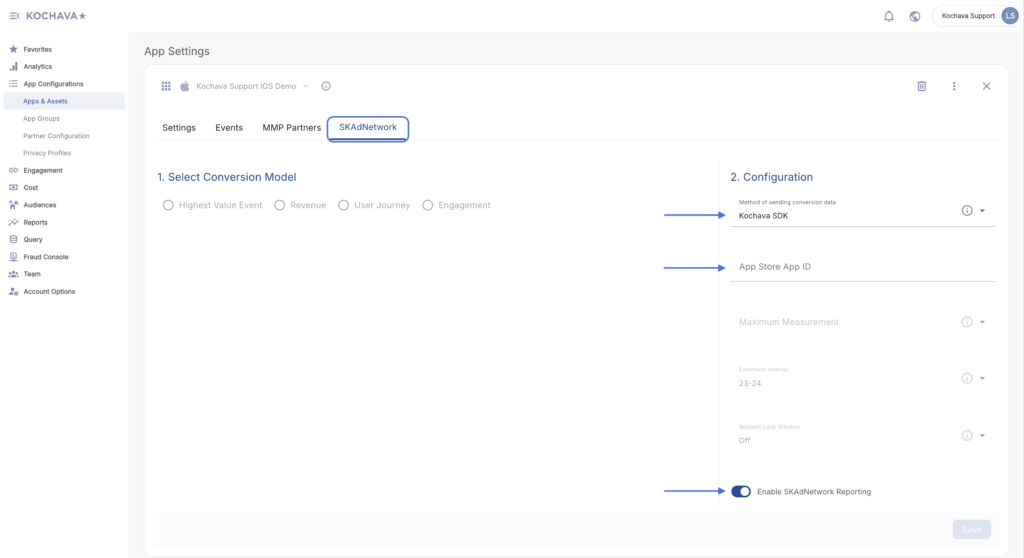
- Enter the App Store App ID.
- Select the Maximum Measurement Window (SKAdNetwork 3.0):
- Install Only
- Day of Install
- Day of Install + 1 Day
- Day of Install + 2 Days
- Day of Install + 3 Days
- Day of Install + 4 Days
- Day of Install + 5 Days
- Day of Install + 6 Days
- Day of Install + 7 Days
- Select the Extension Interval (SKAdNetwork 3.0):
- 12-24
- 23-24
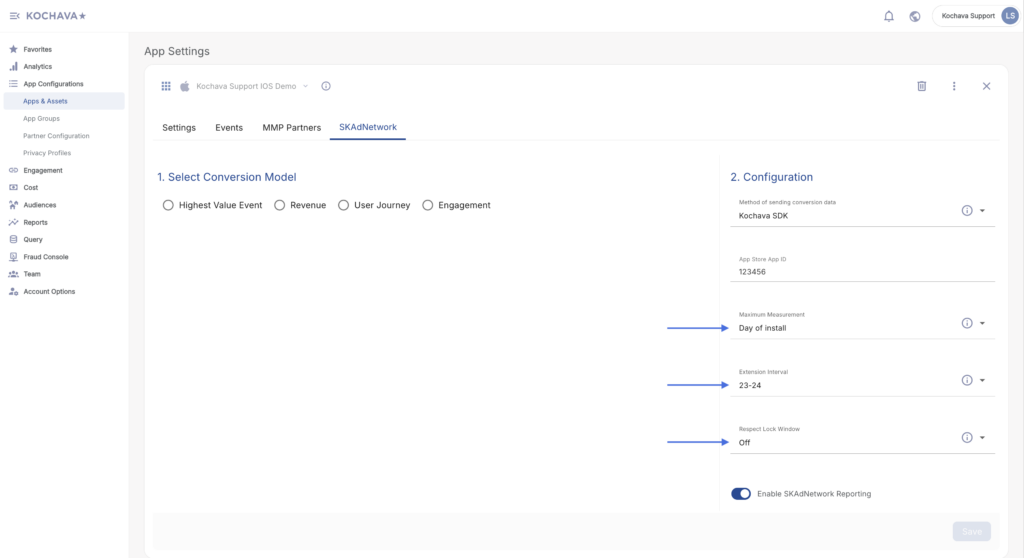
- Select the desired Respect Lock Window:
- Event (Allows the selection of an event to trigger the random postback timer)
- Maximum Conversion Value (The user has completed everything that has been selected in the conversion model and that triggers the lock window)
- Off (No lock window will be used)
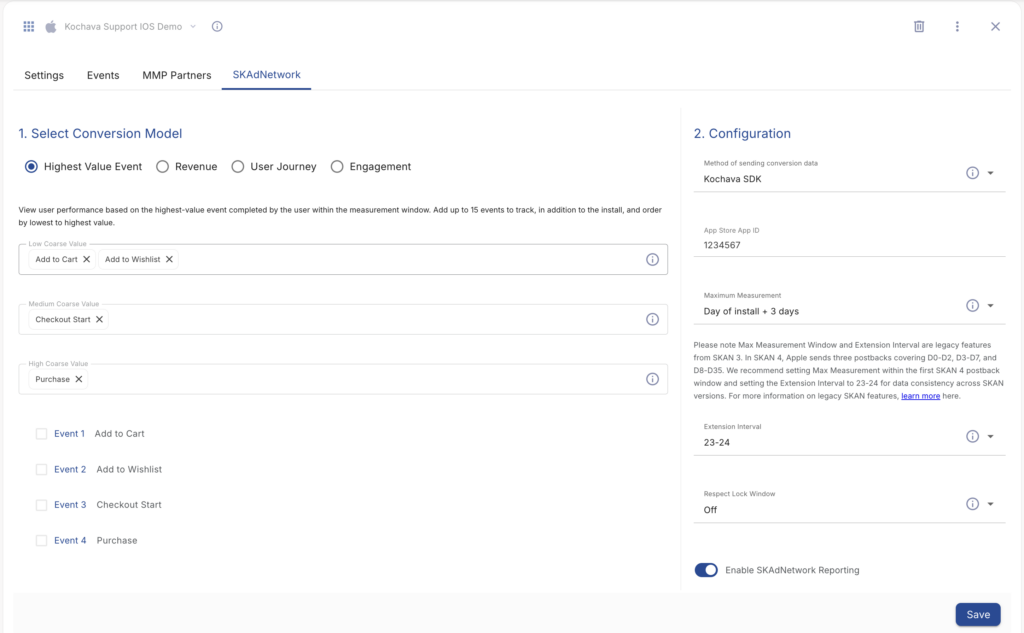
- Select desired Conversion Model.
- Highest Value Event
- Revenue
- User Journey
- Engagement
User performance can be viewed based on the highest-value event completed by the user within the measurement window.
- Select the desired Low Coarse Value events.
- Select the desired Medium Coarse Value events.
- Select the desired High Coarse Value events.
- Click Save.
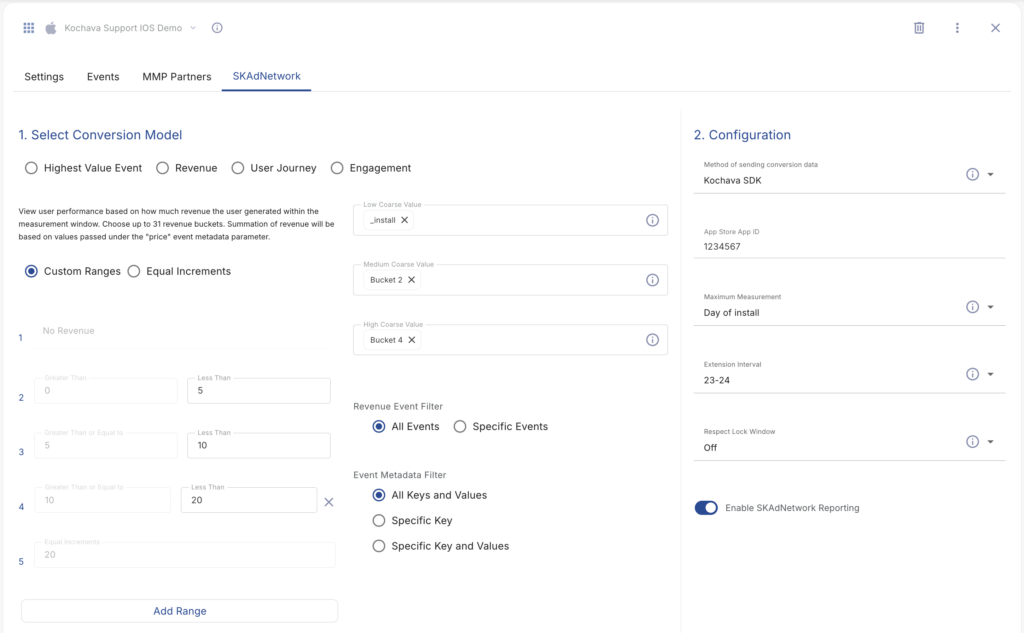
User performance can be viewed based on how much revenue the user generated within the measurement window. Summation of revenue will be based on values passed under the price event metadata parameters.
Revenue Buckets:
- Select Custom Ranges or Equal Increments.
Custom Ranges —
- Enter a Less Than value for Bucket 2.
- Click Add a Bucket.
- Enter the Less Than values for any additional buckets.
Equal Increments —
- Enter an Increment.
Coarse Value Settings:
The Low, Medium and High coarse-grained values provide the ability to add specific revenue buckets.
- Click + to add a revenue bucket.
- Click X to remove a revenue bucket.
Revenue Event Filter:
By default the model will aggregate revenue for any events marked as Revenue on the Apps & Assets > Event Manager page. Users can filter to specific revenue events if they wish to.
- Select All Events or Specific Events.
- If Specific Events has been selected:
- Click + to add an event.
- Click X to remove an event.
Event Metadata Filter:
When using Specific Key and Specific Key and Values, an event will only be included if it contains the selected metadata key, or the selected metadata key+value(s), respectively. Revenue keys, such as price and sum do not need to be added as filters.
- Select All Keys and Values, Specific Key or Specific Key and Values.
- Select the Key. (optional)
- Enter the Value. (optional)
User performance can be viewed based on a list of events completed by the user, regardless of order, within the measurement window.
- Click + to add events.
- Click X to remove an event.

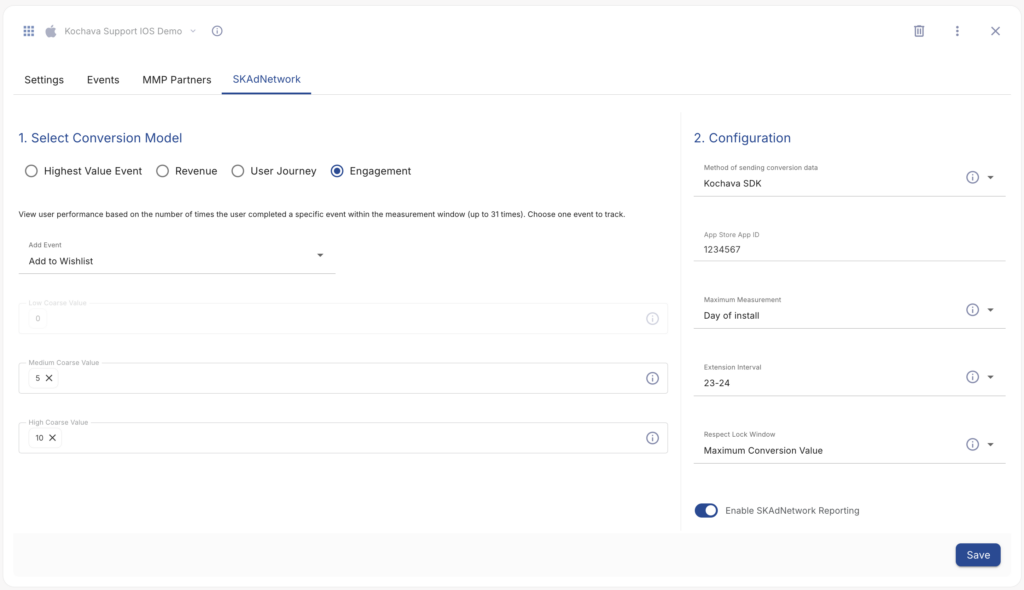
User performance can be viewed based on the number of times the user completed a specific event within the measurement window (Up to 31 times).
- Select the desired Engagement Event.
- Select the number of times the event needs to be triggered to apply the Medium Coarse Value.
- Select the number of times the event needs to be triggered to apply the High Coarse Value.
Sharing your Conversion Model Mappings (Conversion Model API)
Once you have configured your SKAdNetwork Settings as described above, your conversion model mappings can be made available to your media partners. Your partners will be the direct recipients of attribution postbacks from SKAdNetwork. These postbacks contain a conversion value 0-63 to indicate a user’s performance, but lack the associated meaning, which may be a revenue range, a specific event/list of events the user completed, or the number of times the user completed a target event. Kochava has made a Conversion Model API available for partners to access your mappings, which will allow them to interpret the meaning of the conversion value and utilize it for optimization or other purposes.
There are two prerequisites for a media partner to access your app’s mappings. They must be integrated with Kochava for SKAdNetwork support (see SKAdNetwork Certification), and the partner must be added in Partner Configuration in the Kochava dashboard, within the relevant app. If you are already working with this partner and have configured postbacks for them through Partner Configuration, the latter step is already completed.
Tracker Creation
There are no changes to the tracker creation process for SKAdNetwork tracking purposes. For more information on creating a Tracker, refer to our Create an Install Campaign support document.
Reporting
Standard Reports:
Two new standard reports have been added, called SKAdNetwork Install Summary and SKAdNetwork Conversion Value Summary. For more information, please refer to our Reporting support documentation.
Query:
A new table has been added in Kochava Query, called skad_conversions.